

Hasbro Build Log: Entry 1
My proton pack had arrived from Hasbro, somehow FedEx didn't completely destroy it, and it was amazing. But I couldn't shake this feeling that it could be a little better, have a few nicer parts, and overall be a bit more accurate to what we see on screen. Time to get a drill, some screws, various resin parts, and to stare at reference photos on the internet. If you want to know why I decided to mod this pack, I wrote a post right before this one with my honest feelings on Hasbro's offerings. Go back and read that now if you're curious.
 Kevin Willingham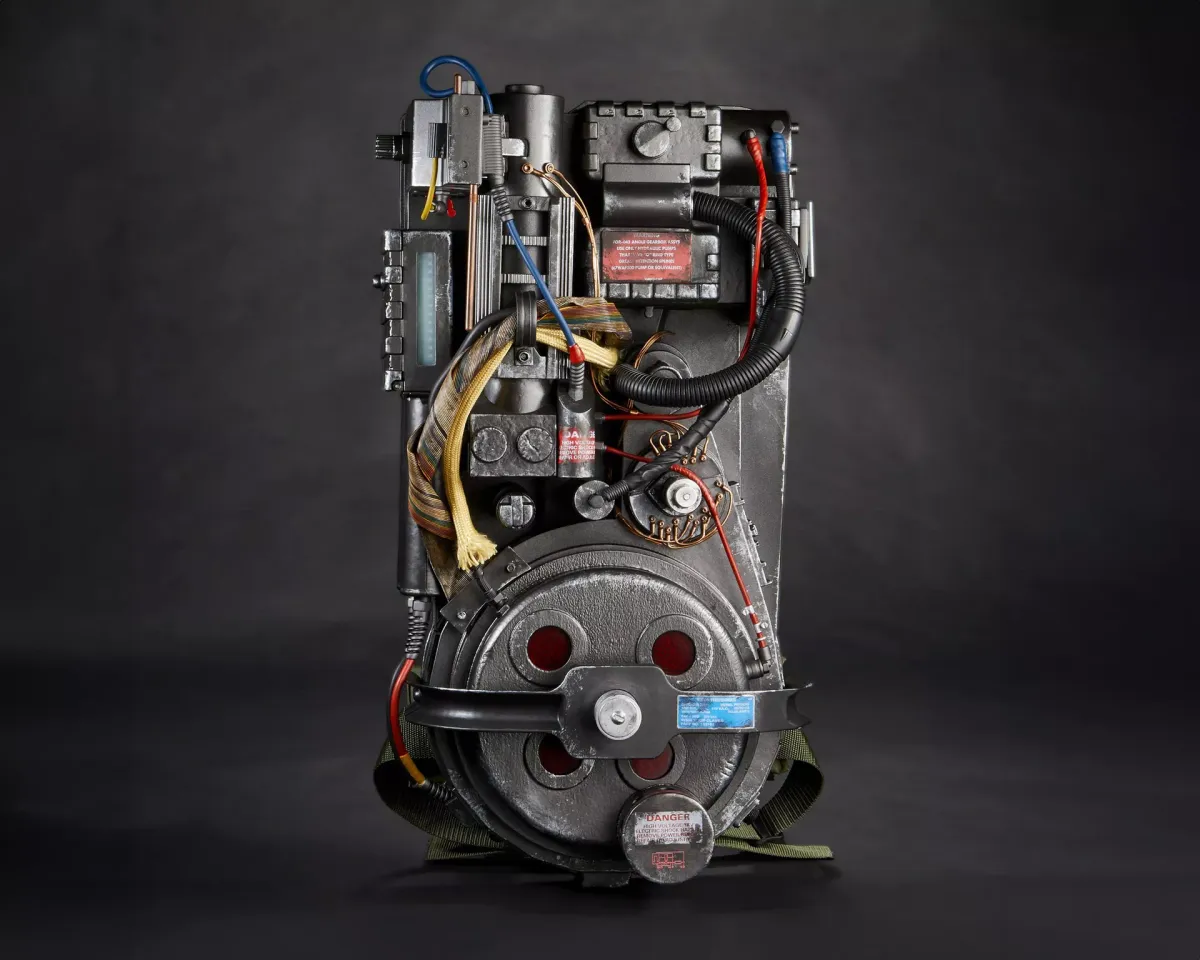
Let the modding begin!
So my first goal was to replace those awful rubber hoses and connectors. This is pretty much everyone's first mod on these packs, as it is easily the lowest-quality part. Besides not looking the part, they are not stiff enough to fake it and just hang there all floppy and sad. As I explained in my first post, the Haslab Afterlife pack succeeds a bit better, likely because of the weathering, but these bright red squishy rubber pieces stick out like a sore thumb here.
I already had a set of Clippard elbows, barbs, and the 4mm yellow and red tubing, thanks to either Dan of Harsh Hobbies or Austin of Rust City Studio. I don't remember exactly, and neither did Dan, so maybe Austin will. So that means I needed Legris Straights and Elbows, 1/4" blue and red tube, and 1/4" split loom.
I ended up buying a full set of tubing anyway; having a little extra won't hurt, and it was cheaper than buying what I needed individually. For the Legris elbows, I grabbed a modern equivalent from GBHQPartsDepot on Etsy; they look the part but are light gray. I can paint them or weather them later or leave them stock; most people won't notice. I also grabbed a set of vintage 4mm Legris straights–they are not an exact screen match but plenty close enough for me, and were a good price compared to recreations.
Going with the flow.
One of my goals for modding this pack was to "damage" as little of the original construction as possible. If I could accomplish a mod in such a way that it was completely reversible, I would. So, I also wanted to somehow save the large post coming off the right side of the cyclotron, where Hasbro still had the same fitting as the Afterlife pack. The weird thing is this elbow doesn't seem to match up to Phoebe's pack or the Workbench pack, so I'm not sure what happened there or why it was kept on the '84 pack. Regardless, I didn't want to cut or break off that post.
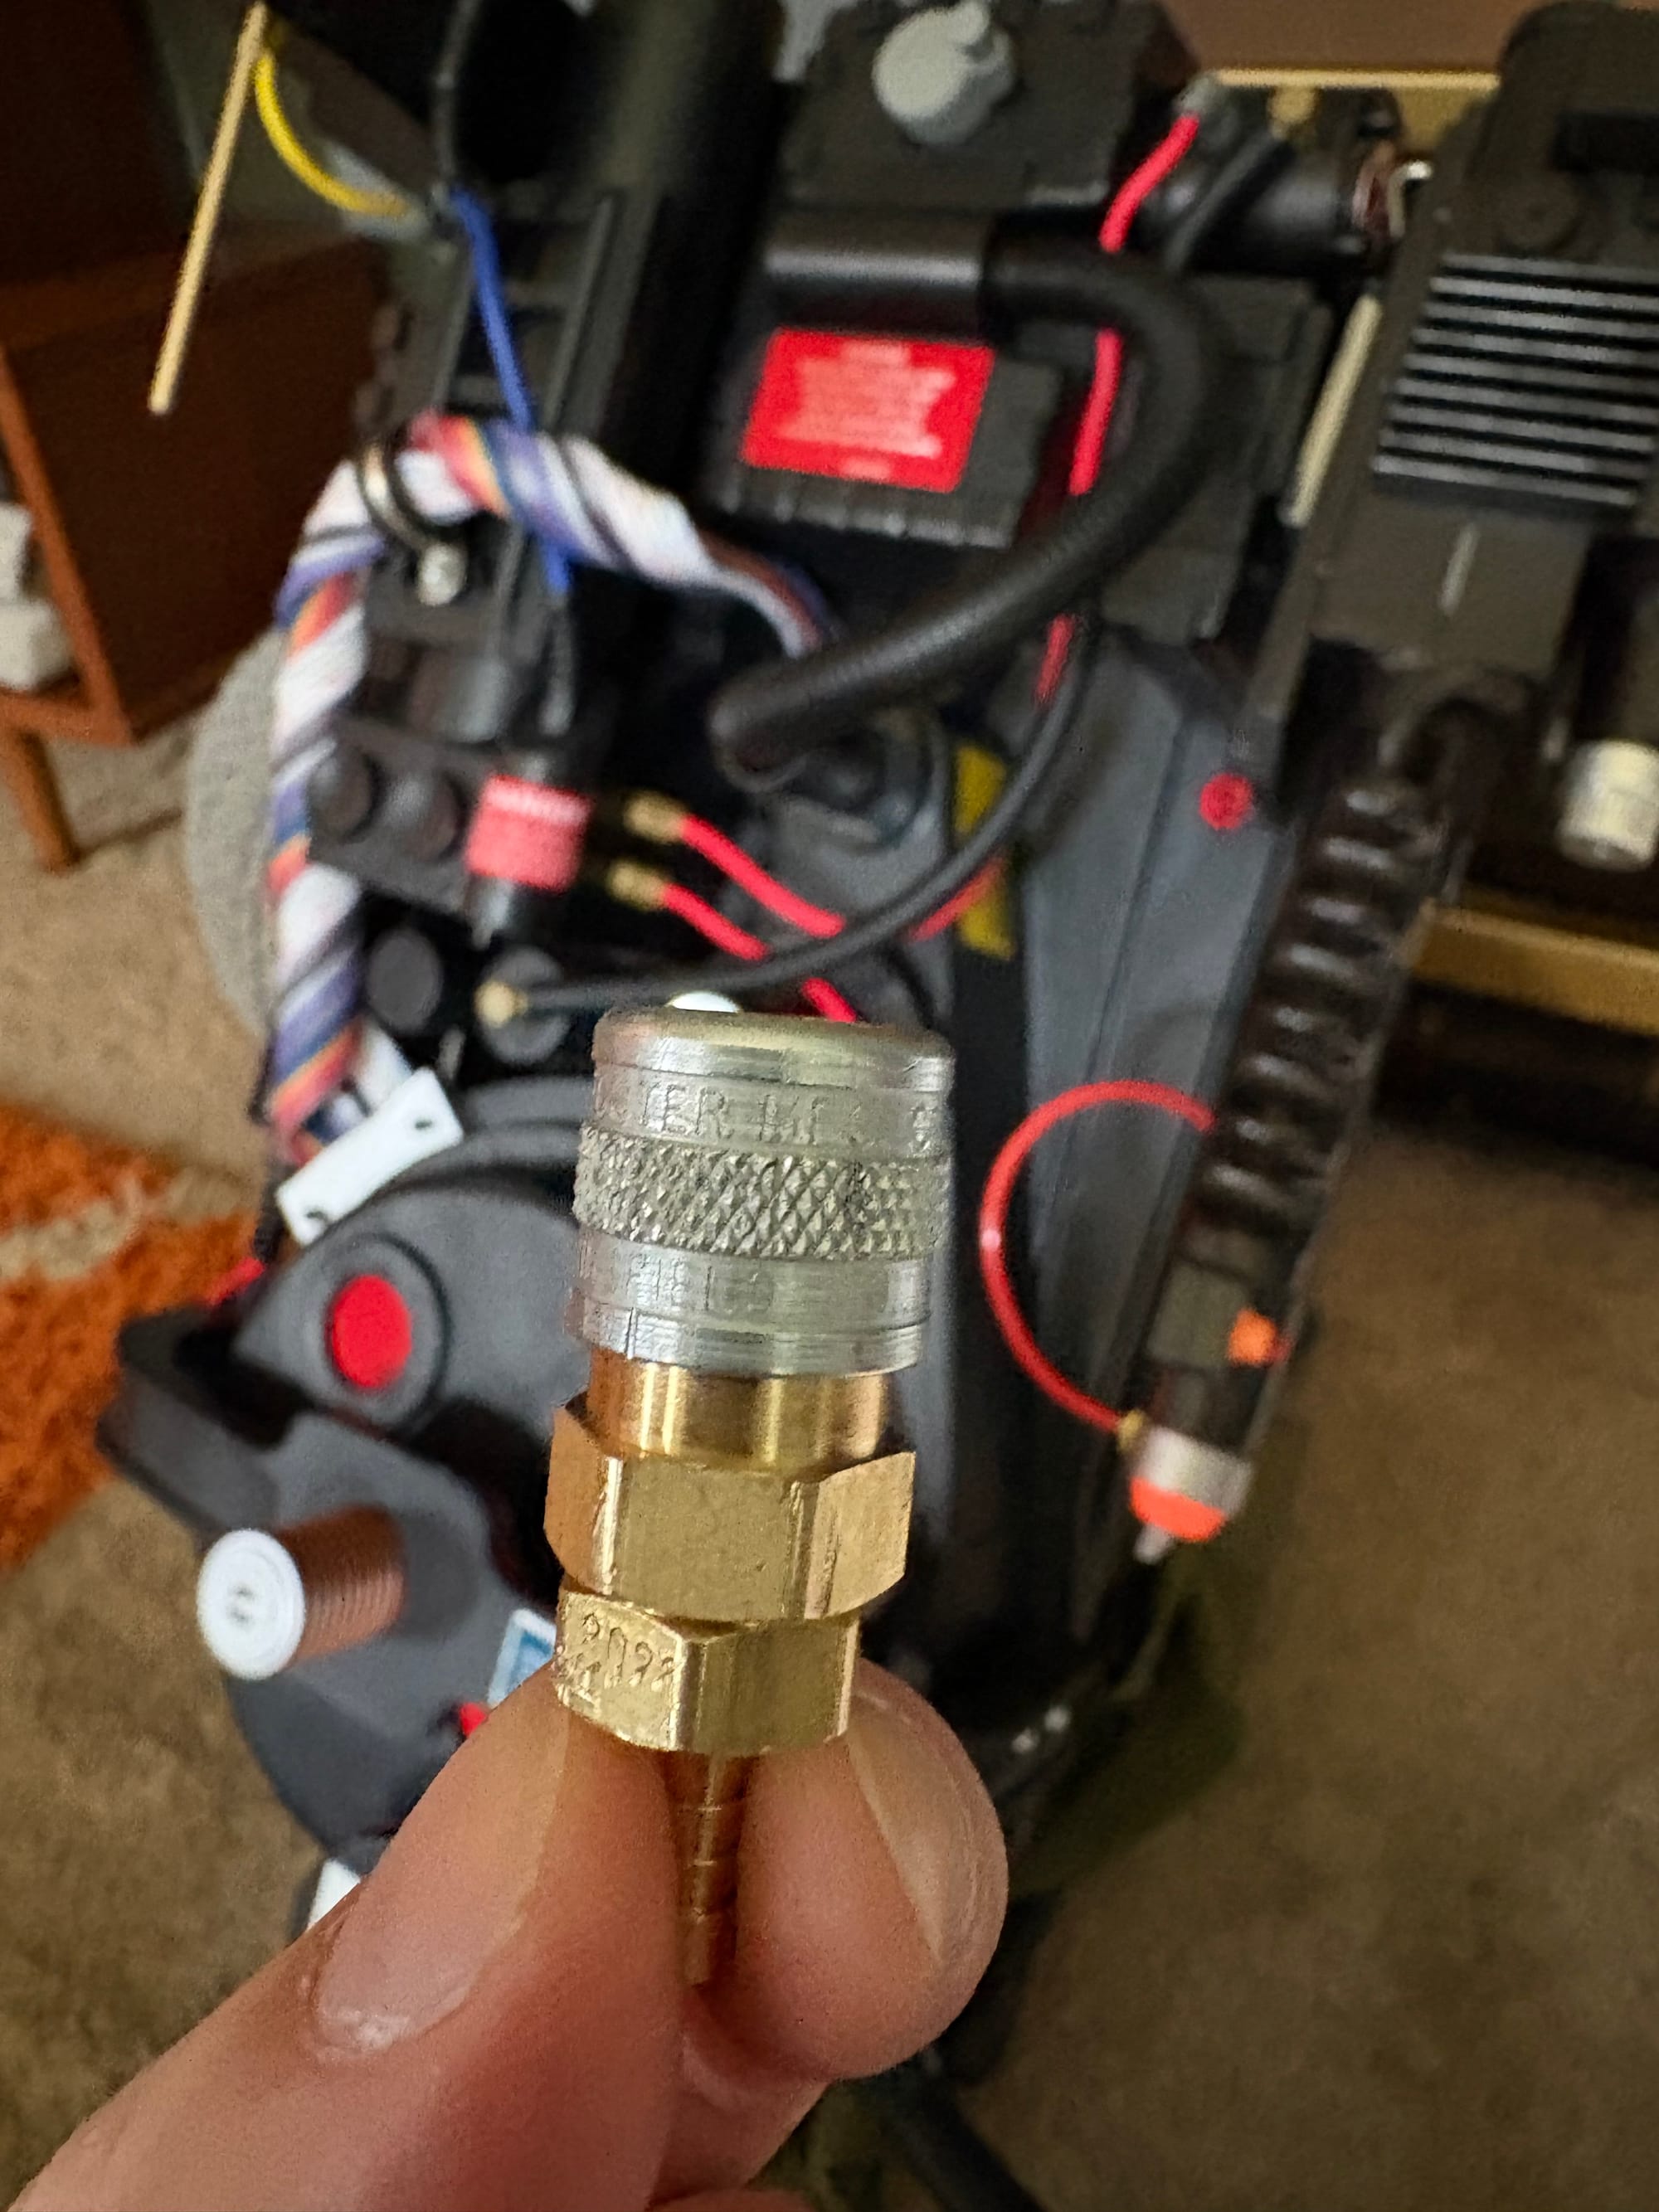
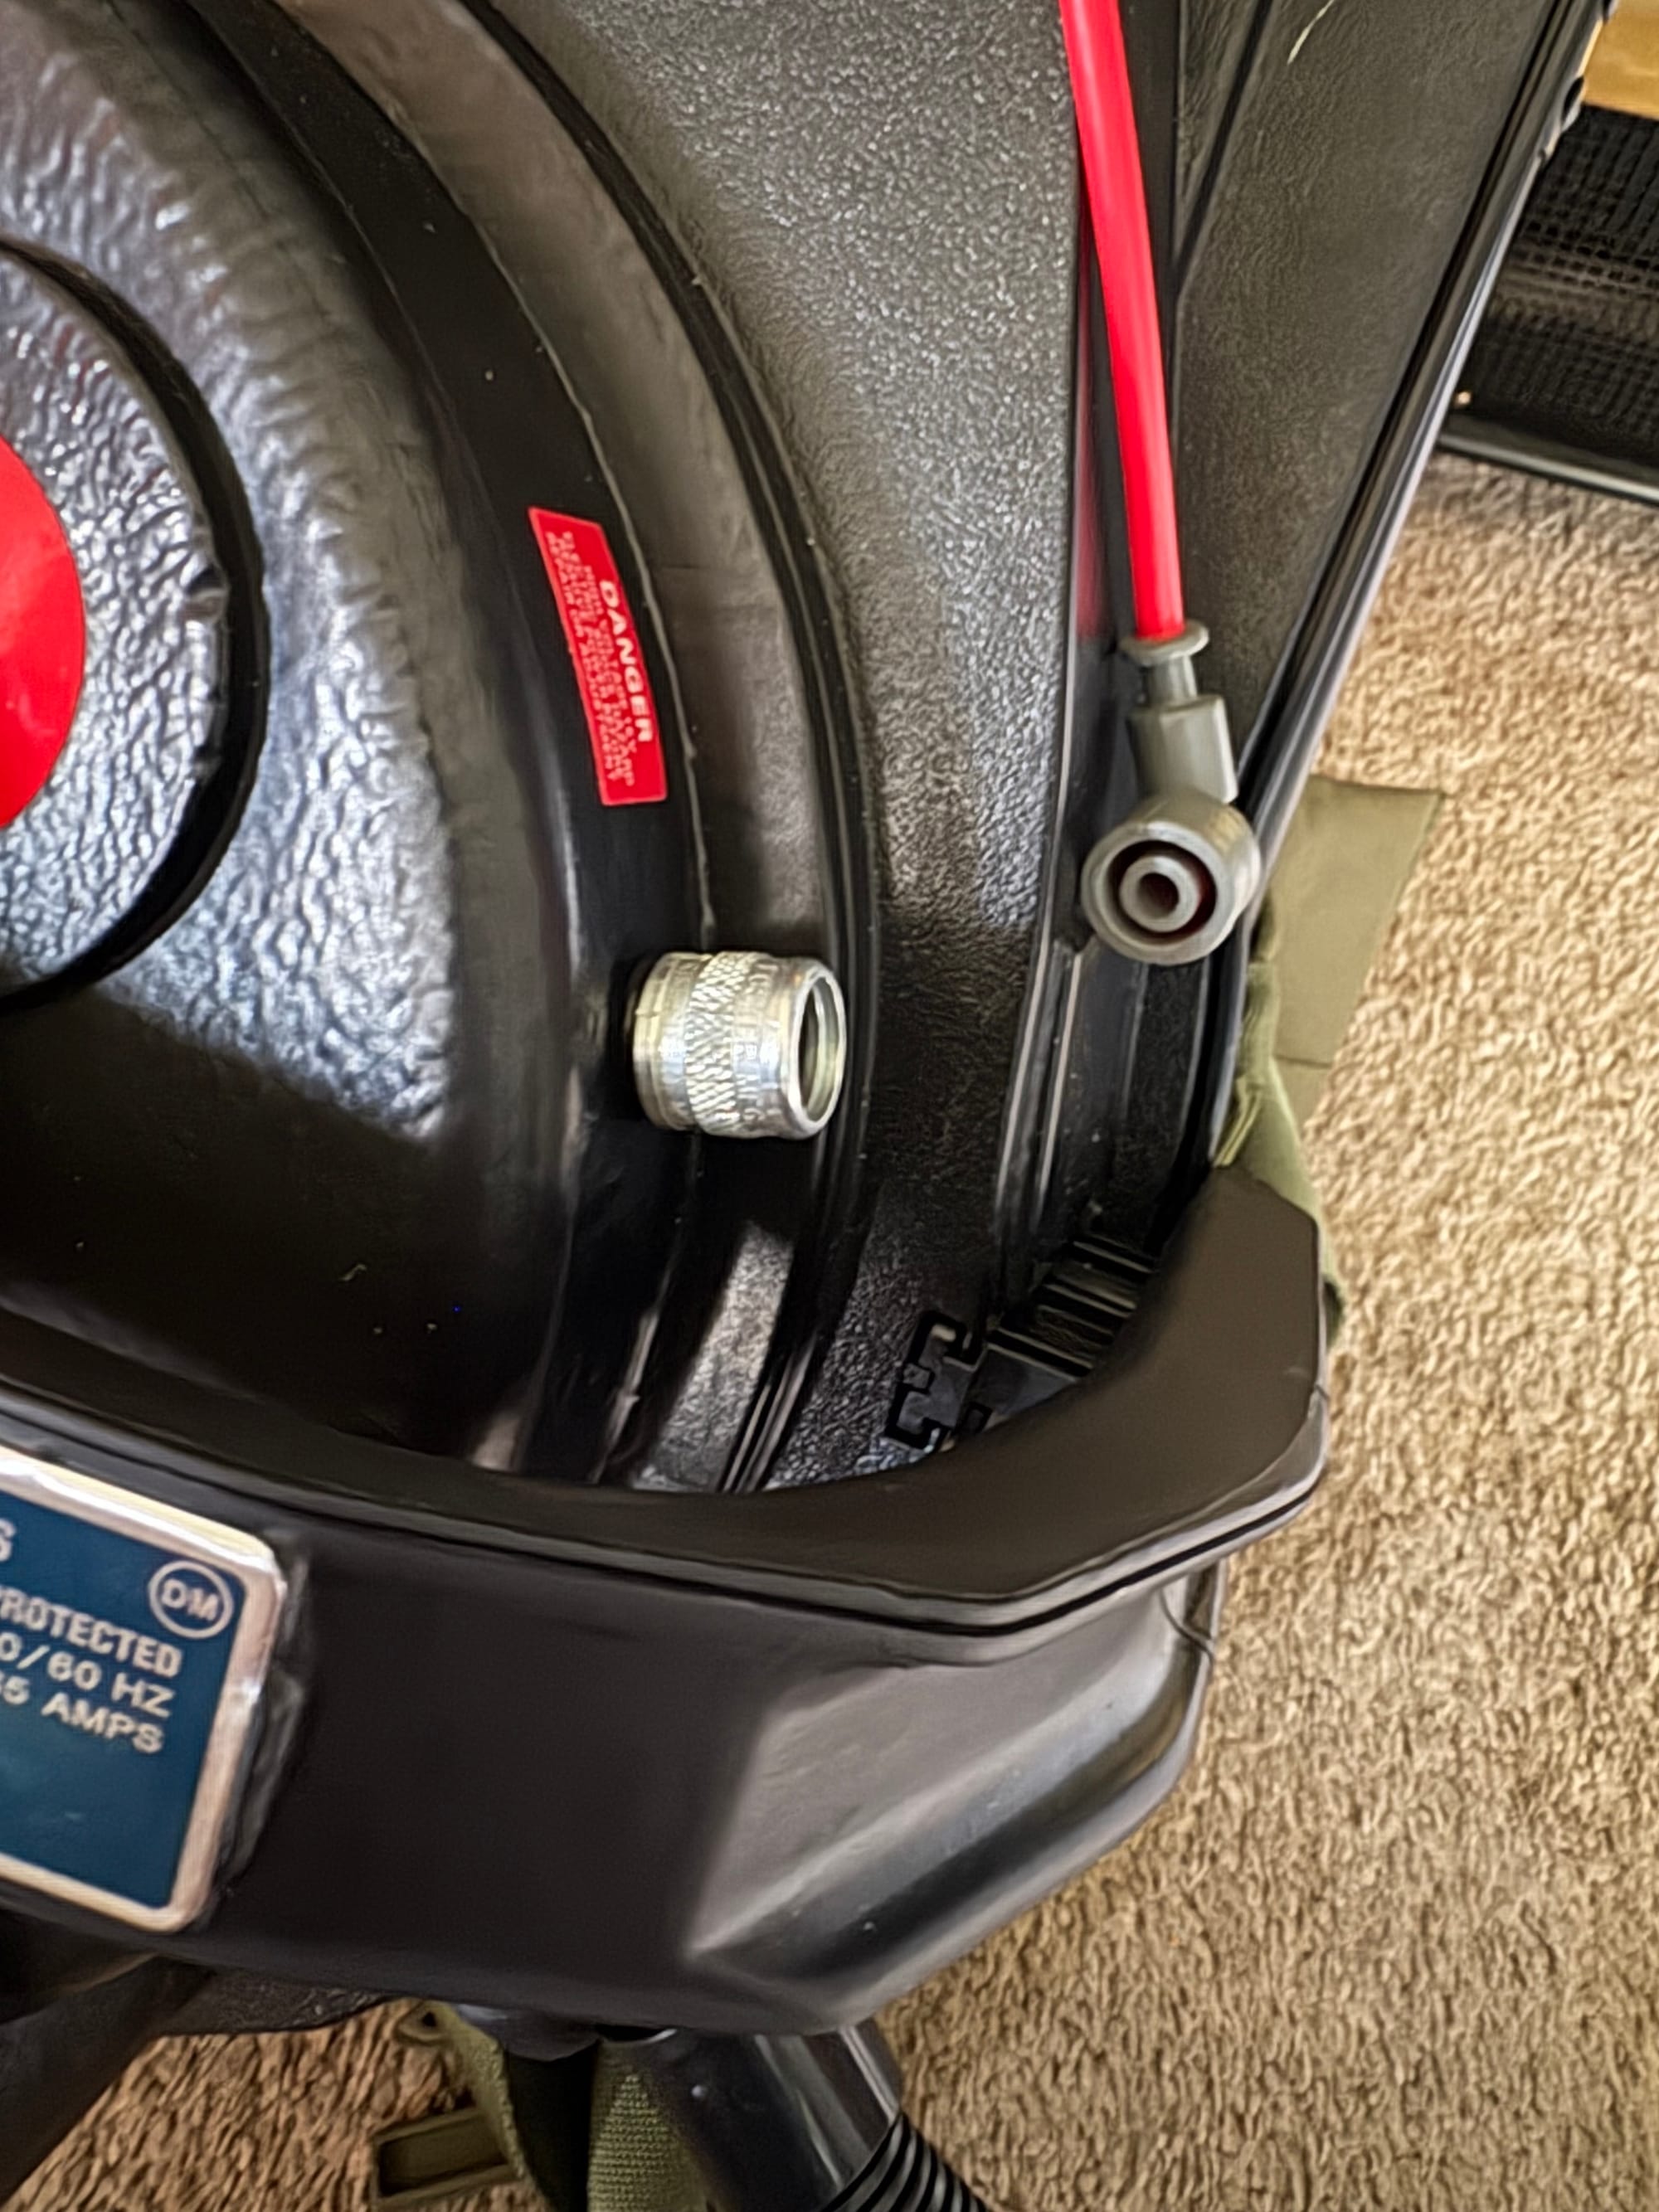
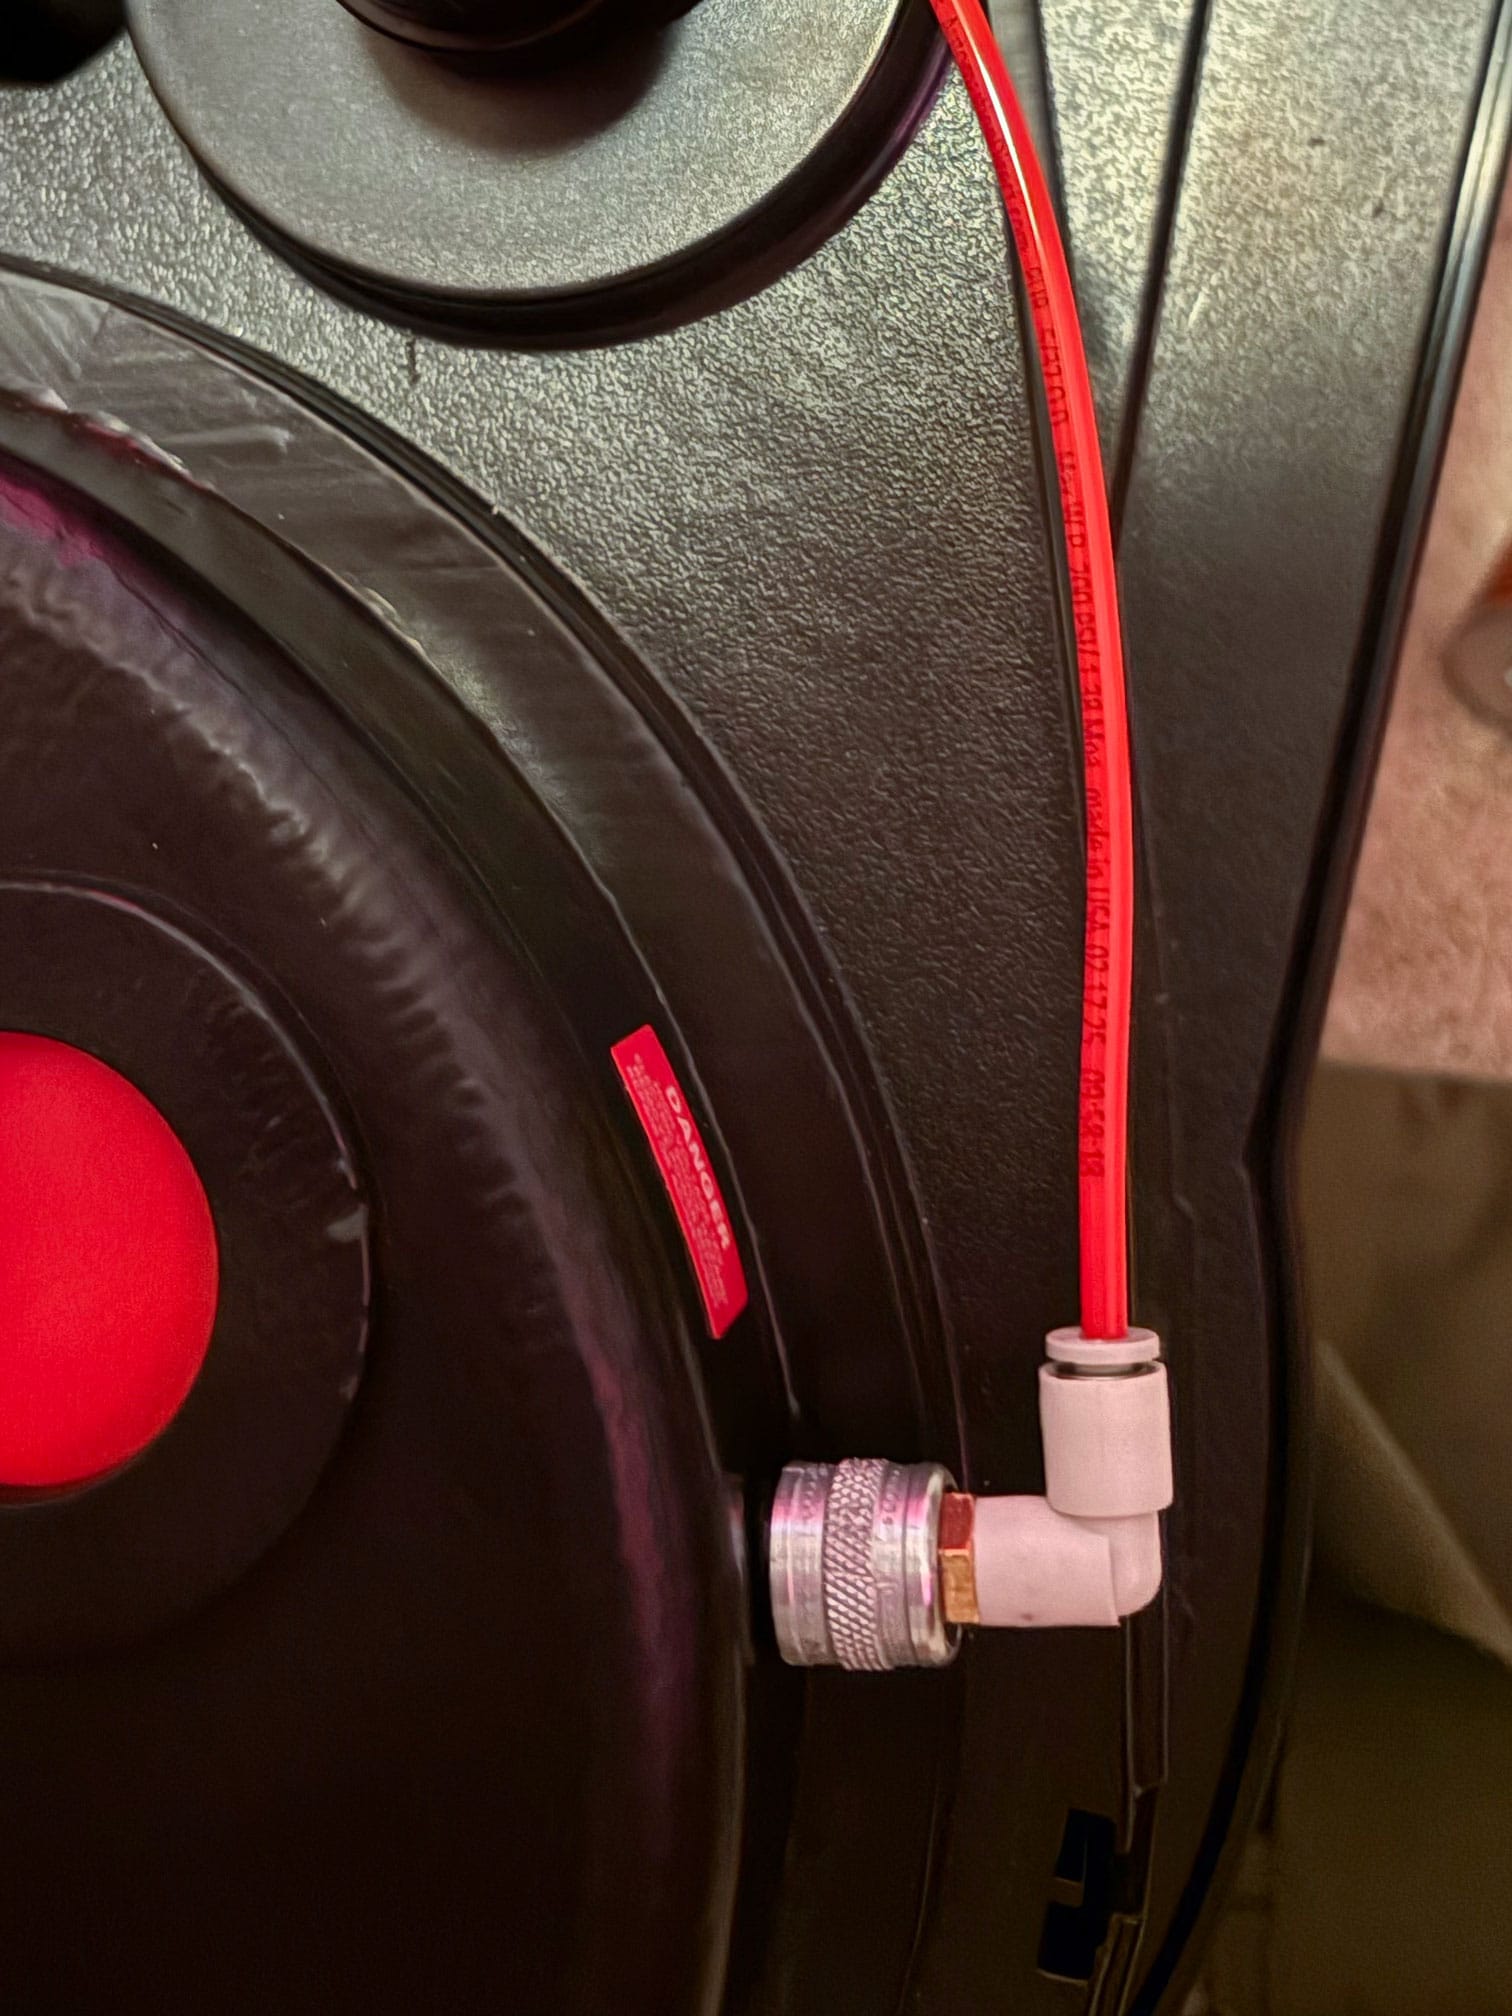
The Foster connector going on the cyclotron.
I saw someone on Facebook combine two different parts to accomplish what I've wanted to do. First, I grabbed a Foster quick-disconnect coupler, which is used on the Ghost Trap to connect the trap to the pedal. I removed the internals by pulling out the wire that holds it together, along with the inner ridge. Then I drilled out the exterior connector and the cyclotron stump. Drop the Foster connector onto the post, then take the 4mm elbow and thread it into the stump until both are tight. Easy, it still looks intentional and gives my pack a little personal flair.
To drill or not to drill...
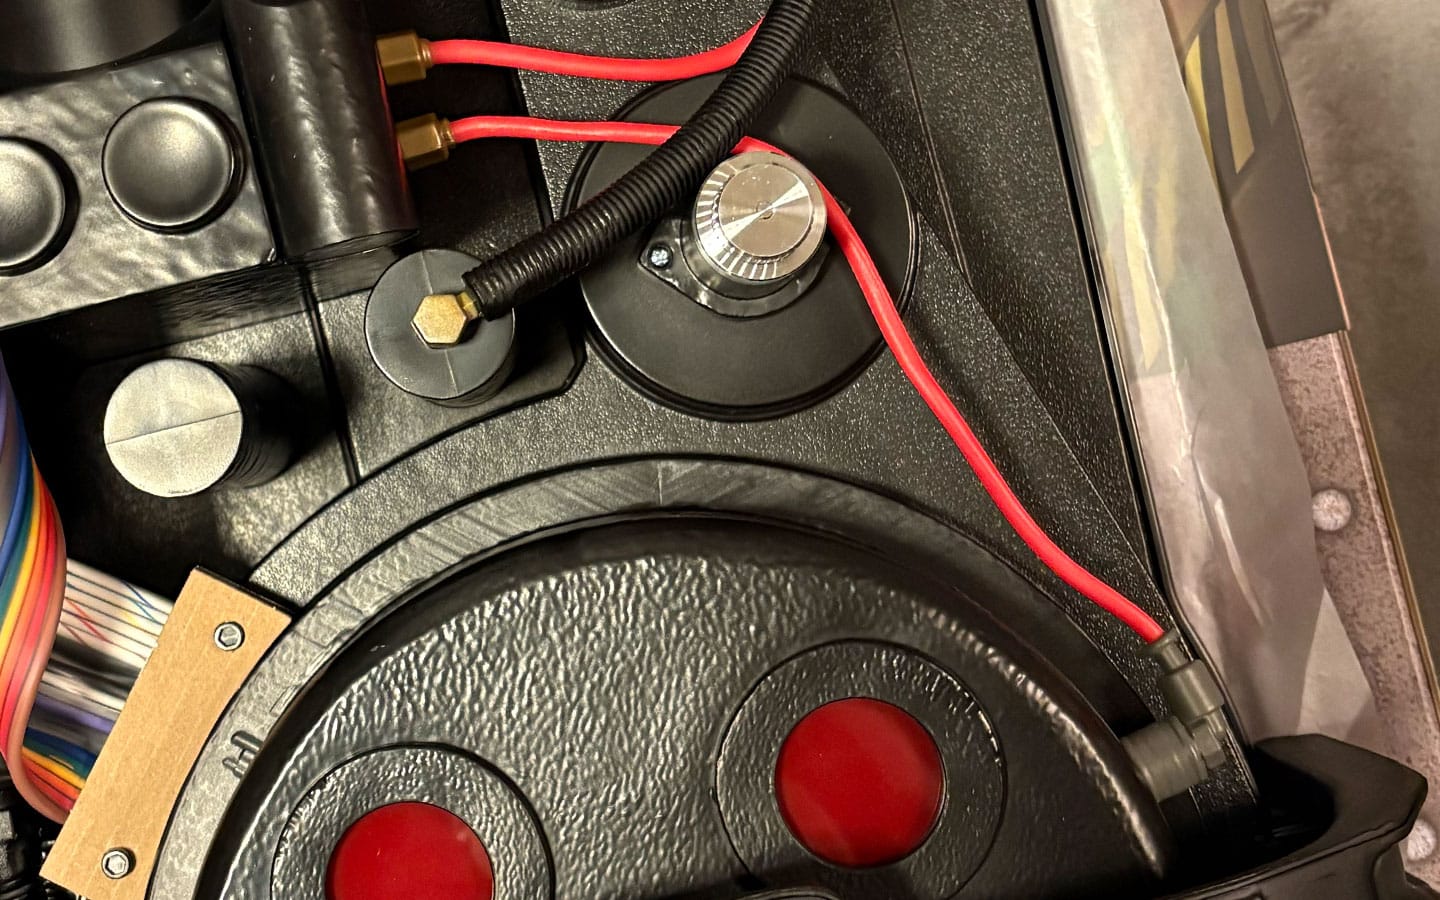
The rest were much more straightforward. I had considered cutting the threads off the Clippard and Legris elbows and instead seating them on the posts used by the rubber versions. But it probably would have been more work, with little reward, aside from keeping things fully reversible. Cutting that brass to sit flush was going to be rough, and I didn't even really know if they would fit on there; I was just guessing. So, in the end, I took some pliers and popped off the posts, then drilled holes in the same spots on the HGA. I then just threaded them into the holes, no need for glue or bolts.
For some reason, the other end with the rubber version of the straights had holes rather than posts–why Hasbro made one end tension fit on posts, and the other had bulbs that shoved into small holes, I'll never understand. So I took my drill and enlarged the holes, then screwed those straights into them.
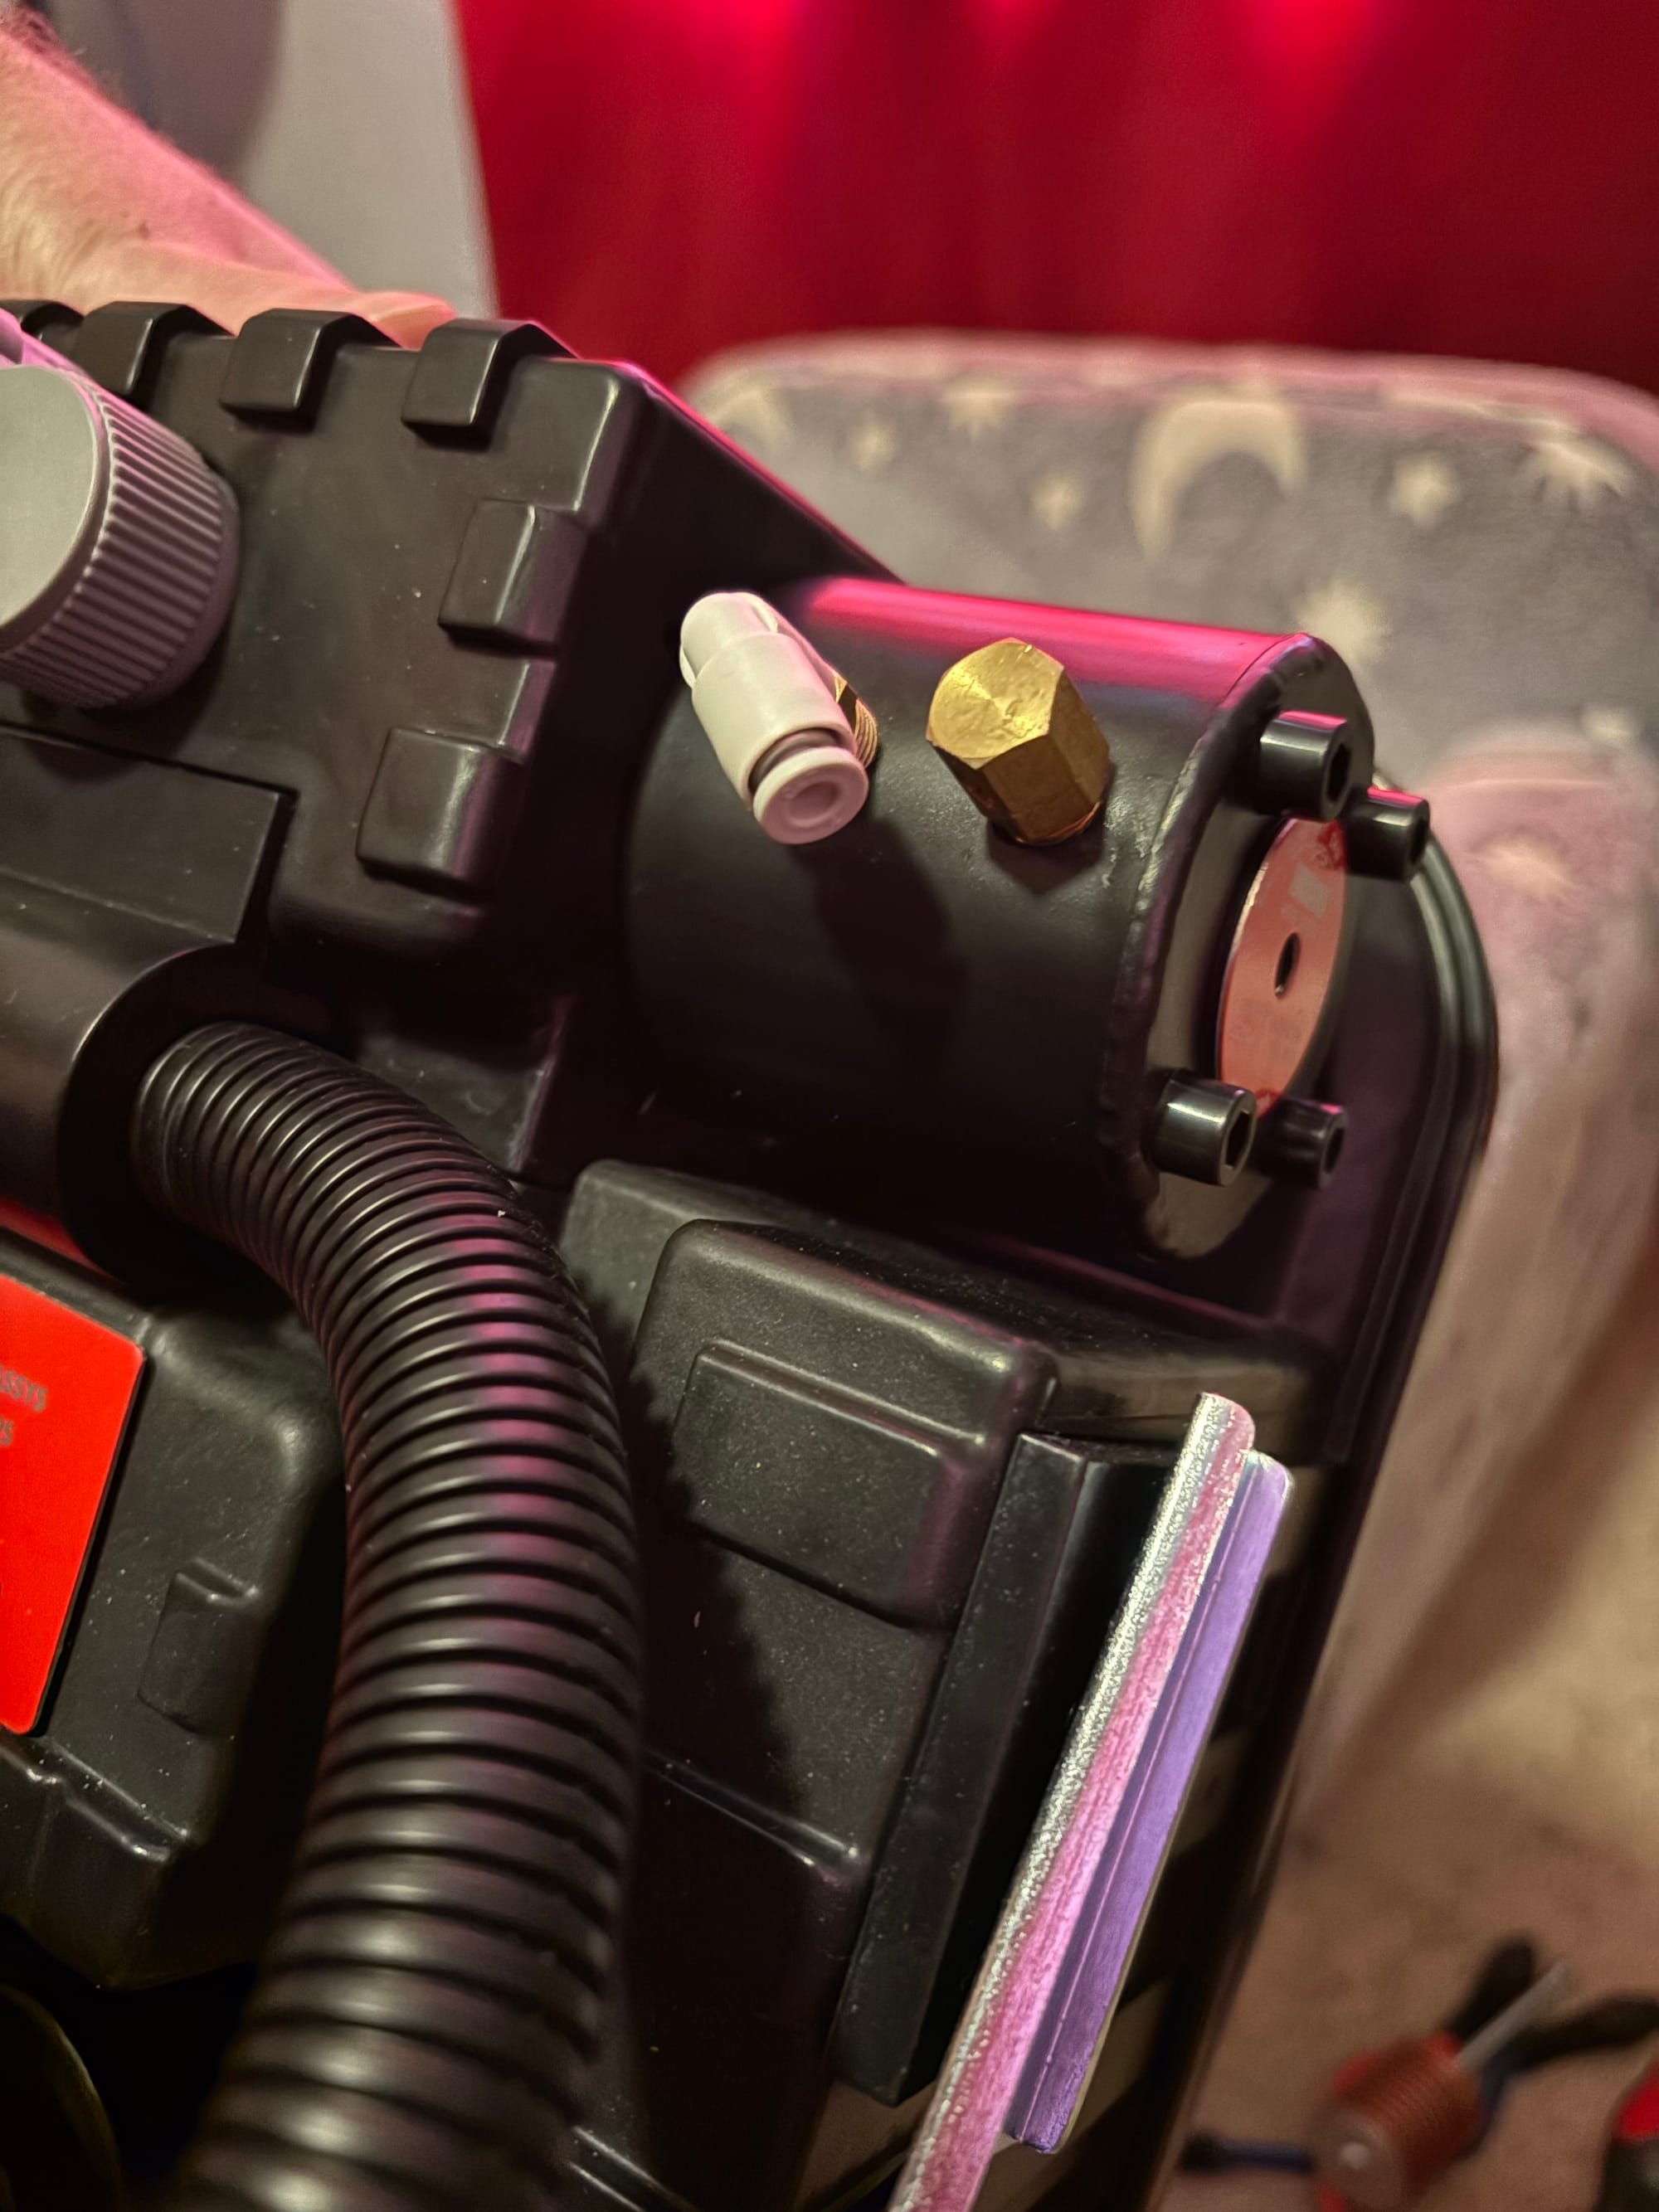
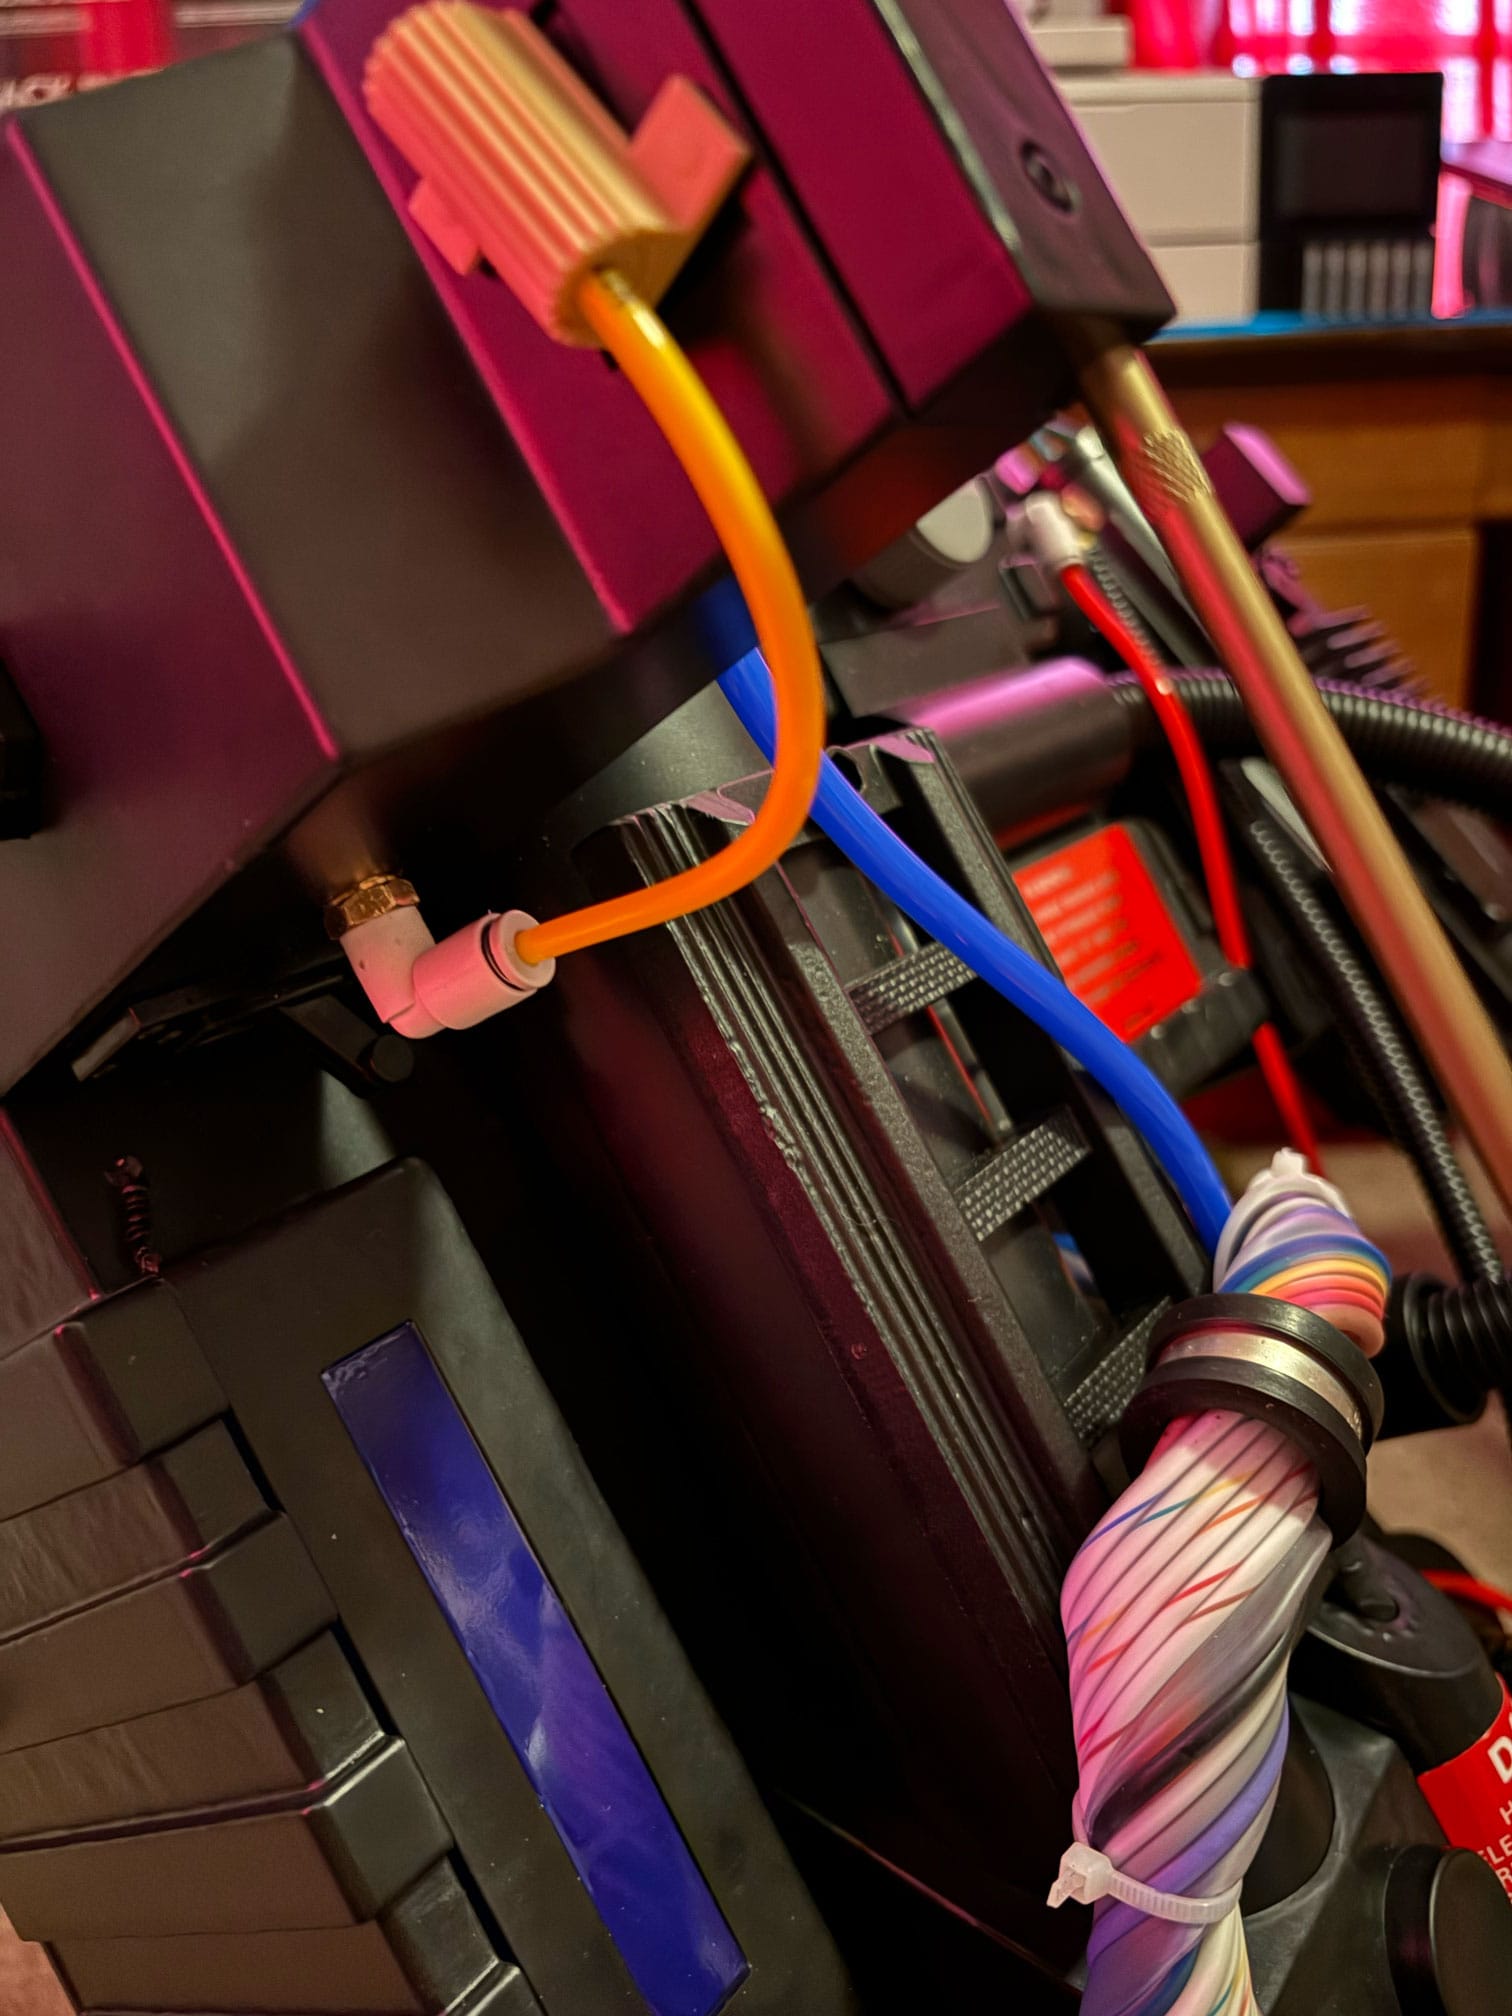
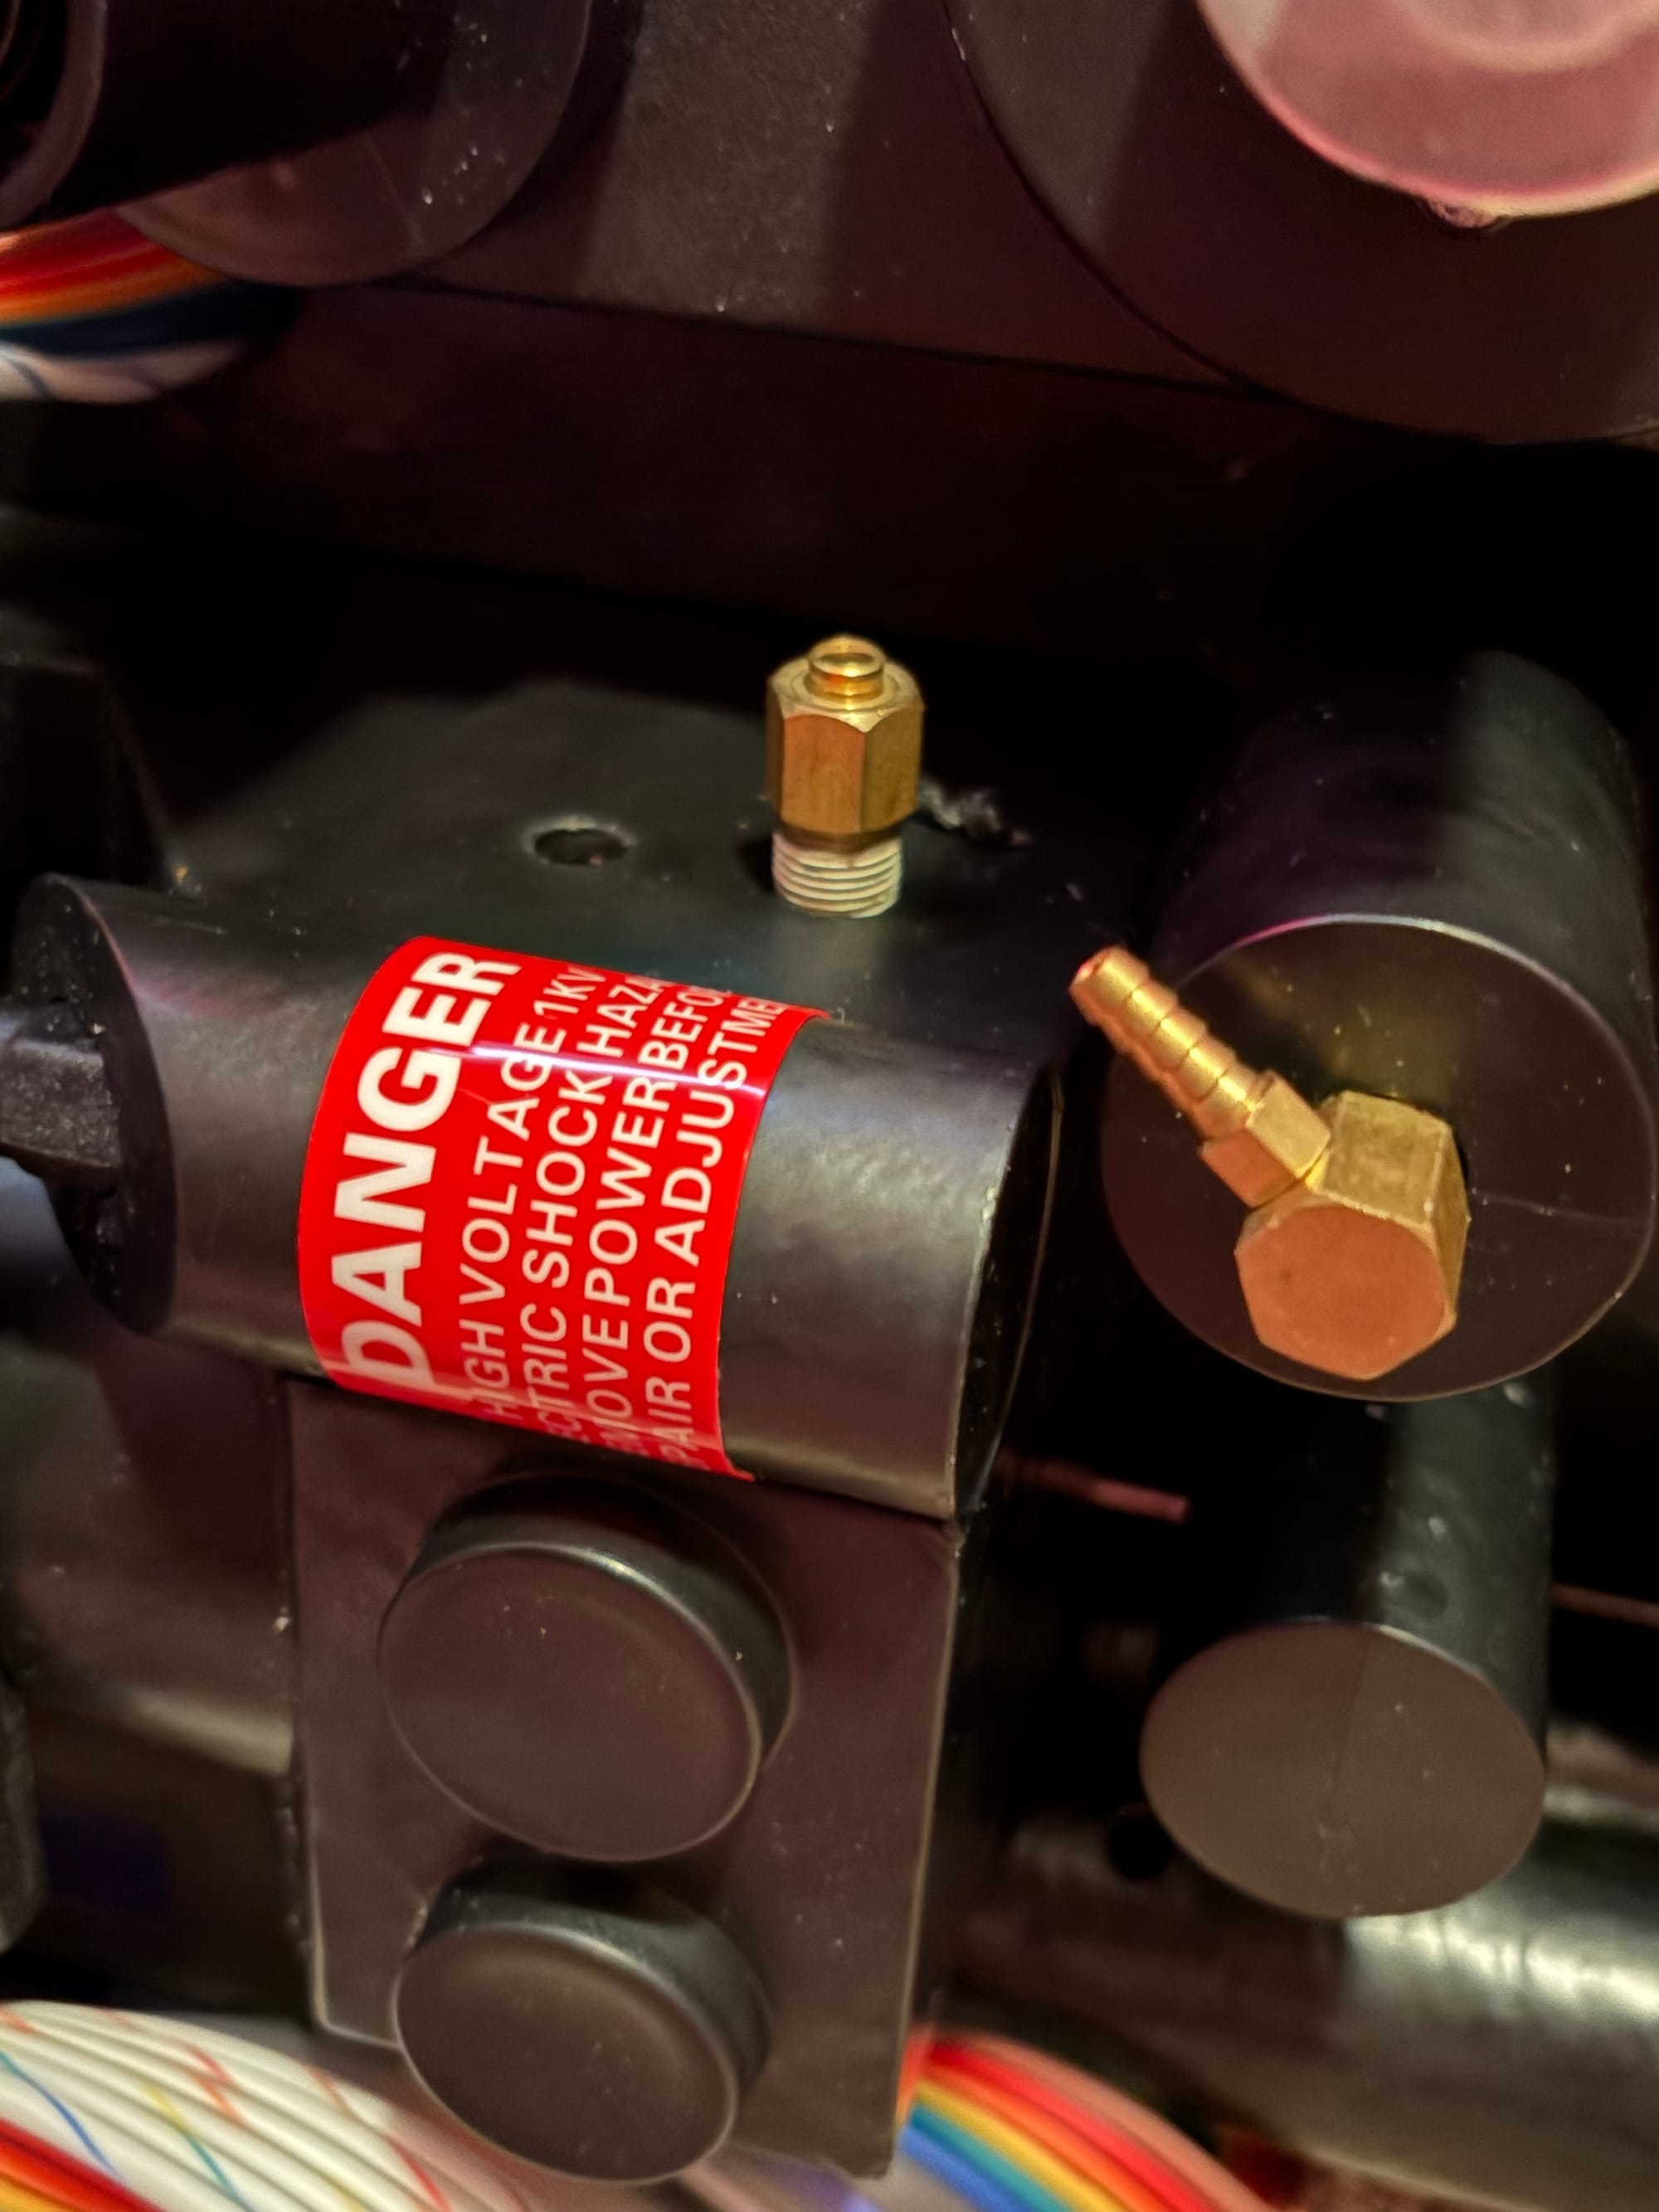
New elbows on the HGA, Legris on the Ion Arm, straights going in.
On the Ion Arm, I needed two more holes: one for the Legris elbow at the bottom and one for the Clippard at the top. The bottom Legris was the same as the HGA; pop the post and drill a new hole. The '84 setup has the Clippard elbow on the end cap rather than the arm, unlike the Afterlife pack, which is modeled after the GB2 packs. I decided I wanted the GB2 style and would replace the end cap. There was one problem, though: the Ion Arm has a seam from the Afterlife pack design, and I worried that drilling into it would risk cracking it. So I had to scoot back the new hole a bit, further than screen-accurate, but it looks perfectly fine.
The last two bits that needed to be changed before running the new tubes were the two resistors on the Ion Arm. I had two resin replicas, so I opted to use those for now rather than accurate parts. For both, I kept the post holding on the rubber version, marked where the hole would need to be on the resin versions, and drilled it out. Since neither of these had a metal post for the tubes to hold onto, I also had to drill holes for them to tension-fit into. Then I lined them up on the Ion Arm and drilled out where I needed to put the hex screws. Unfortunately, the screws broke the thin old resin spots where the screws went on the small resistor, so it will need to be replaced. For now, black paint and the screws hide the cracked pads well enough.
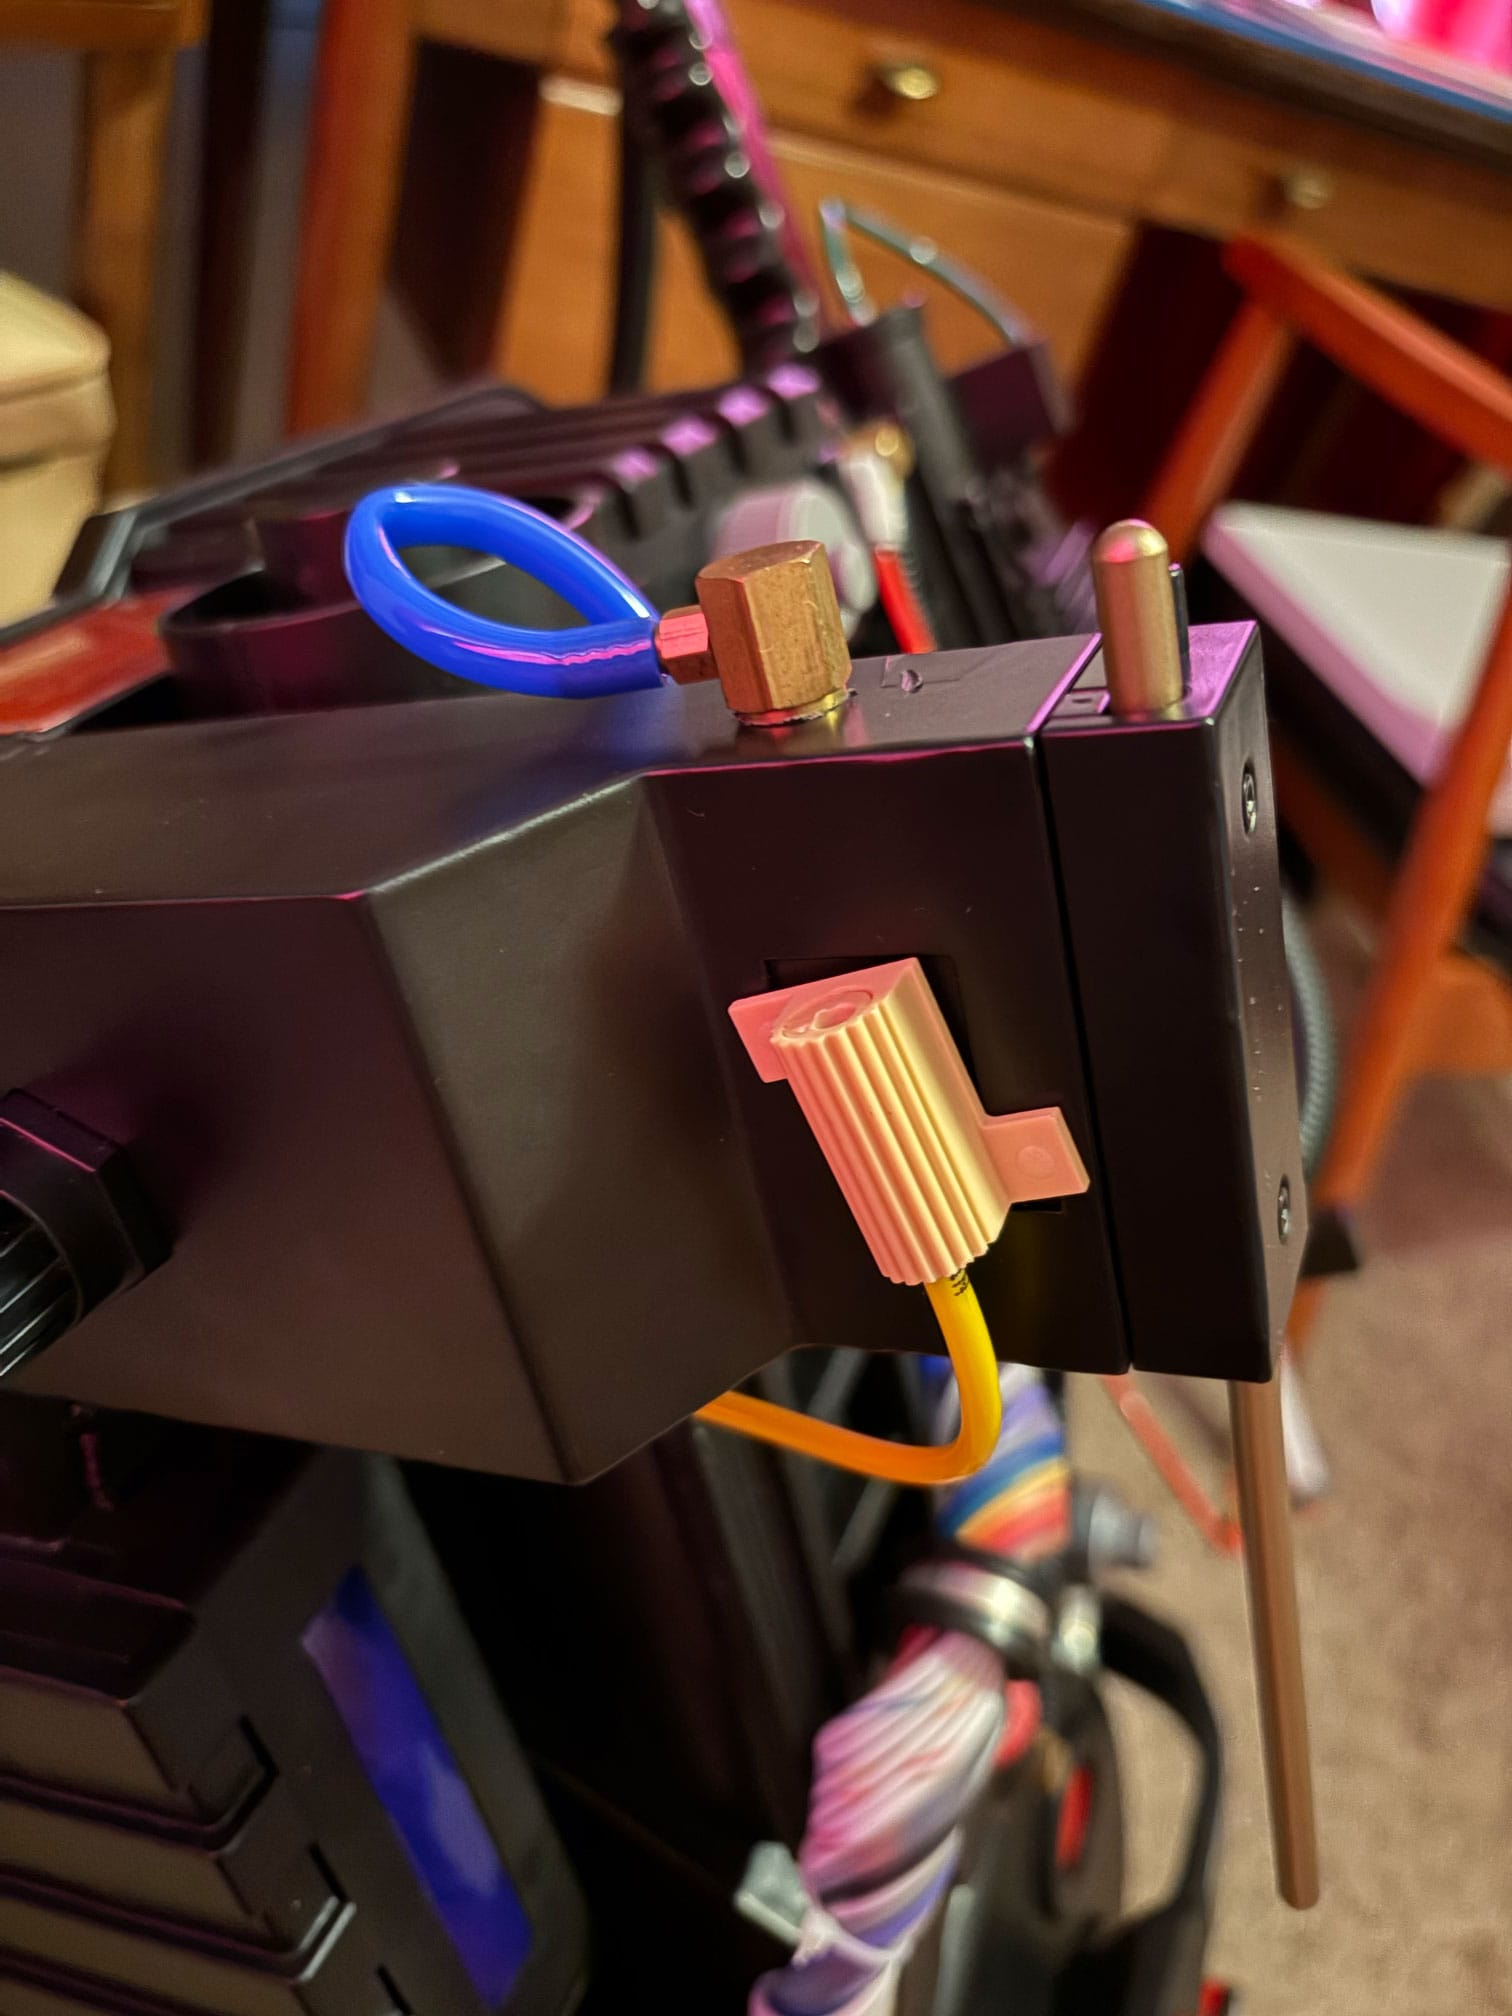
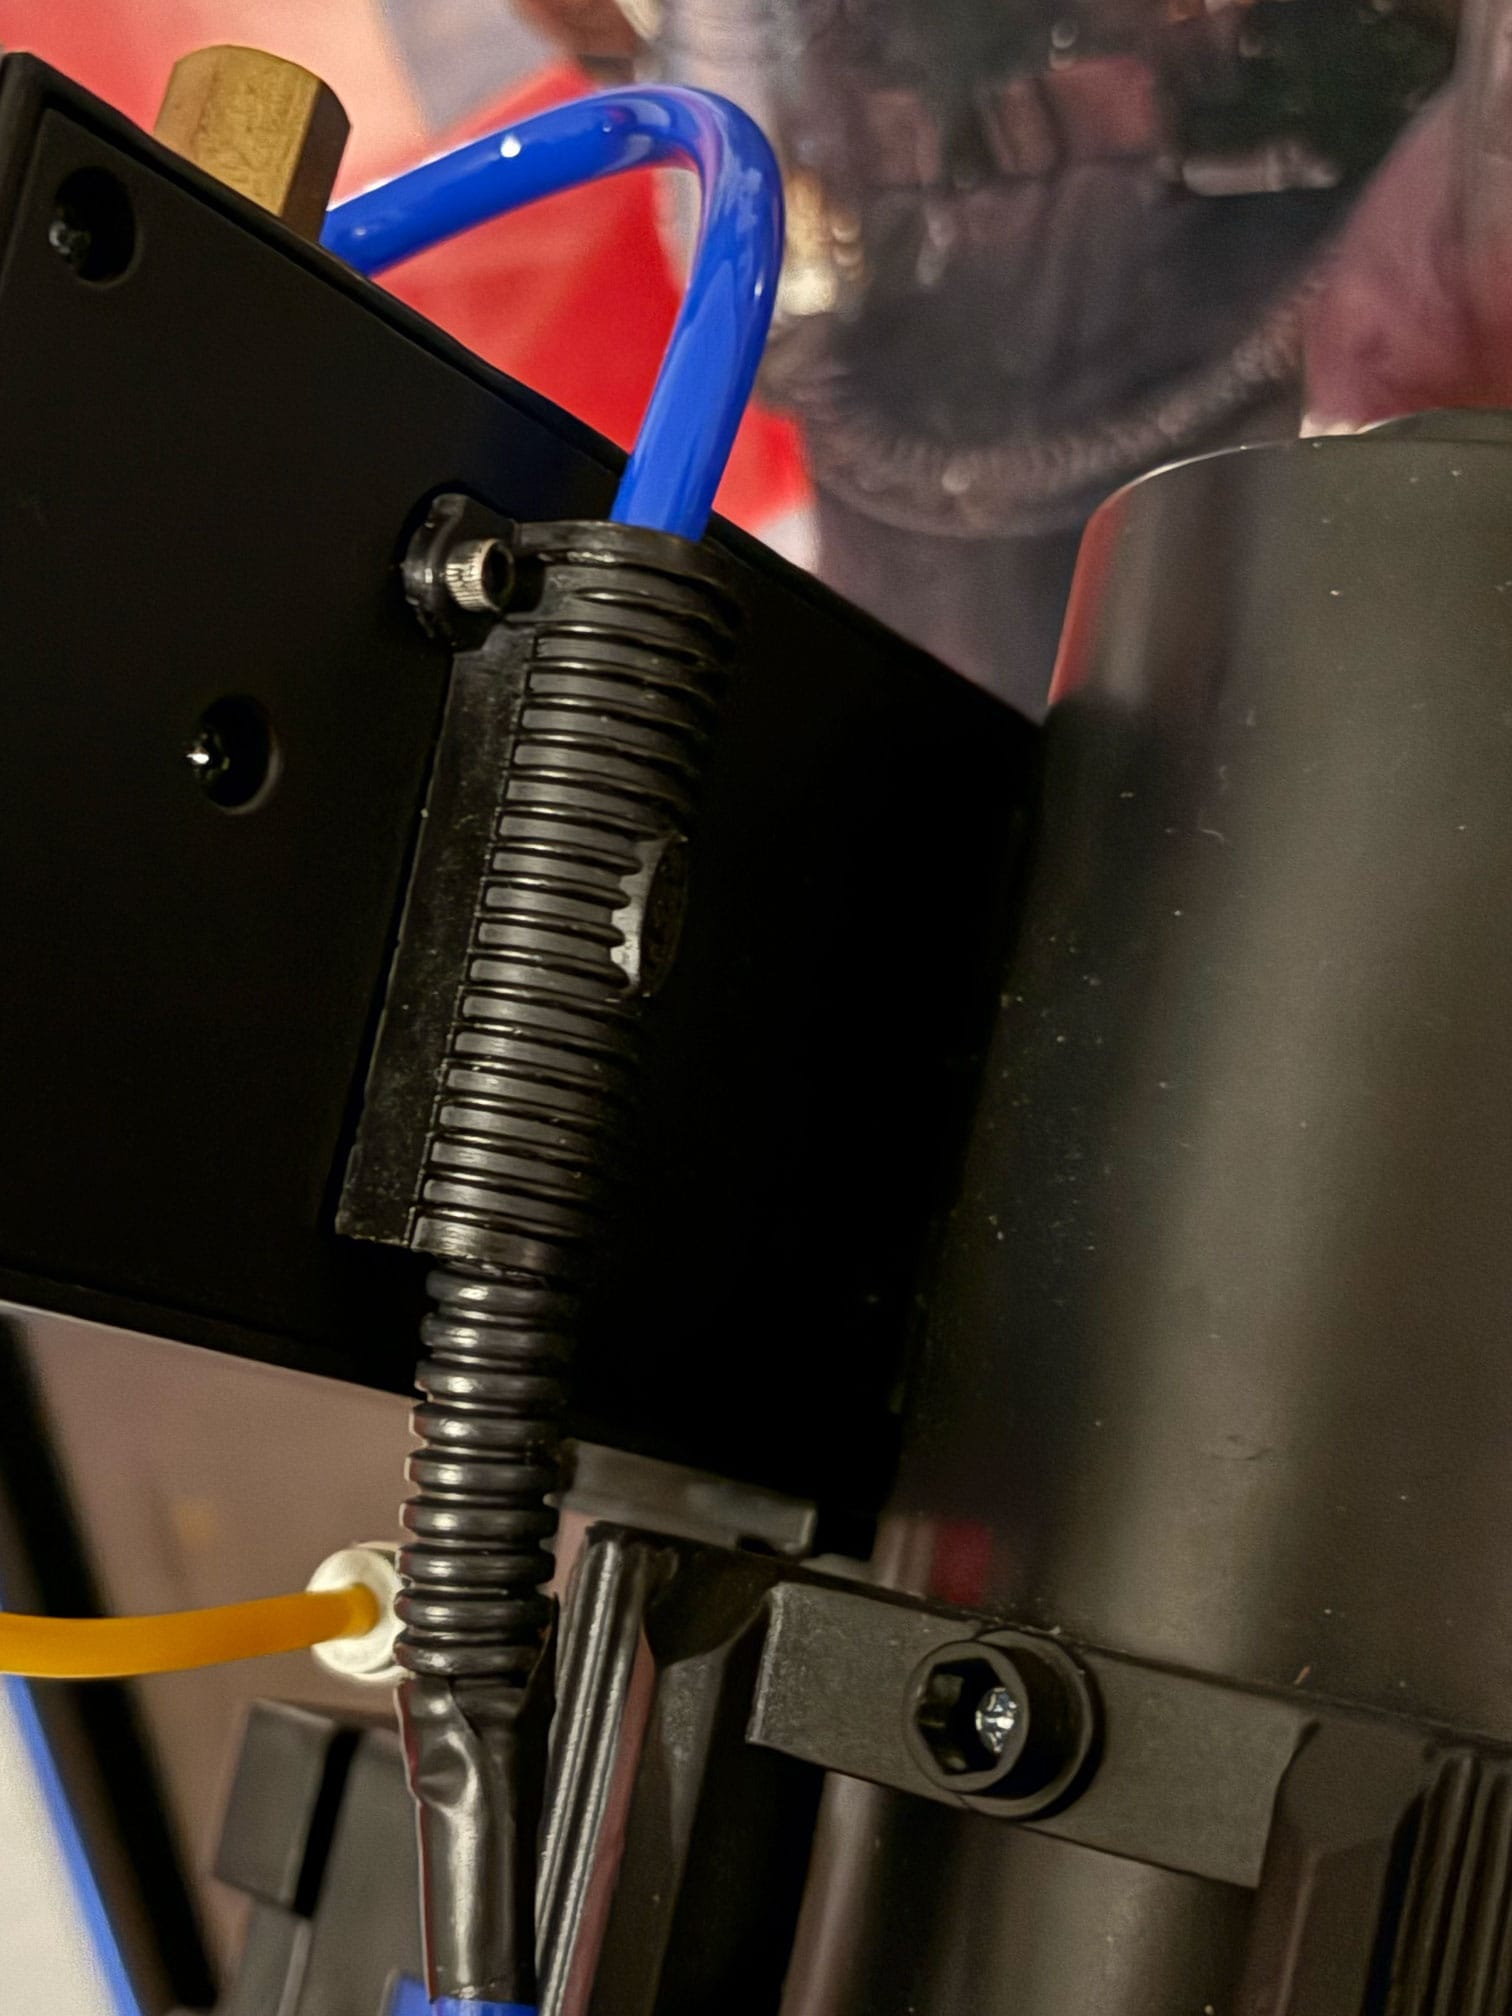
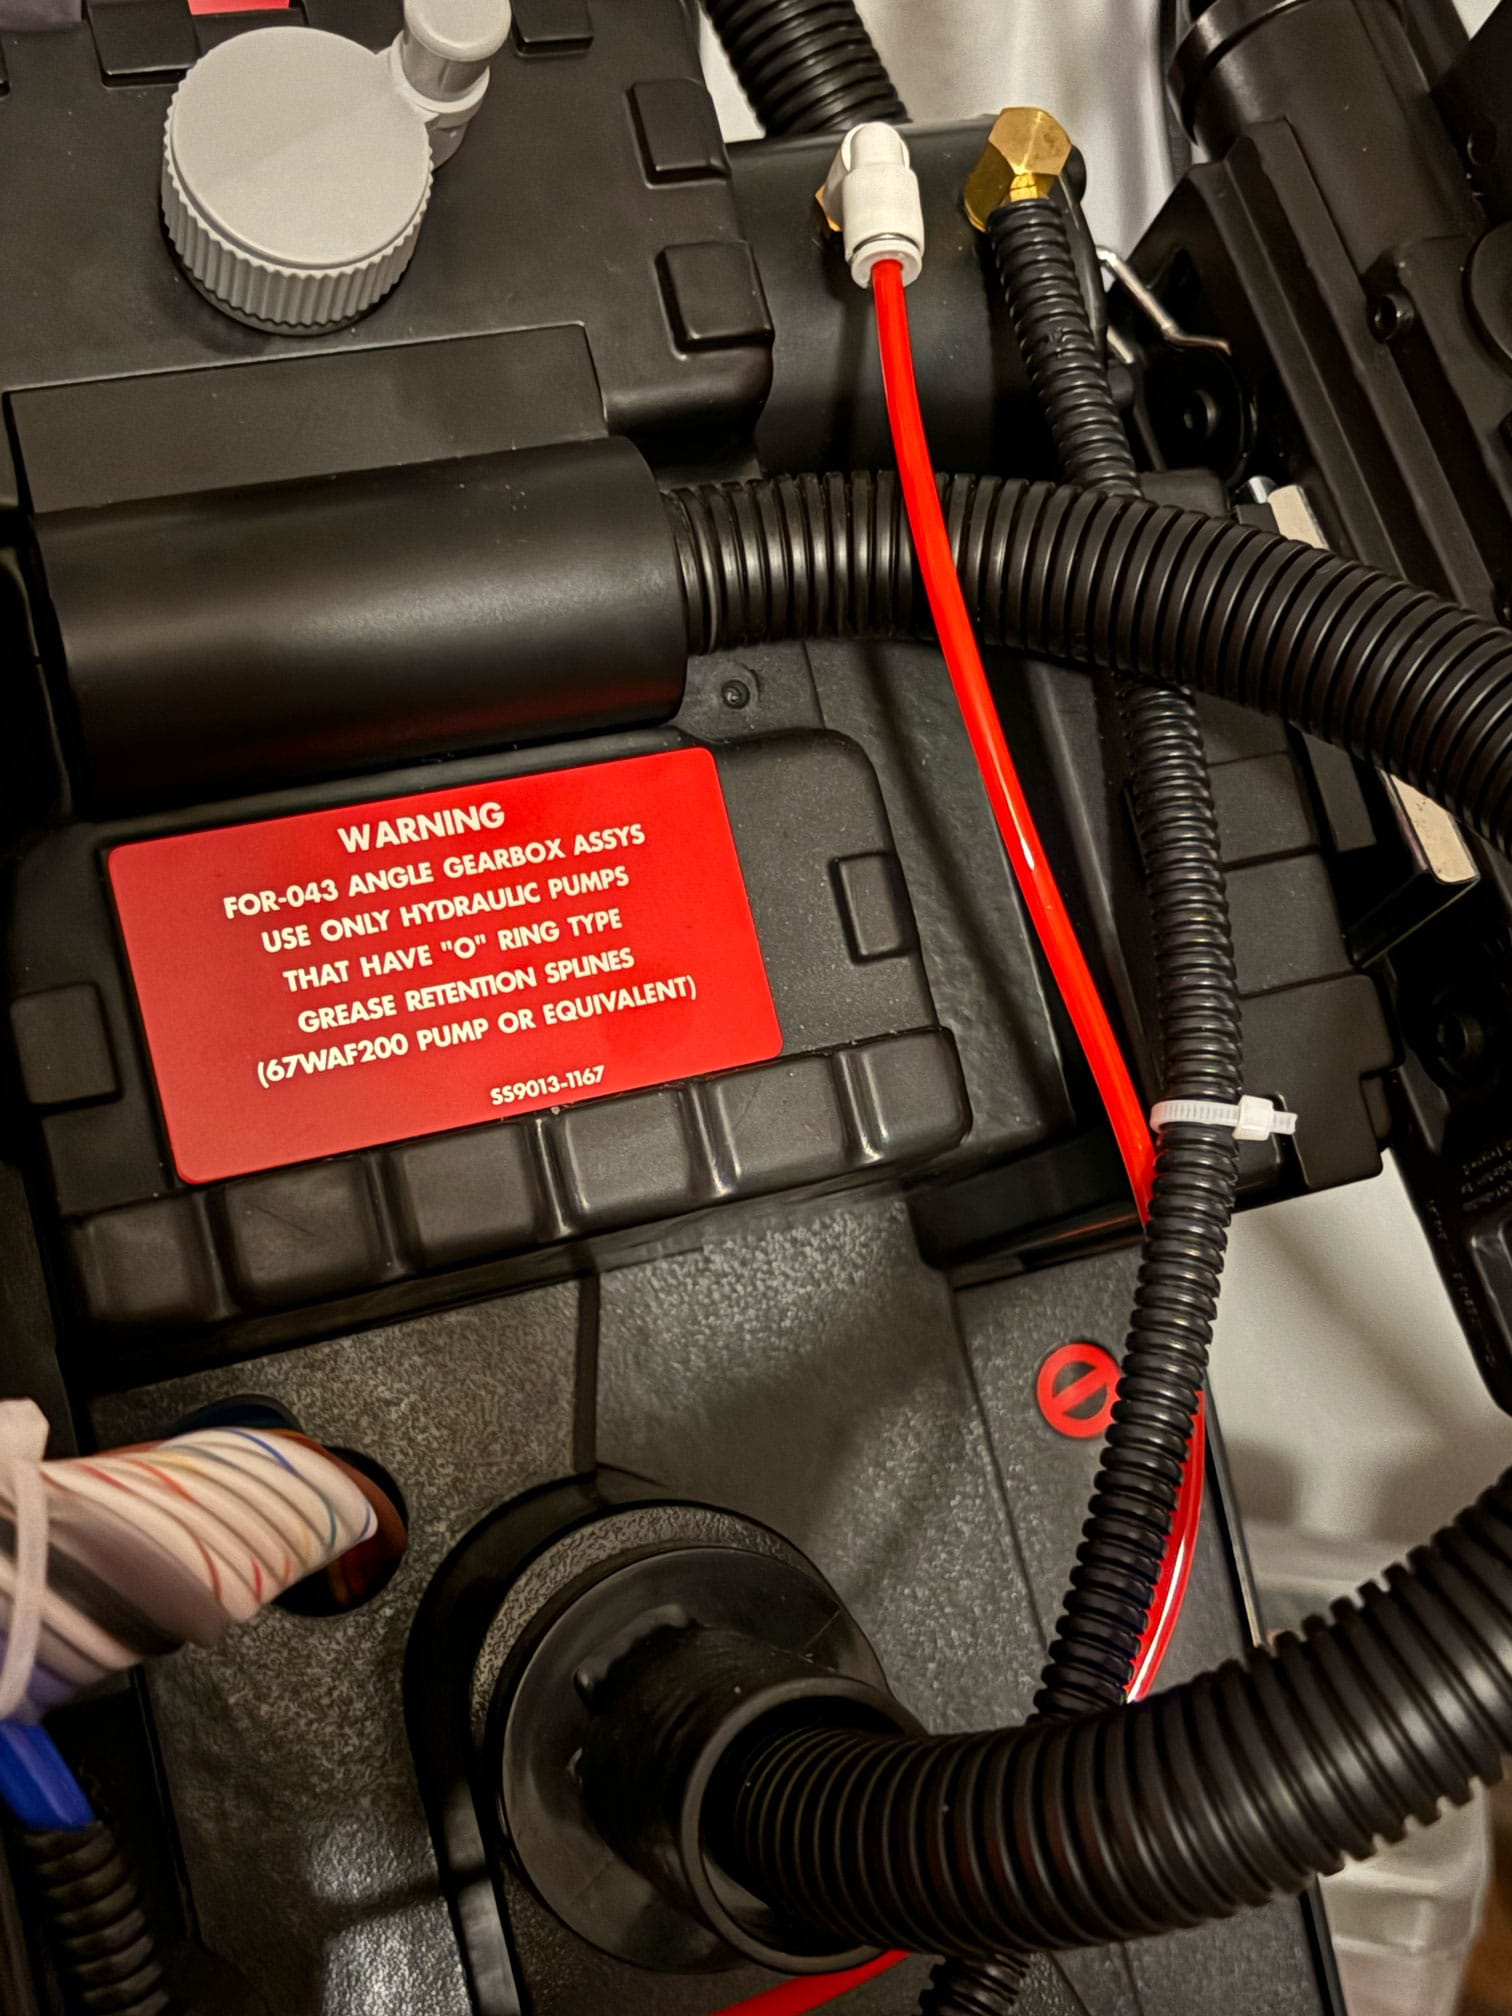
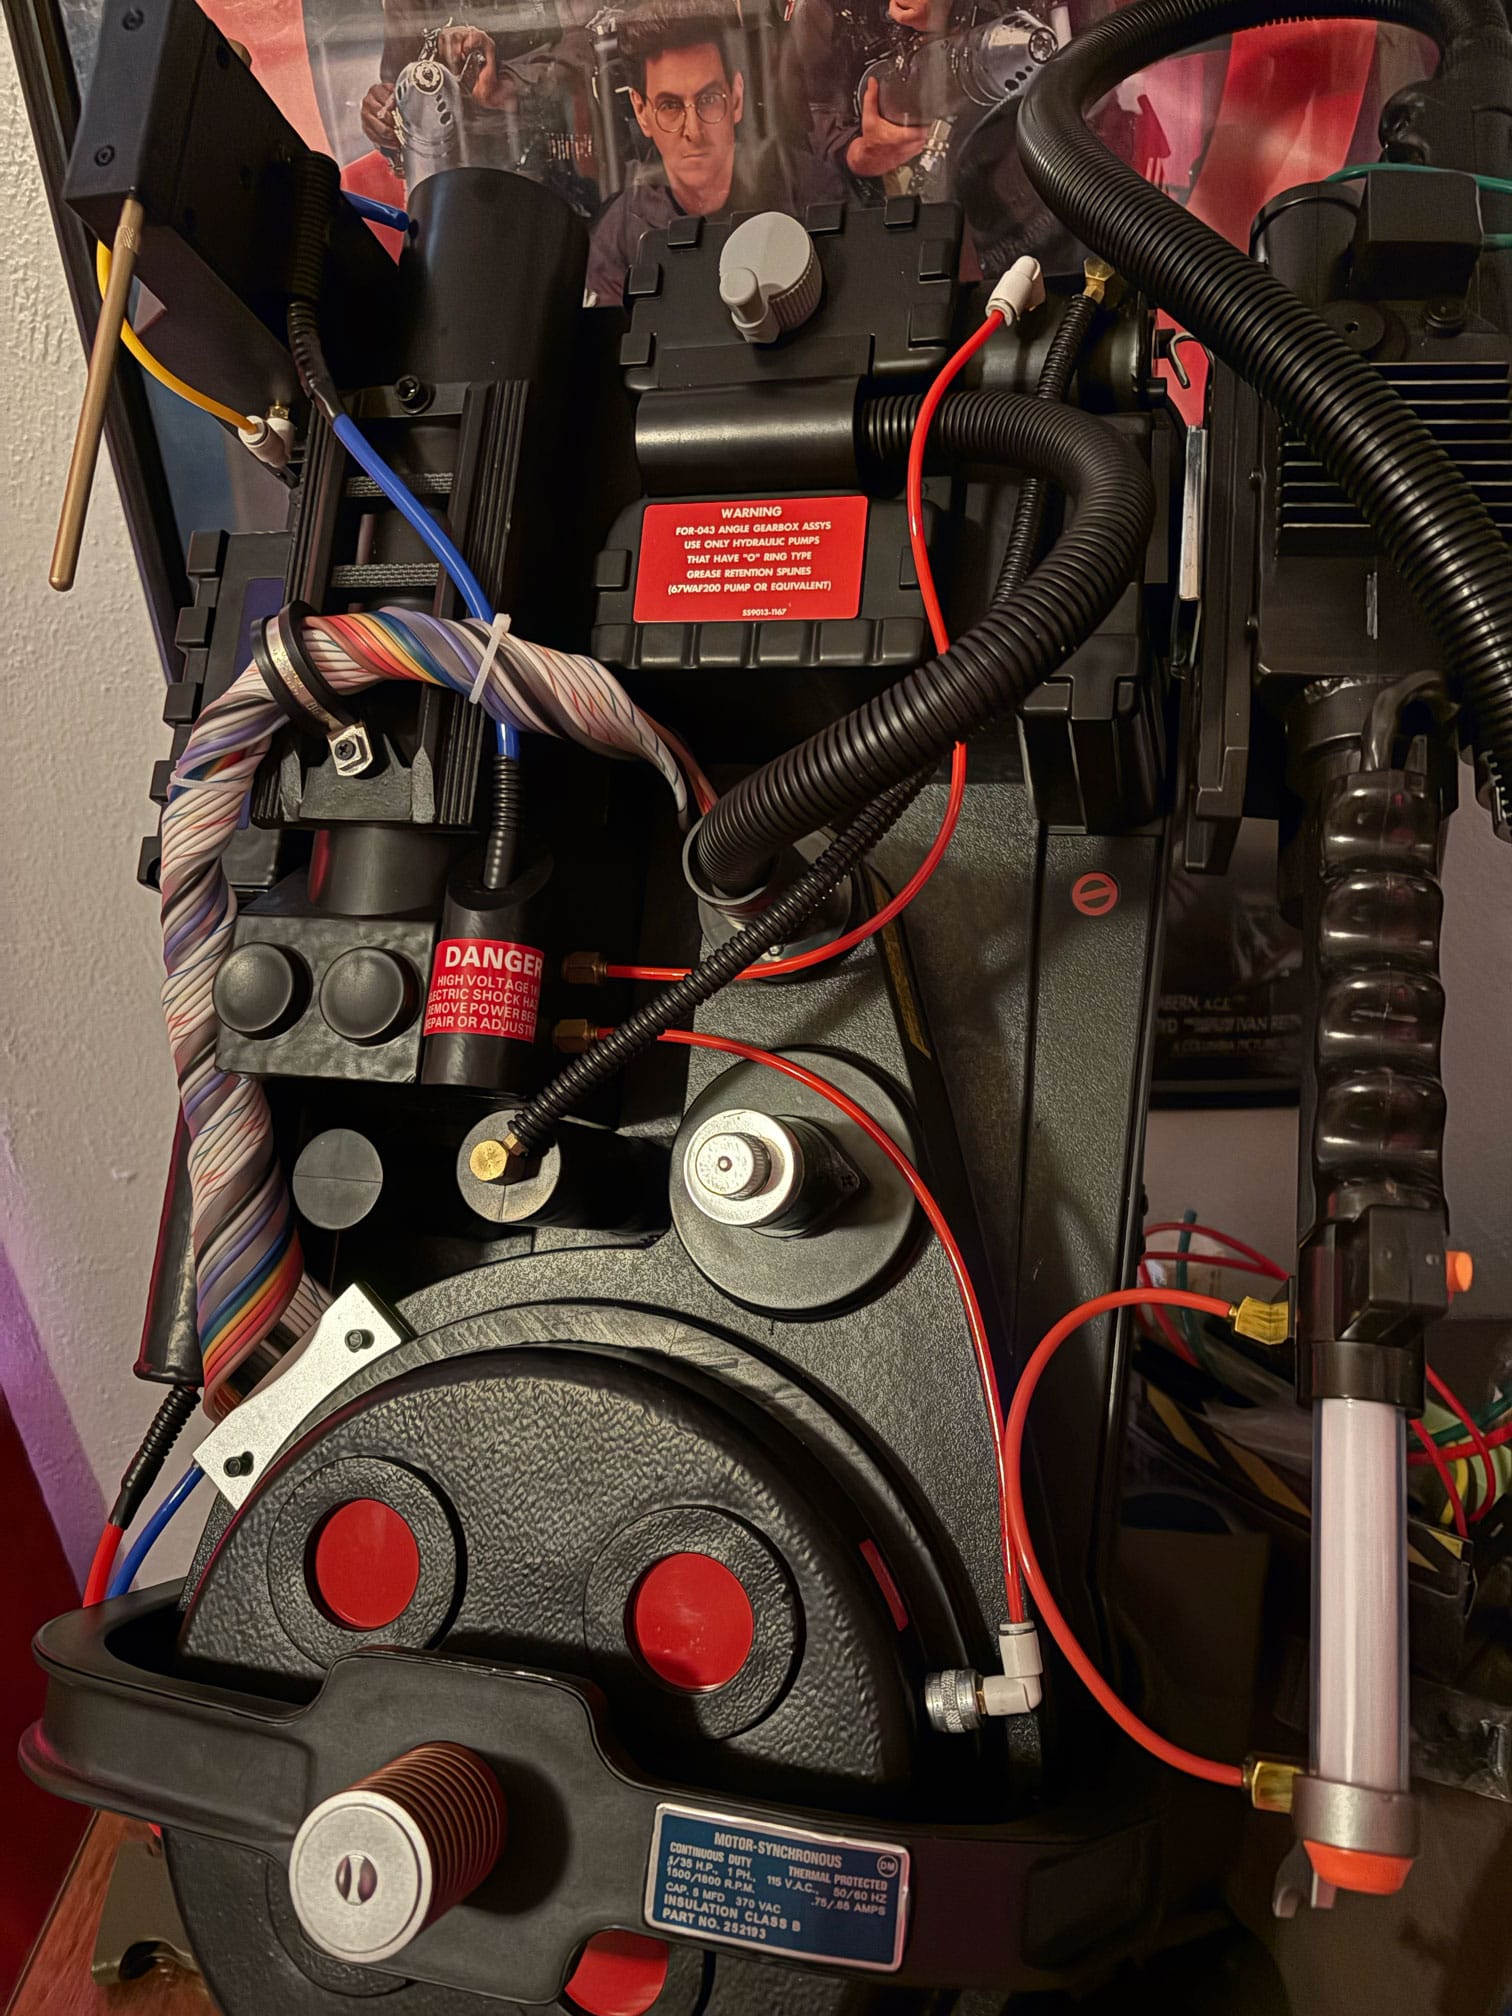
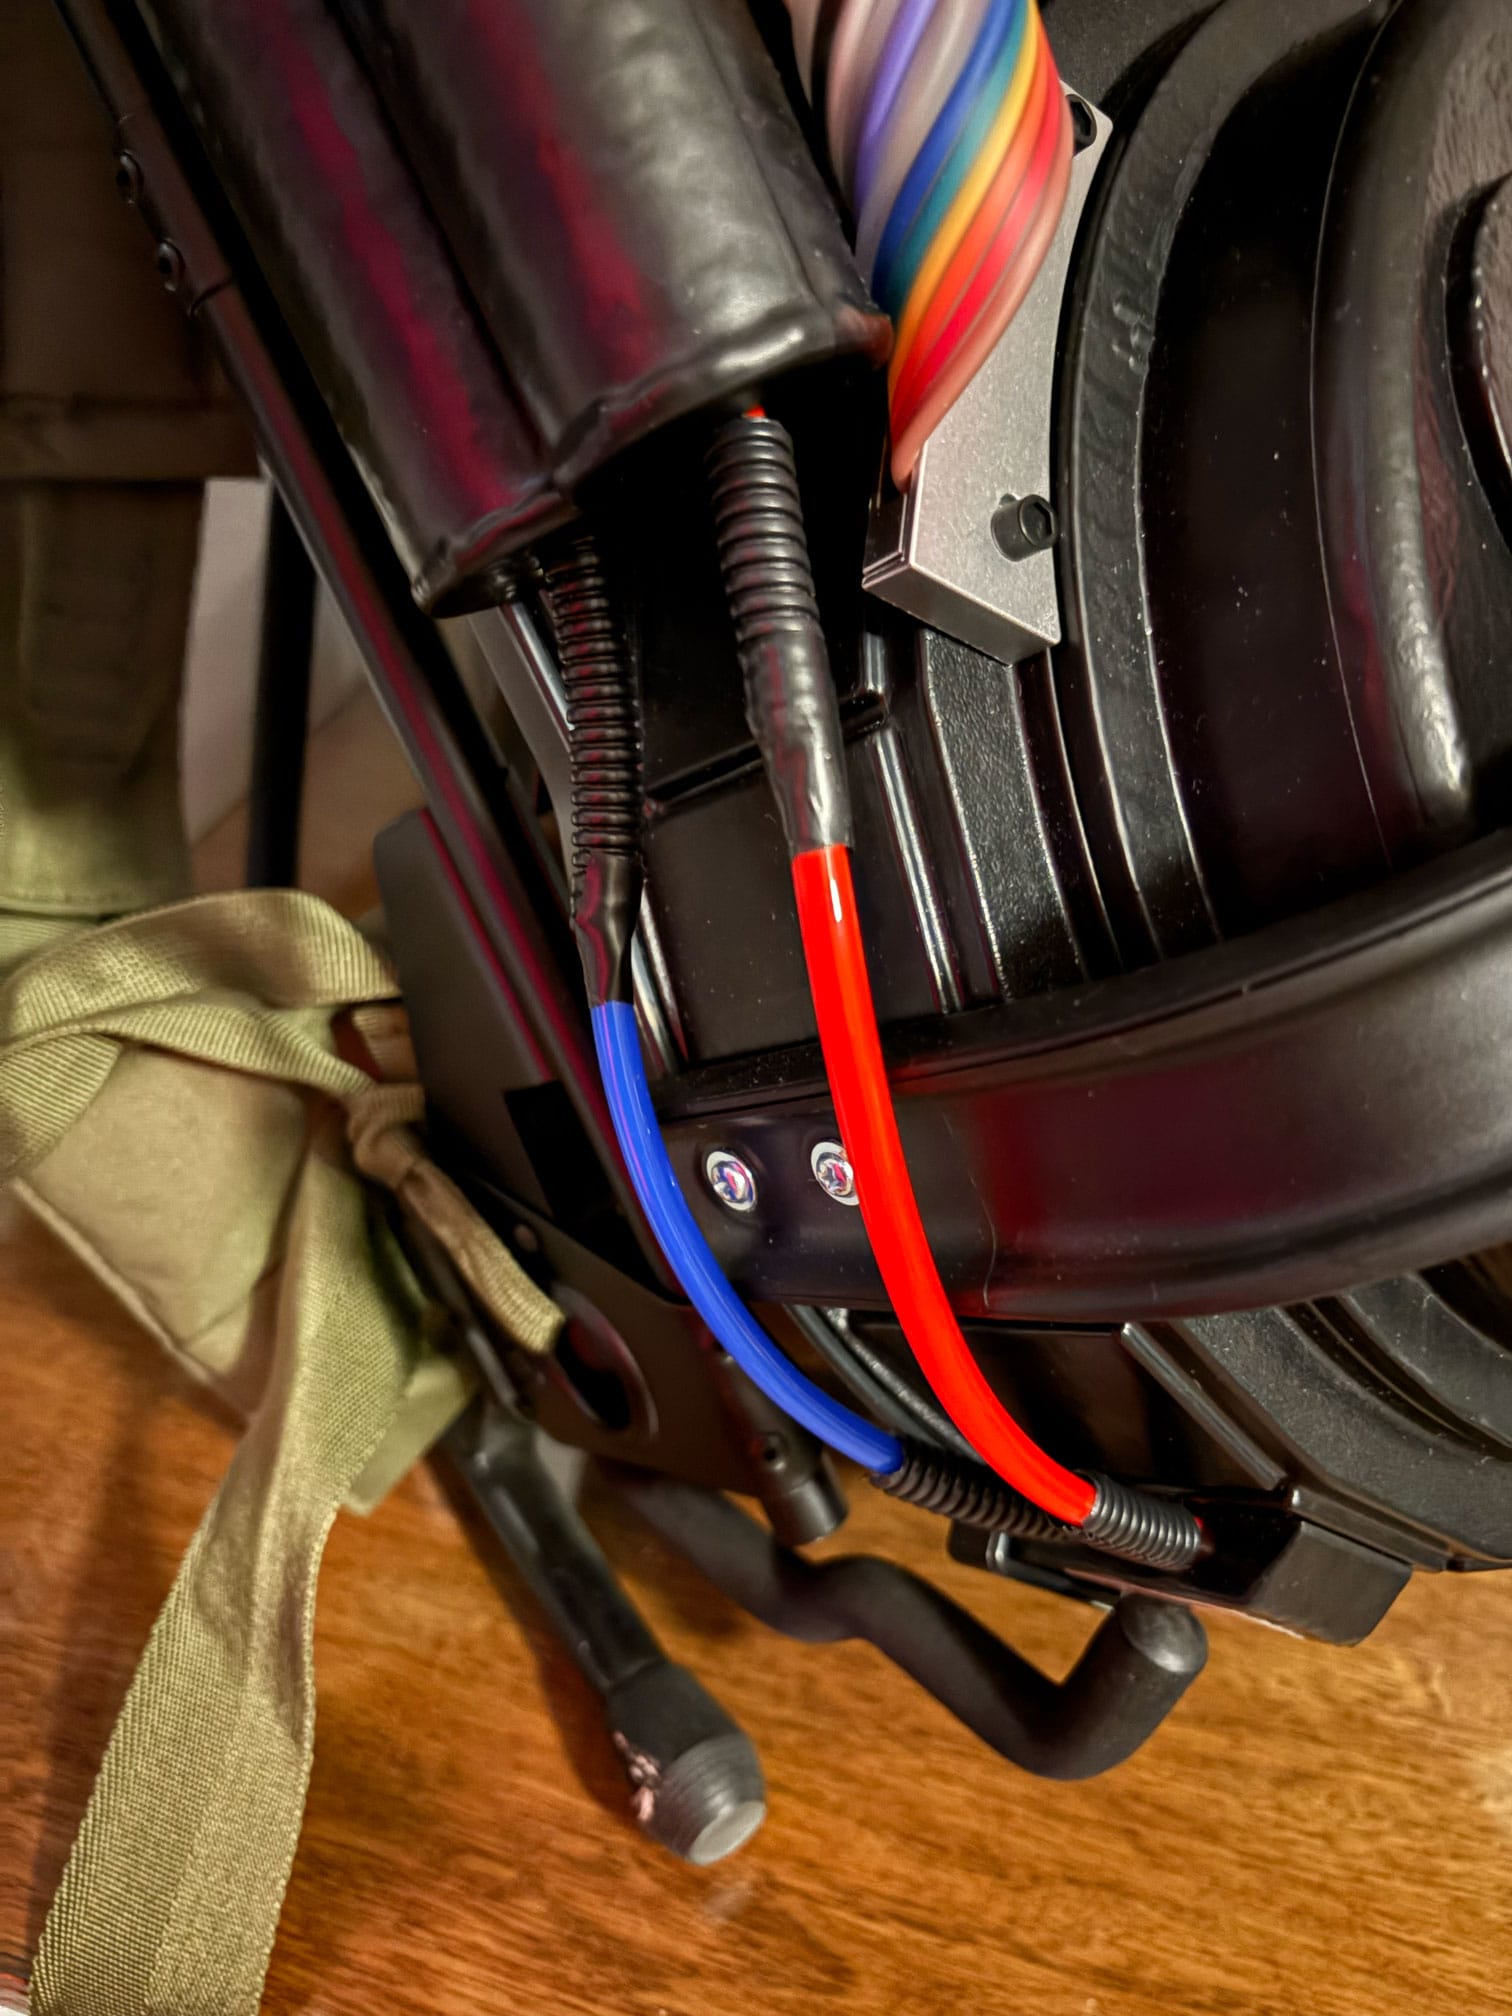
Elbows and straights on, tubing cut and installed.
Now for the easy part! I ran the tubes between their two connectors, guessed at the length, cut them, and stuck them in there. For the beam line and filler tubes, this is the easiest mod to make the pack more 84/89-accurate, since the rubber versions still use the strain-relief look of the Afterlife pack. One also uses a square hole and the other a round hole, what the hell is that about? Anyway, I stuck tubes up there, and for the slots at the base of the pack, I pinched each with plies and shoved them in–1/4" split loom covers the oddities there. Small bits of black electrical tape on a few of them, and we're done here for now.
A Weird Clippard Valve.
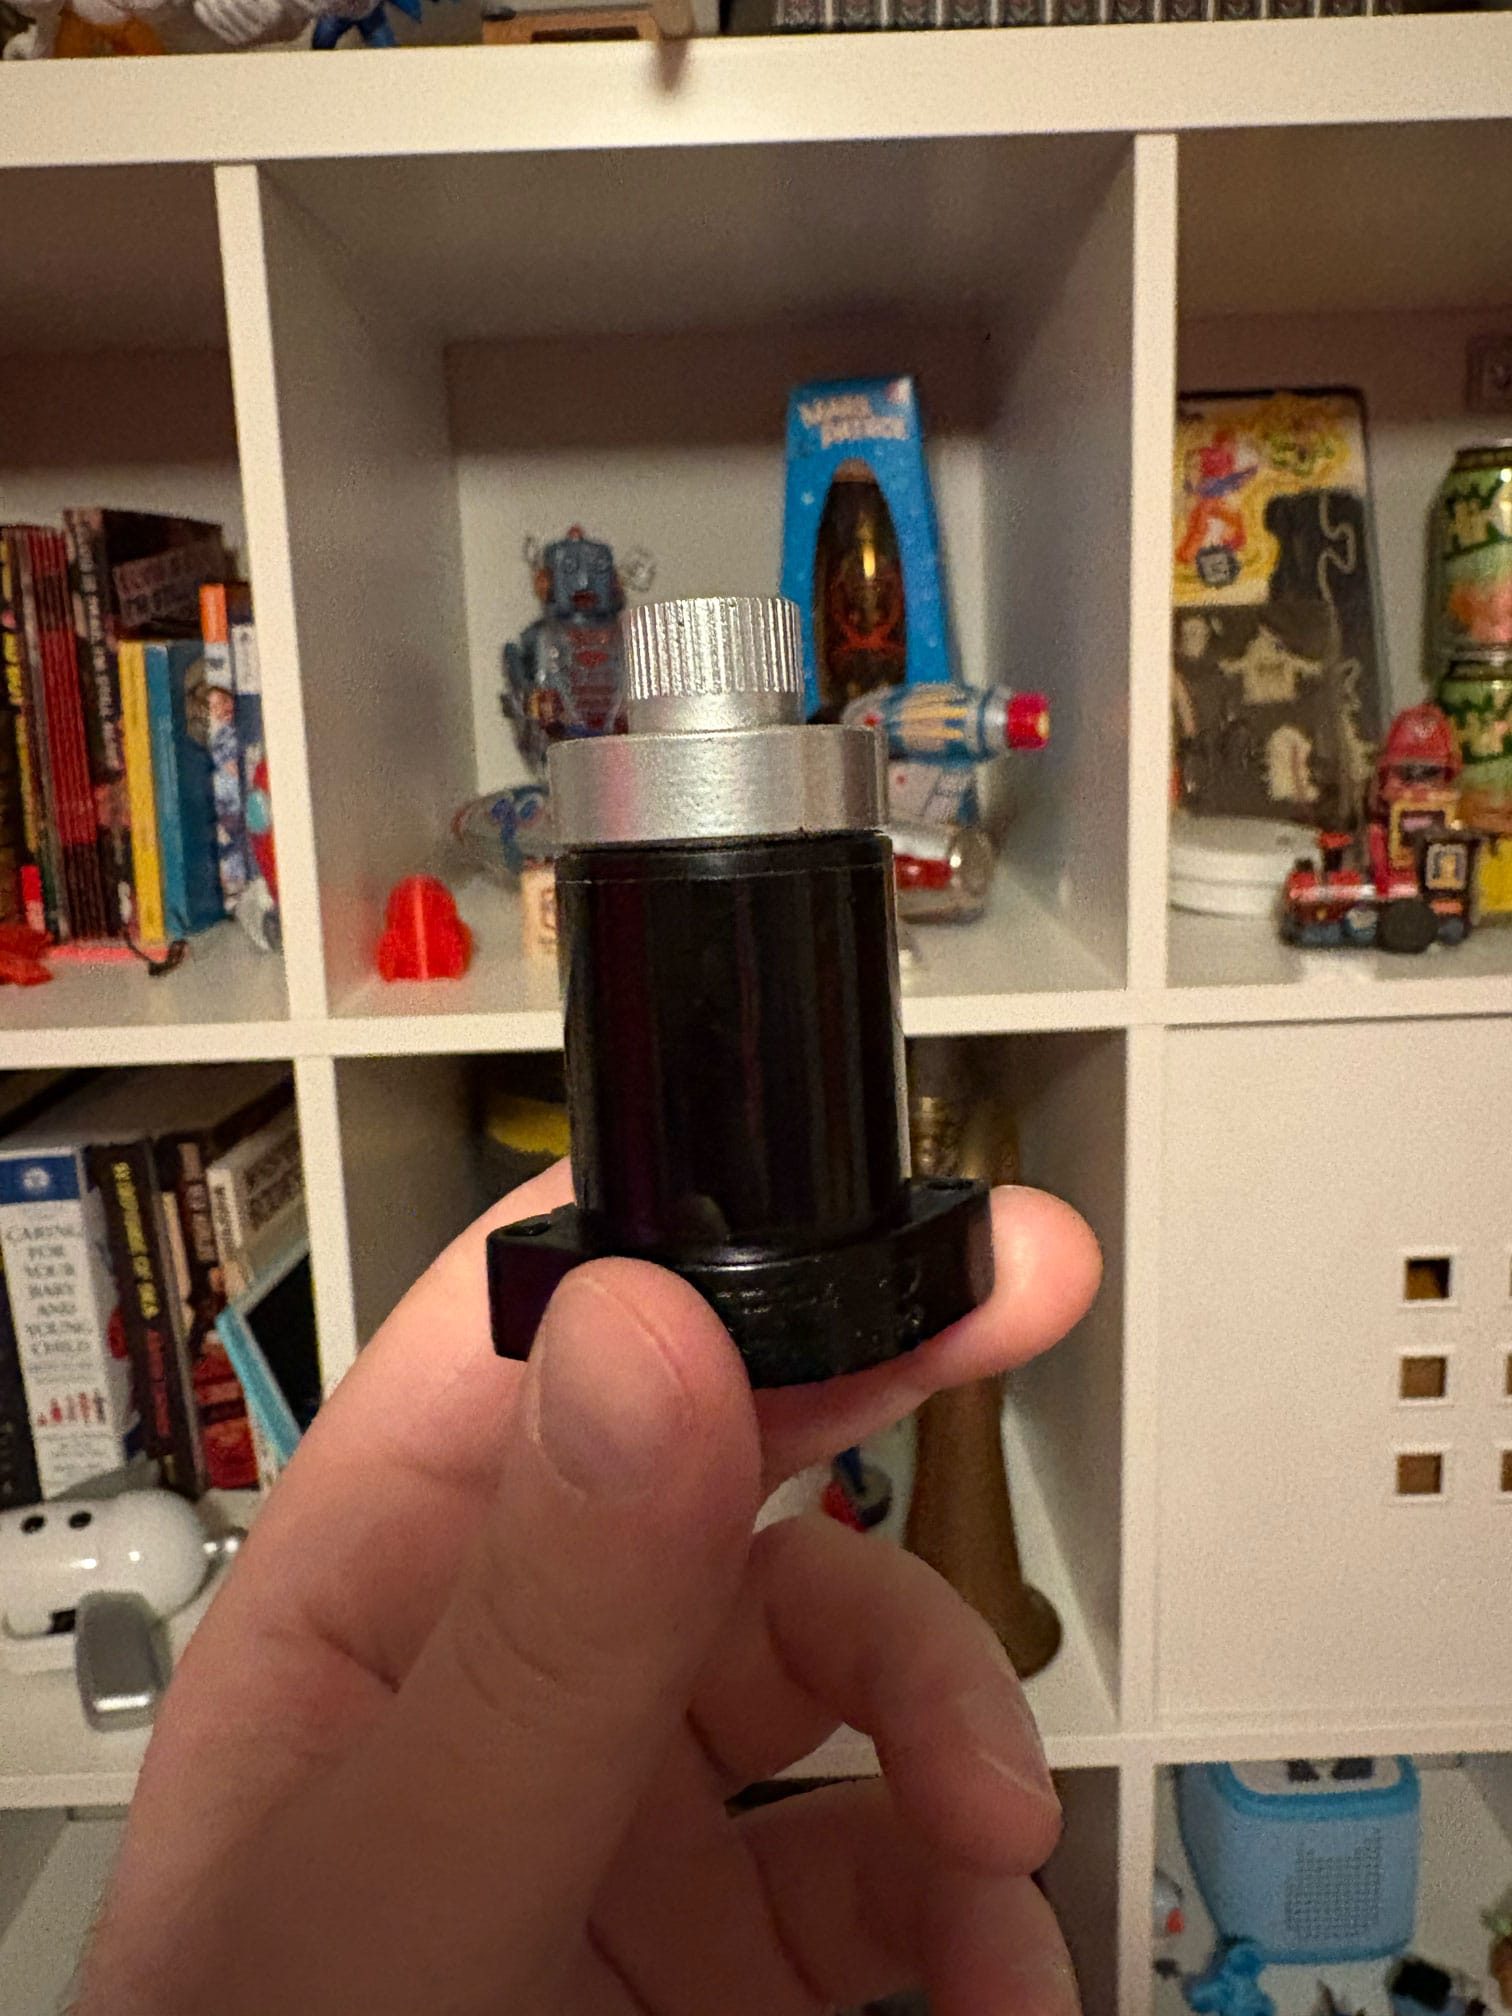
One of the oddest parts of both this pack and the Afterlife pack is the Clippard valve replica. The circumference is wrong; the top is both too short and too wide; and it is hollow, held on with small screws and a post. Once again, I had an old resin Clippard valve, and I decided to make it semi-reversible. I didn't want to hollow out the resin part, so I broke off the post that stabilized the hollow part on the pack. But I kept the screw posts by drilling out the top of the base, then doing the same on the bottom. That way, the stock screws or replacements could be sunk into the valve base and slip over those posts.
Of course before I could mount it I had to paint the top to look like chrome/silver and apply a label. After a few rounds of sliver spray paint I applied a label from Mack's Factory. I am really happy with how this came out, definitely an improvement over their attempt.
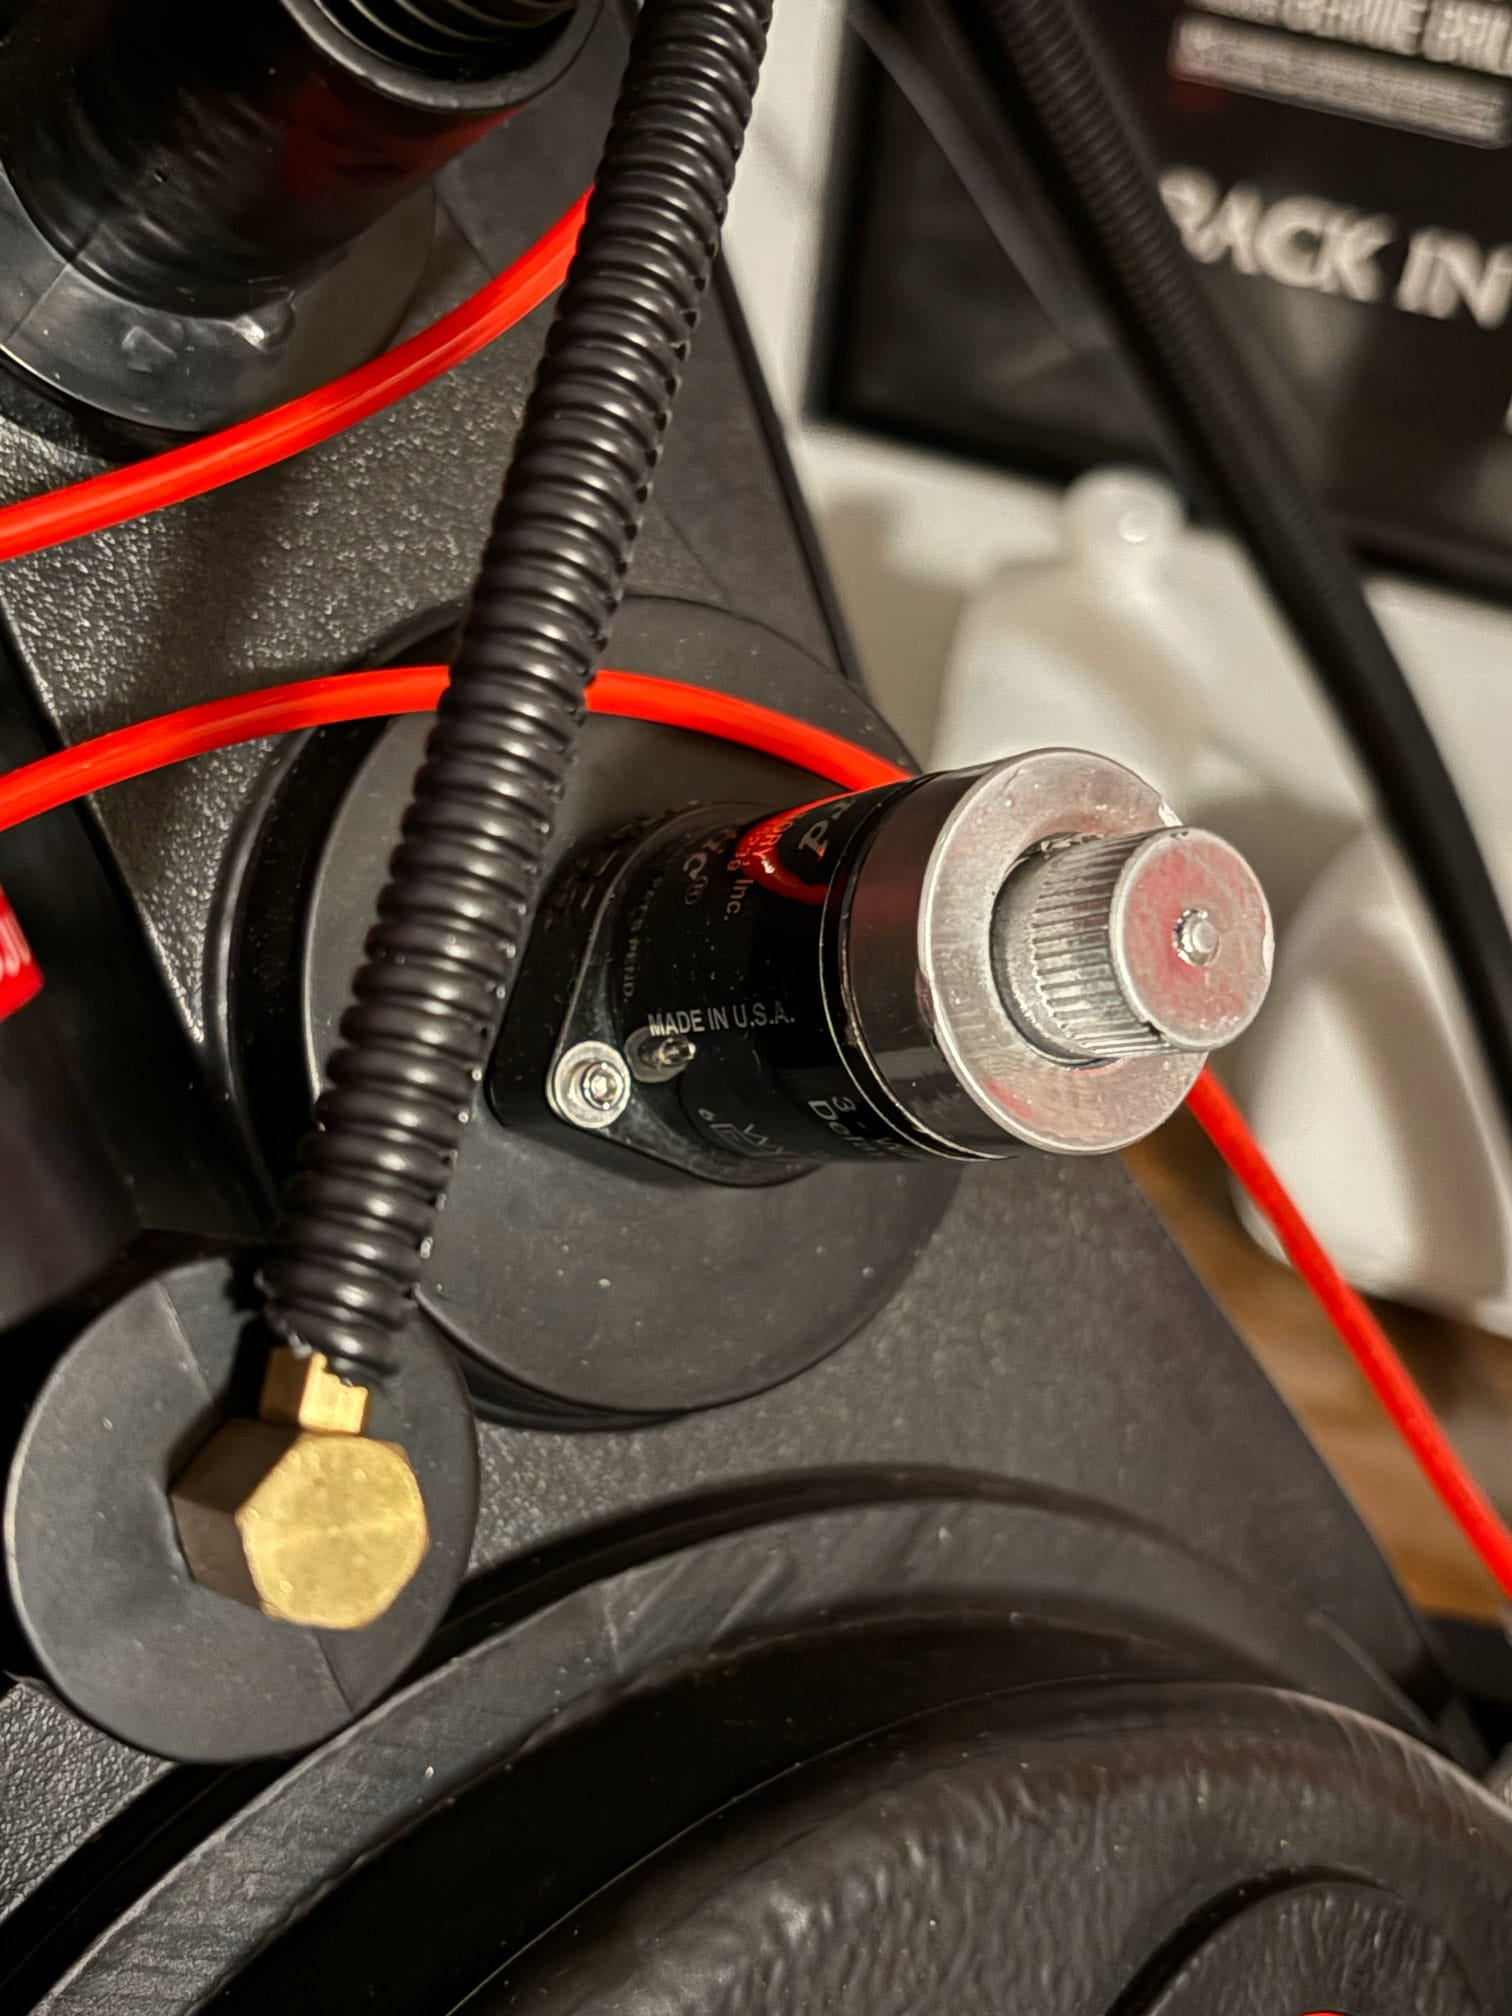
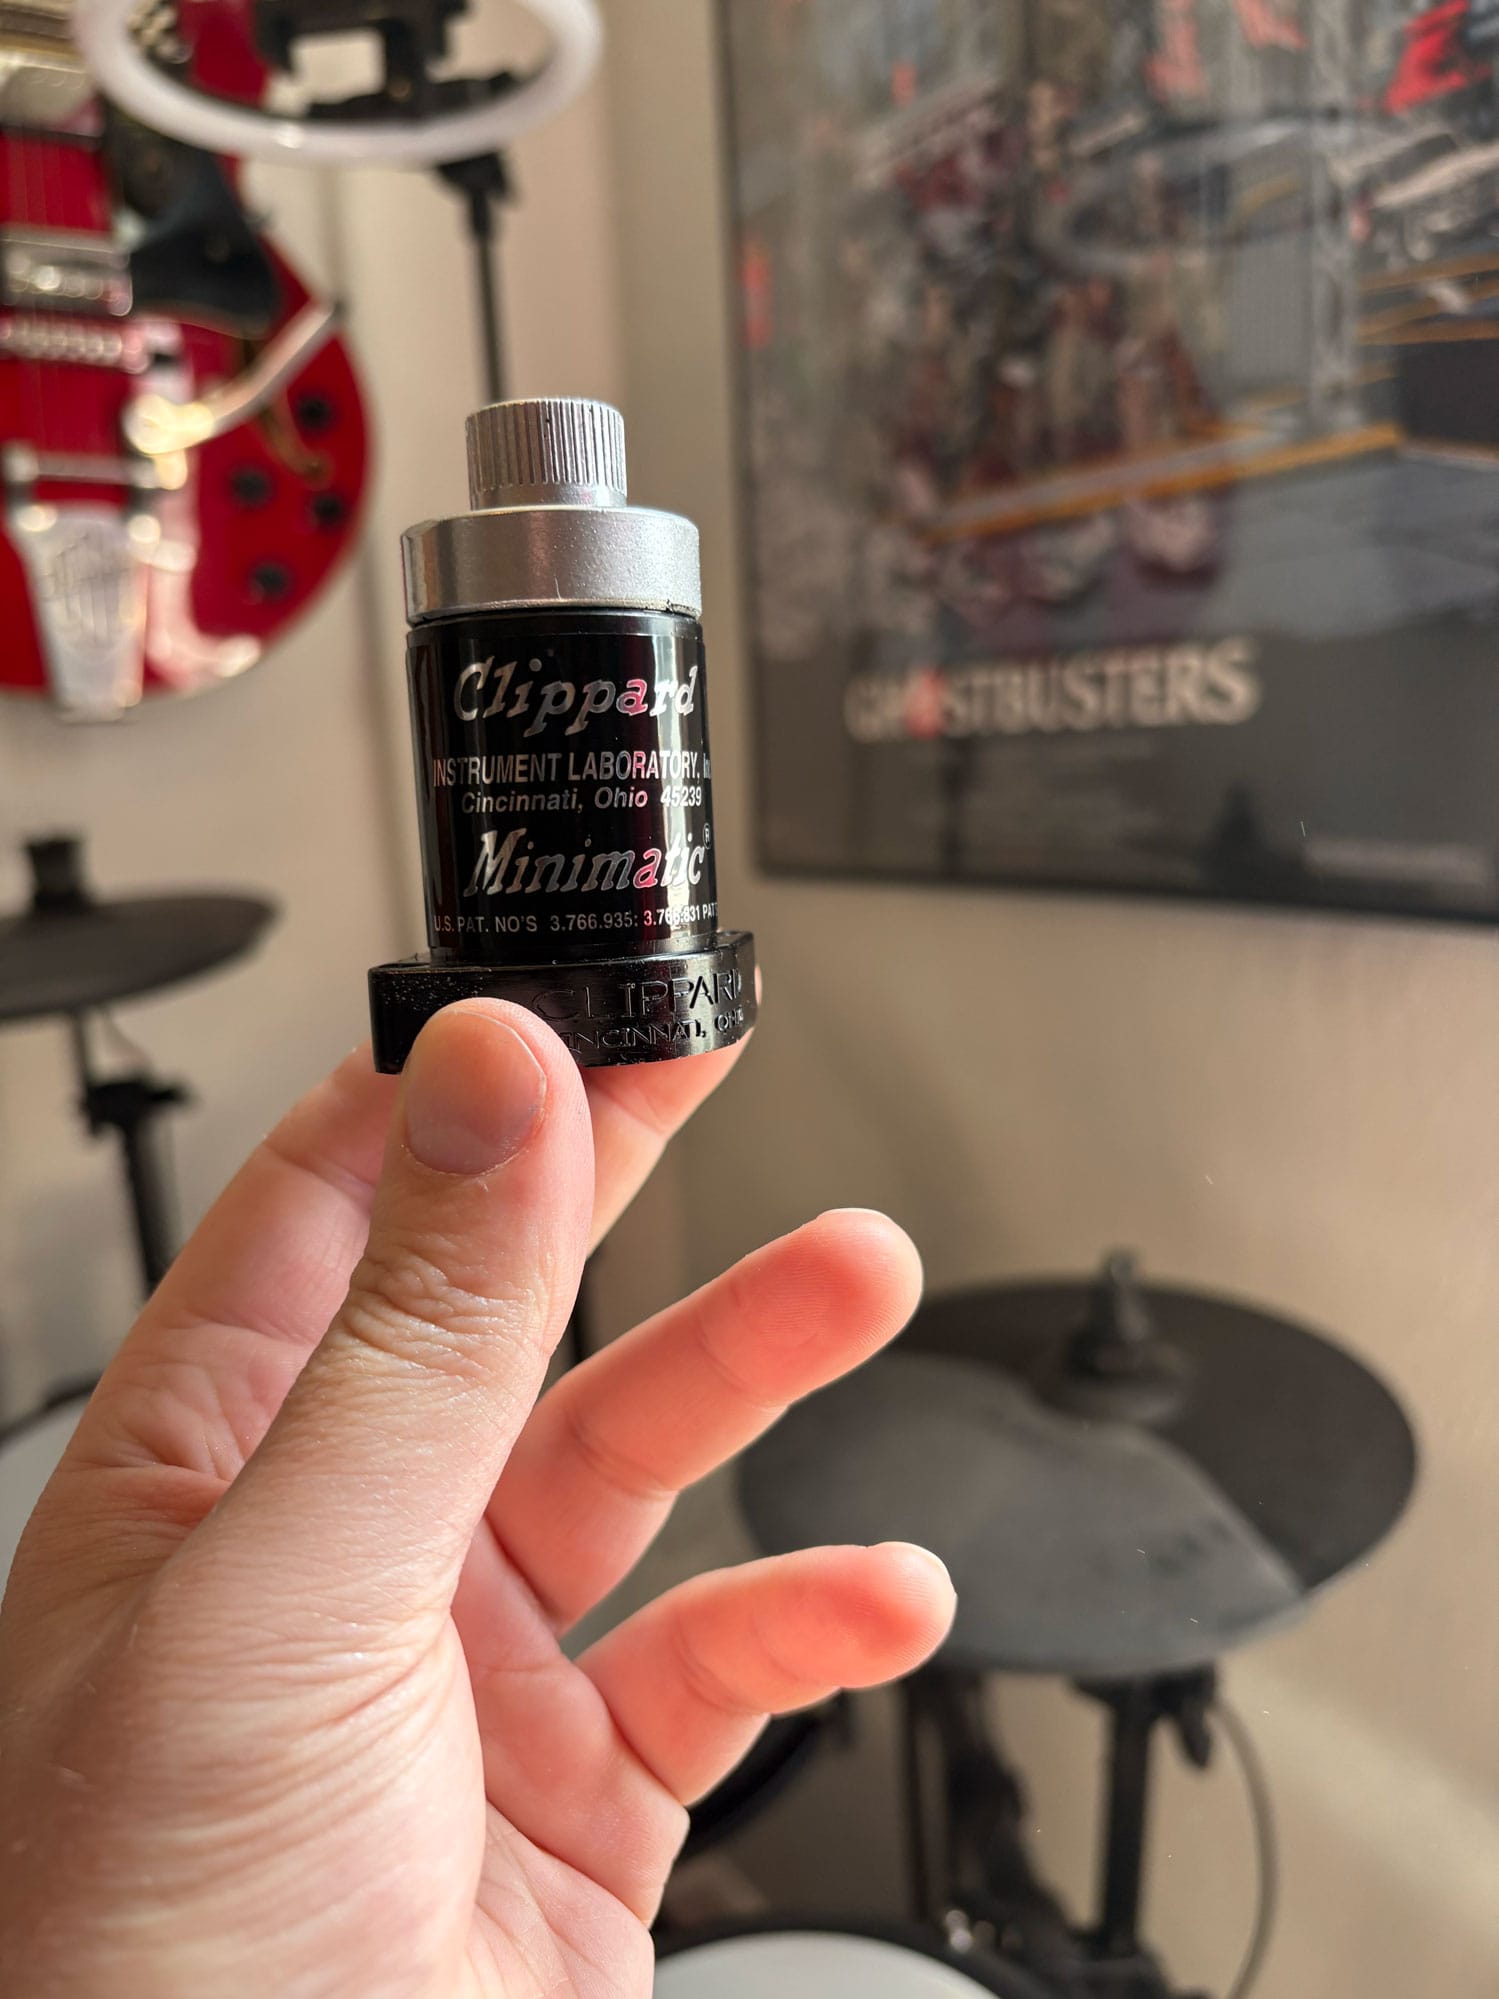
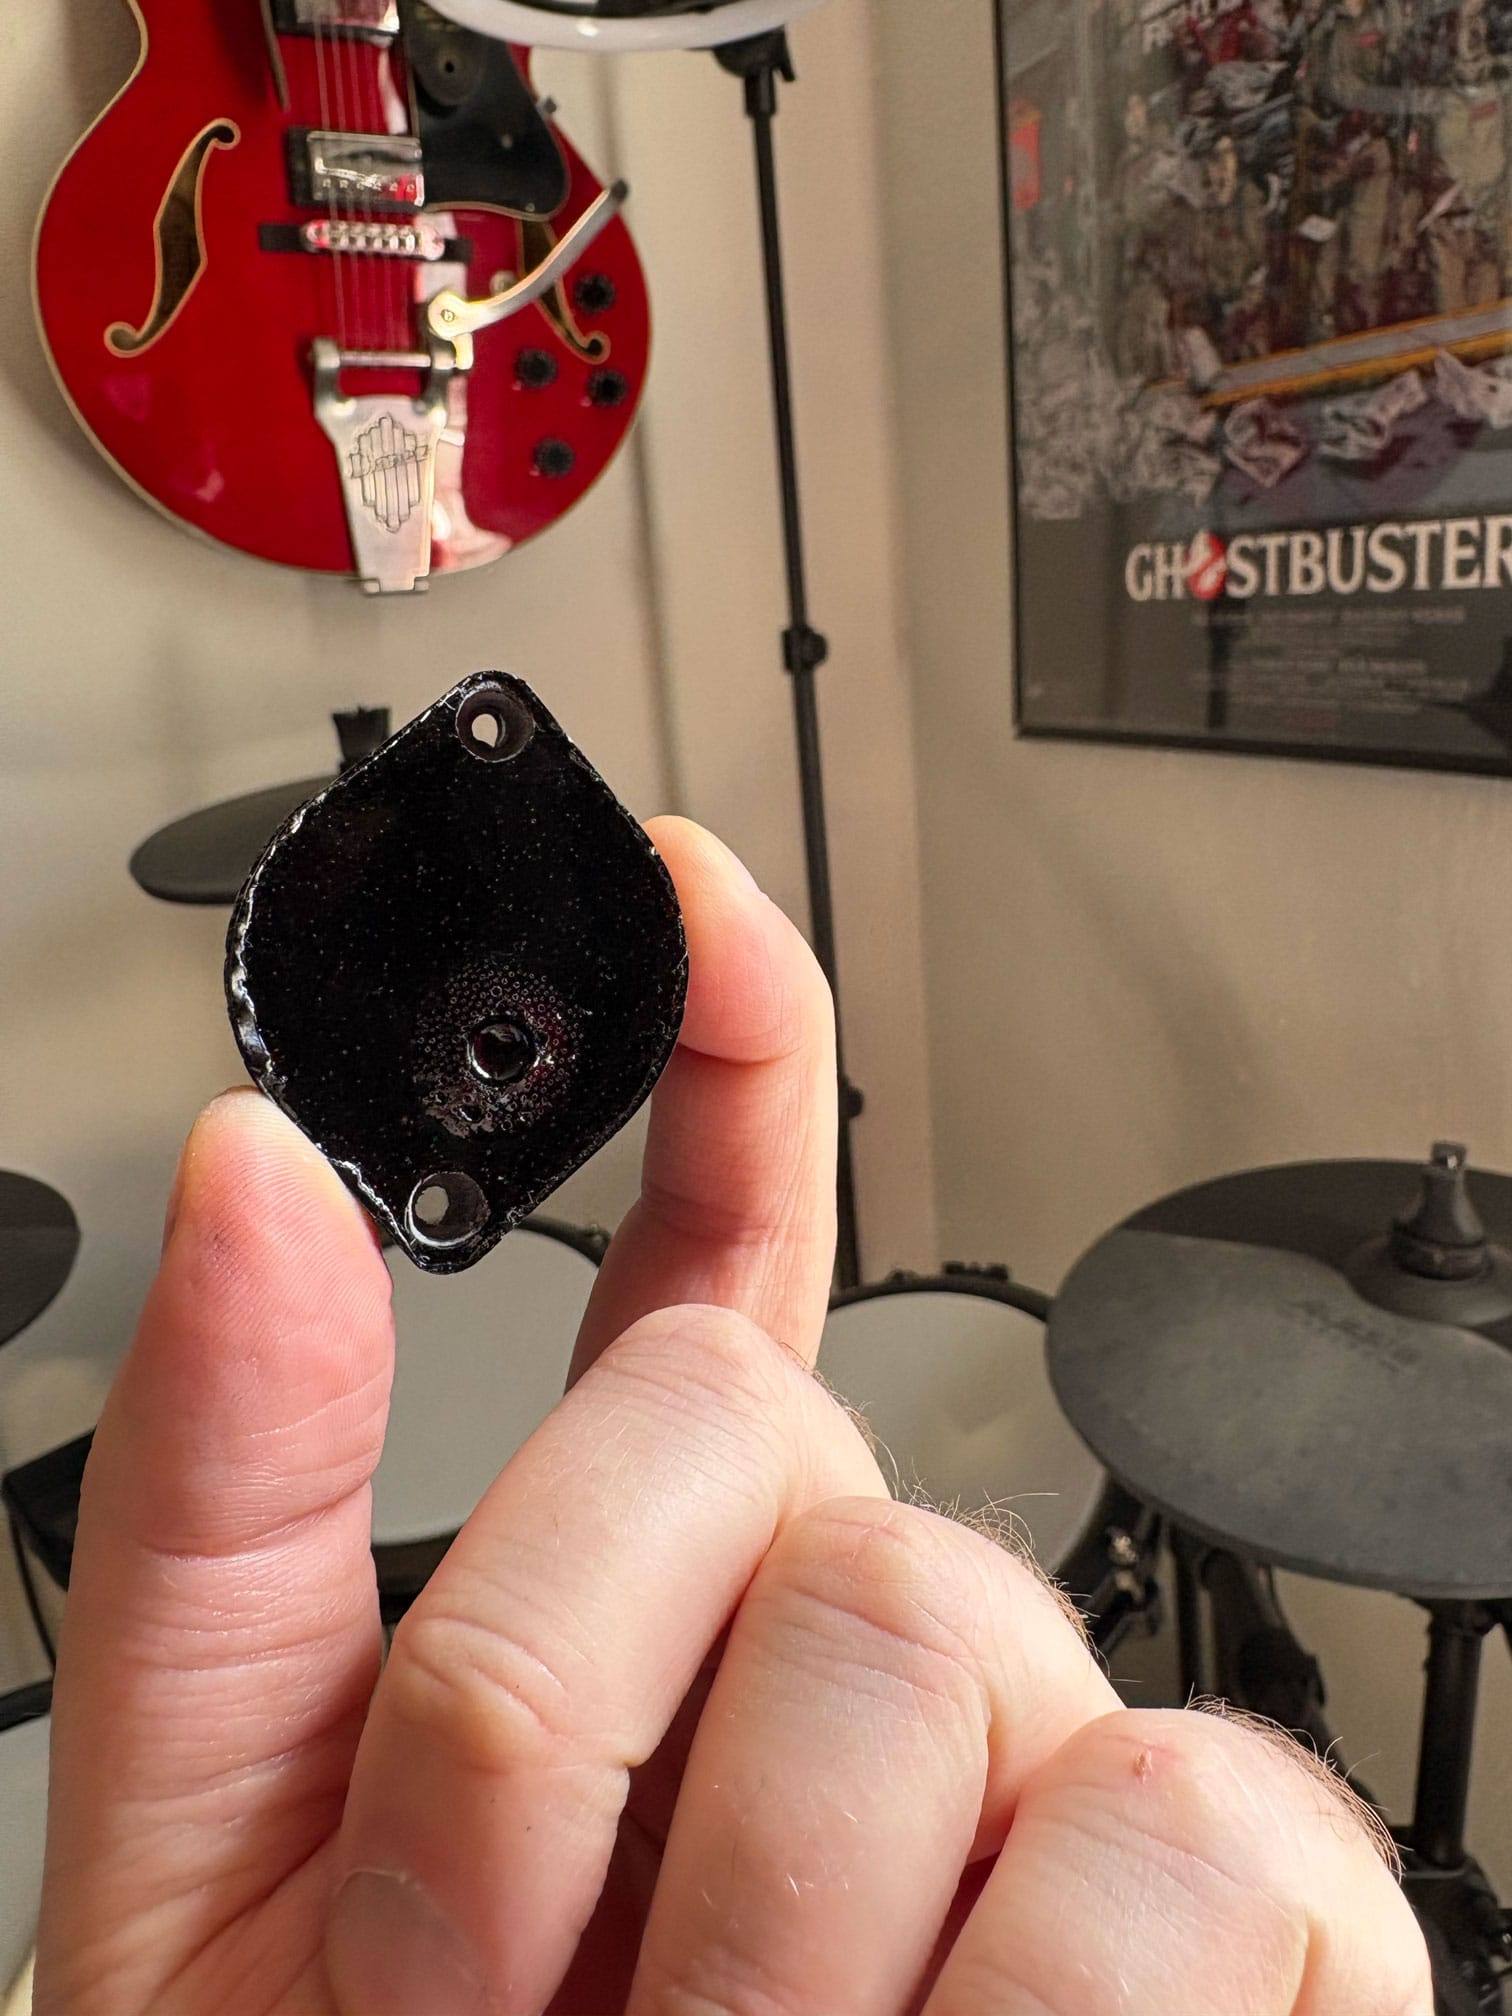
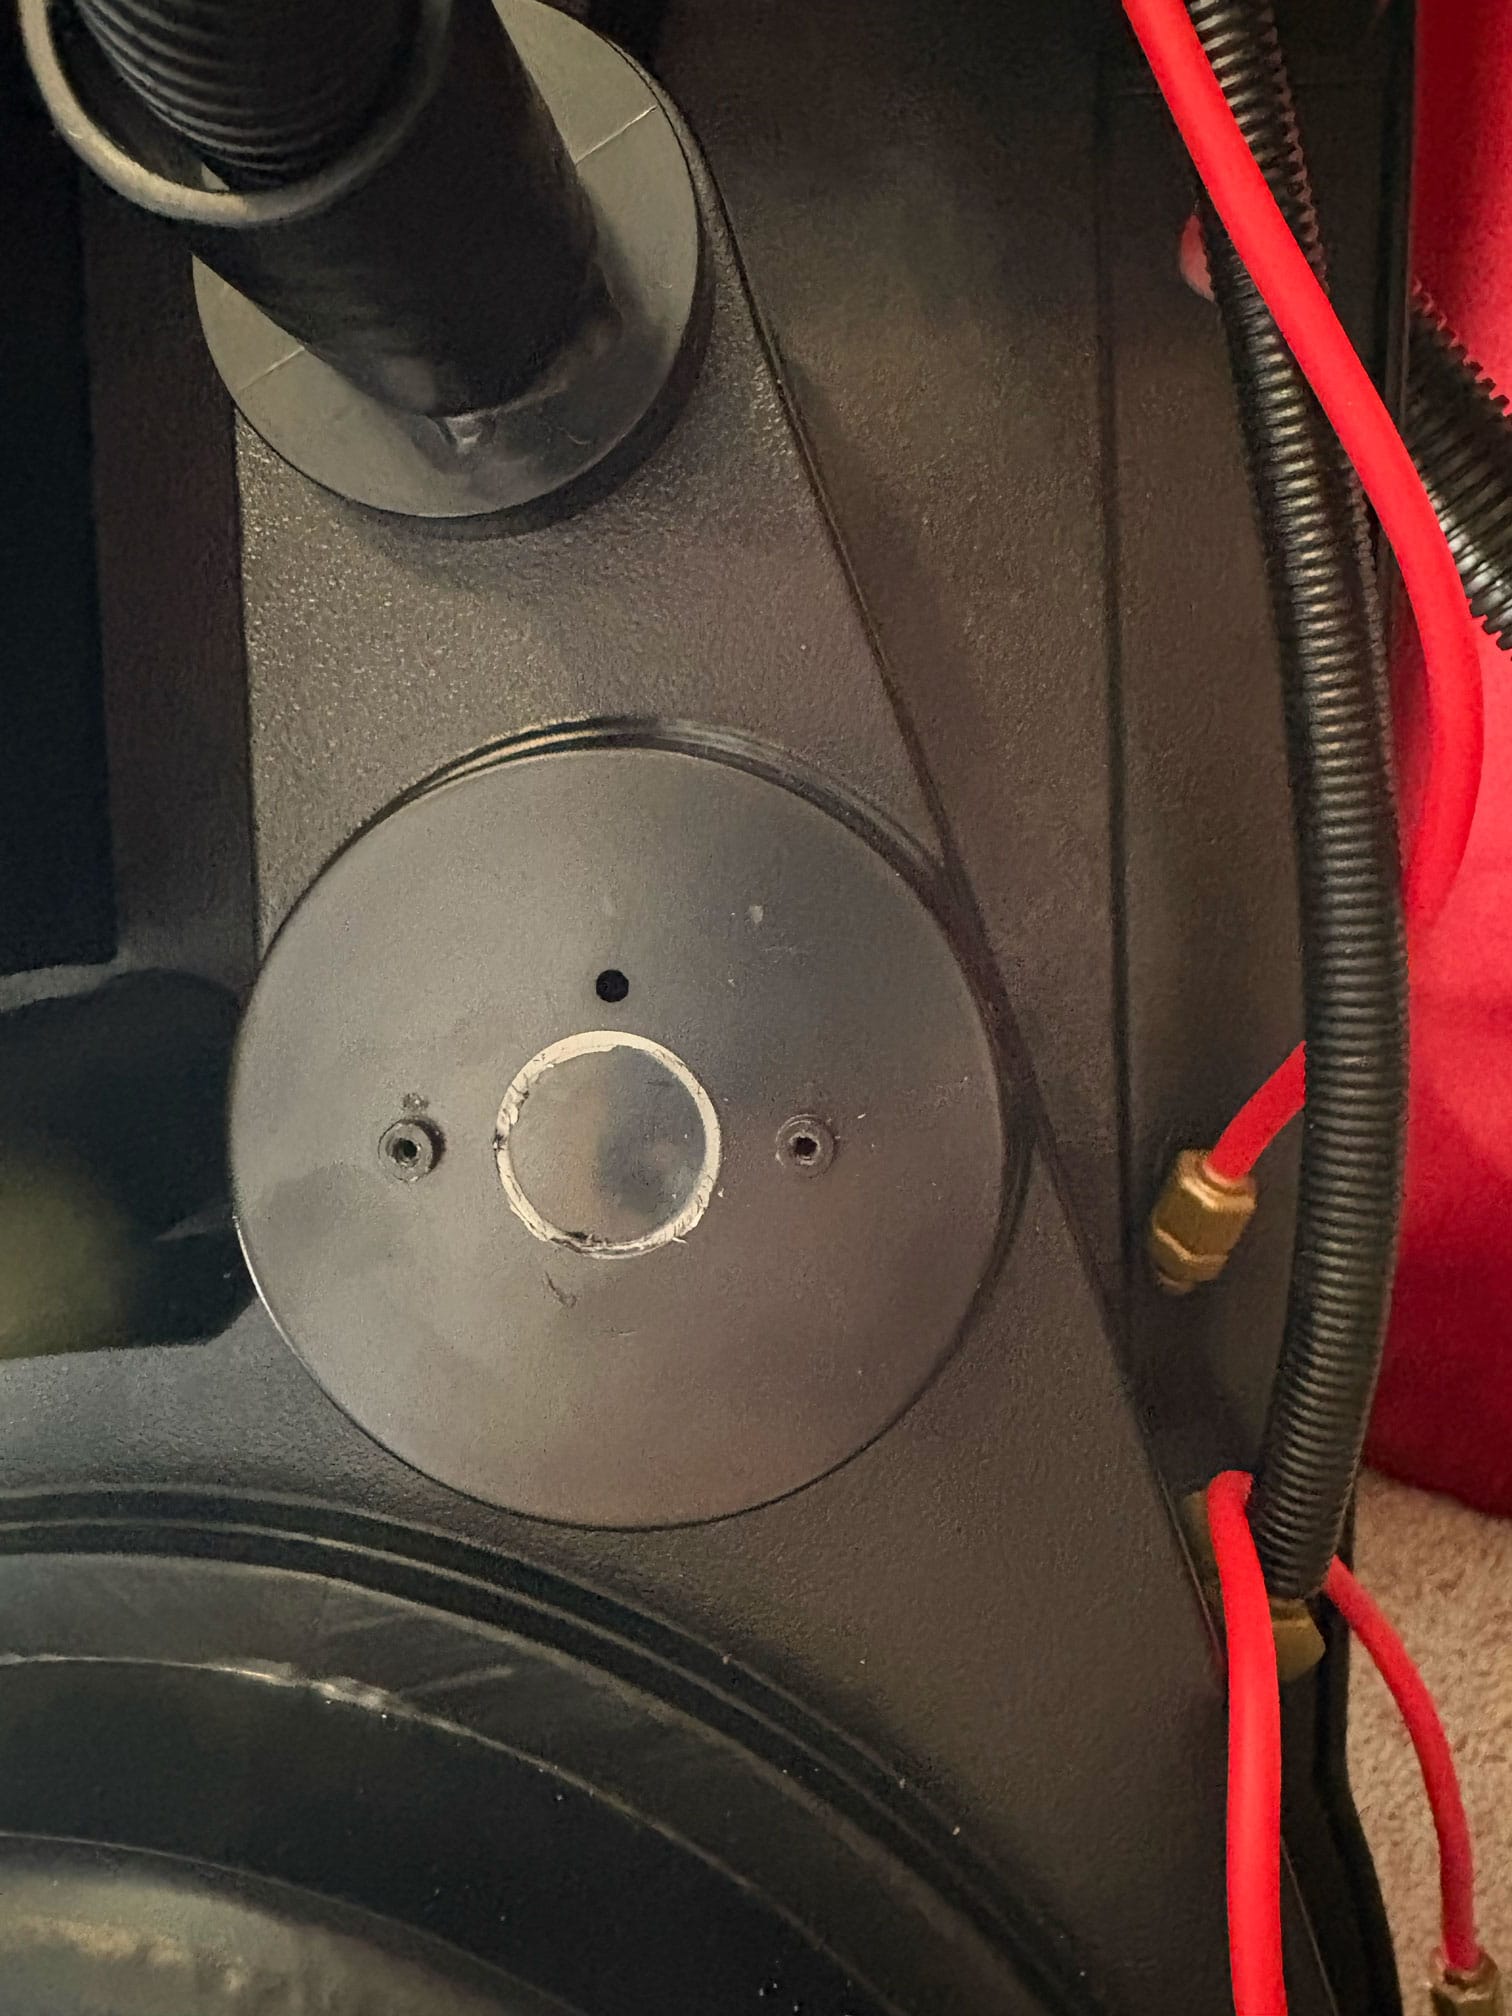
Resin Clippard valve installed.
Time to apply some stickers.
The pack comes bare and with a sheet of clean labels that you need to apply. From the very first instant people started receiving their packs, there were complaints that the labels did not stick or would peel up after a day. So I got ahead of the game and ordered an entire set of labels from Mack's Factory. When they arrived, I wasted no time applying these amazing labels. Miles above Hasbro's offerings, and even if others make great-looking plastic/vinyl labels, I have a hard time believing anyone's aluminum labels, and especially the plate labels, come close to these. A lot of "aluminum labels" out there are on foil BOP; these are actually aluminum, and the plates are thick and could be ripped straight off the screen.
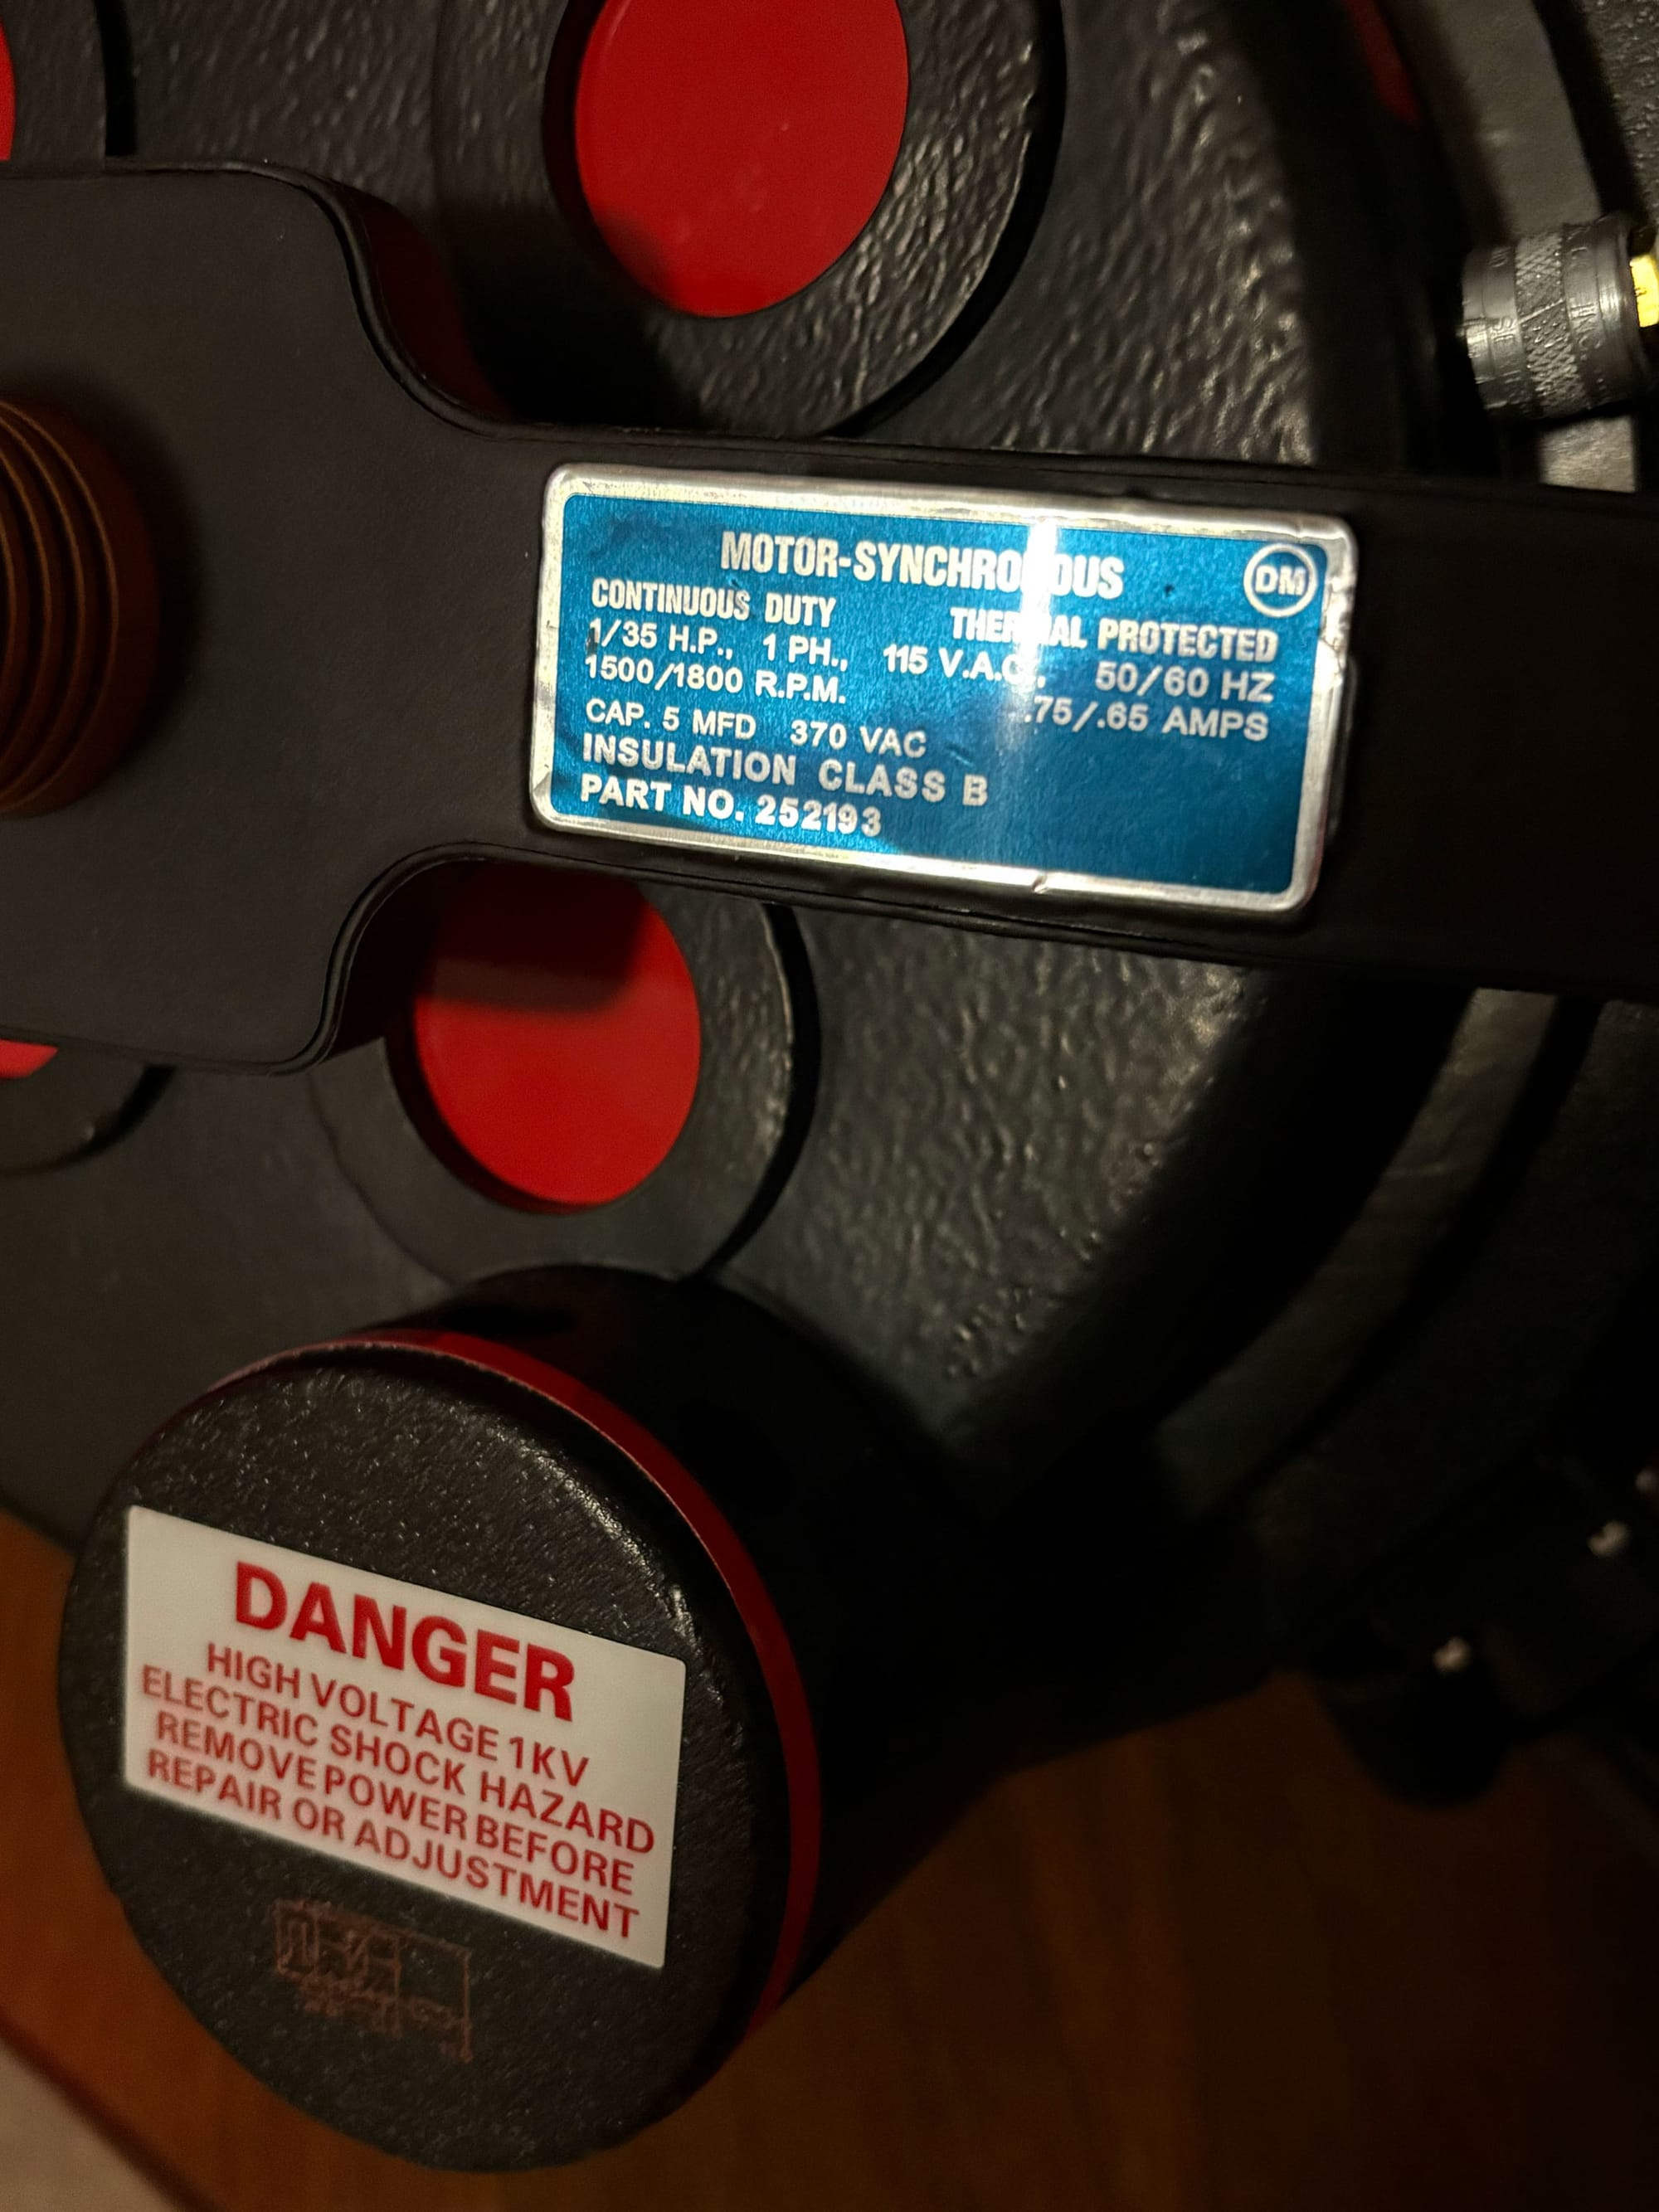
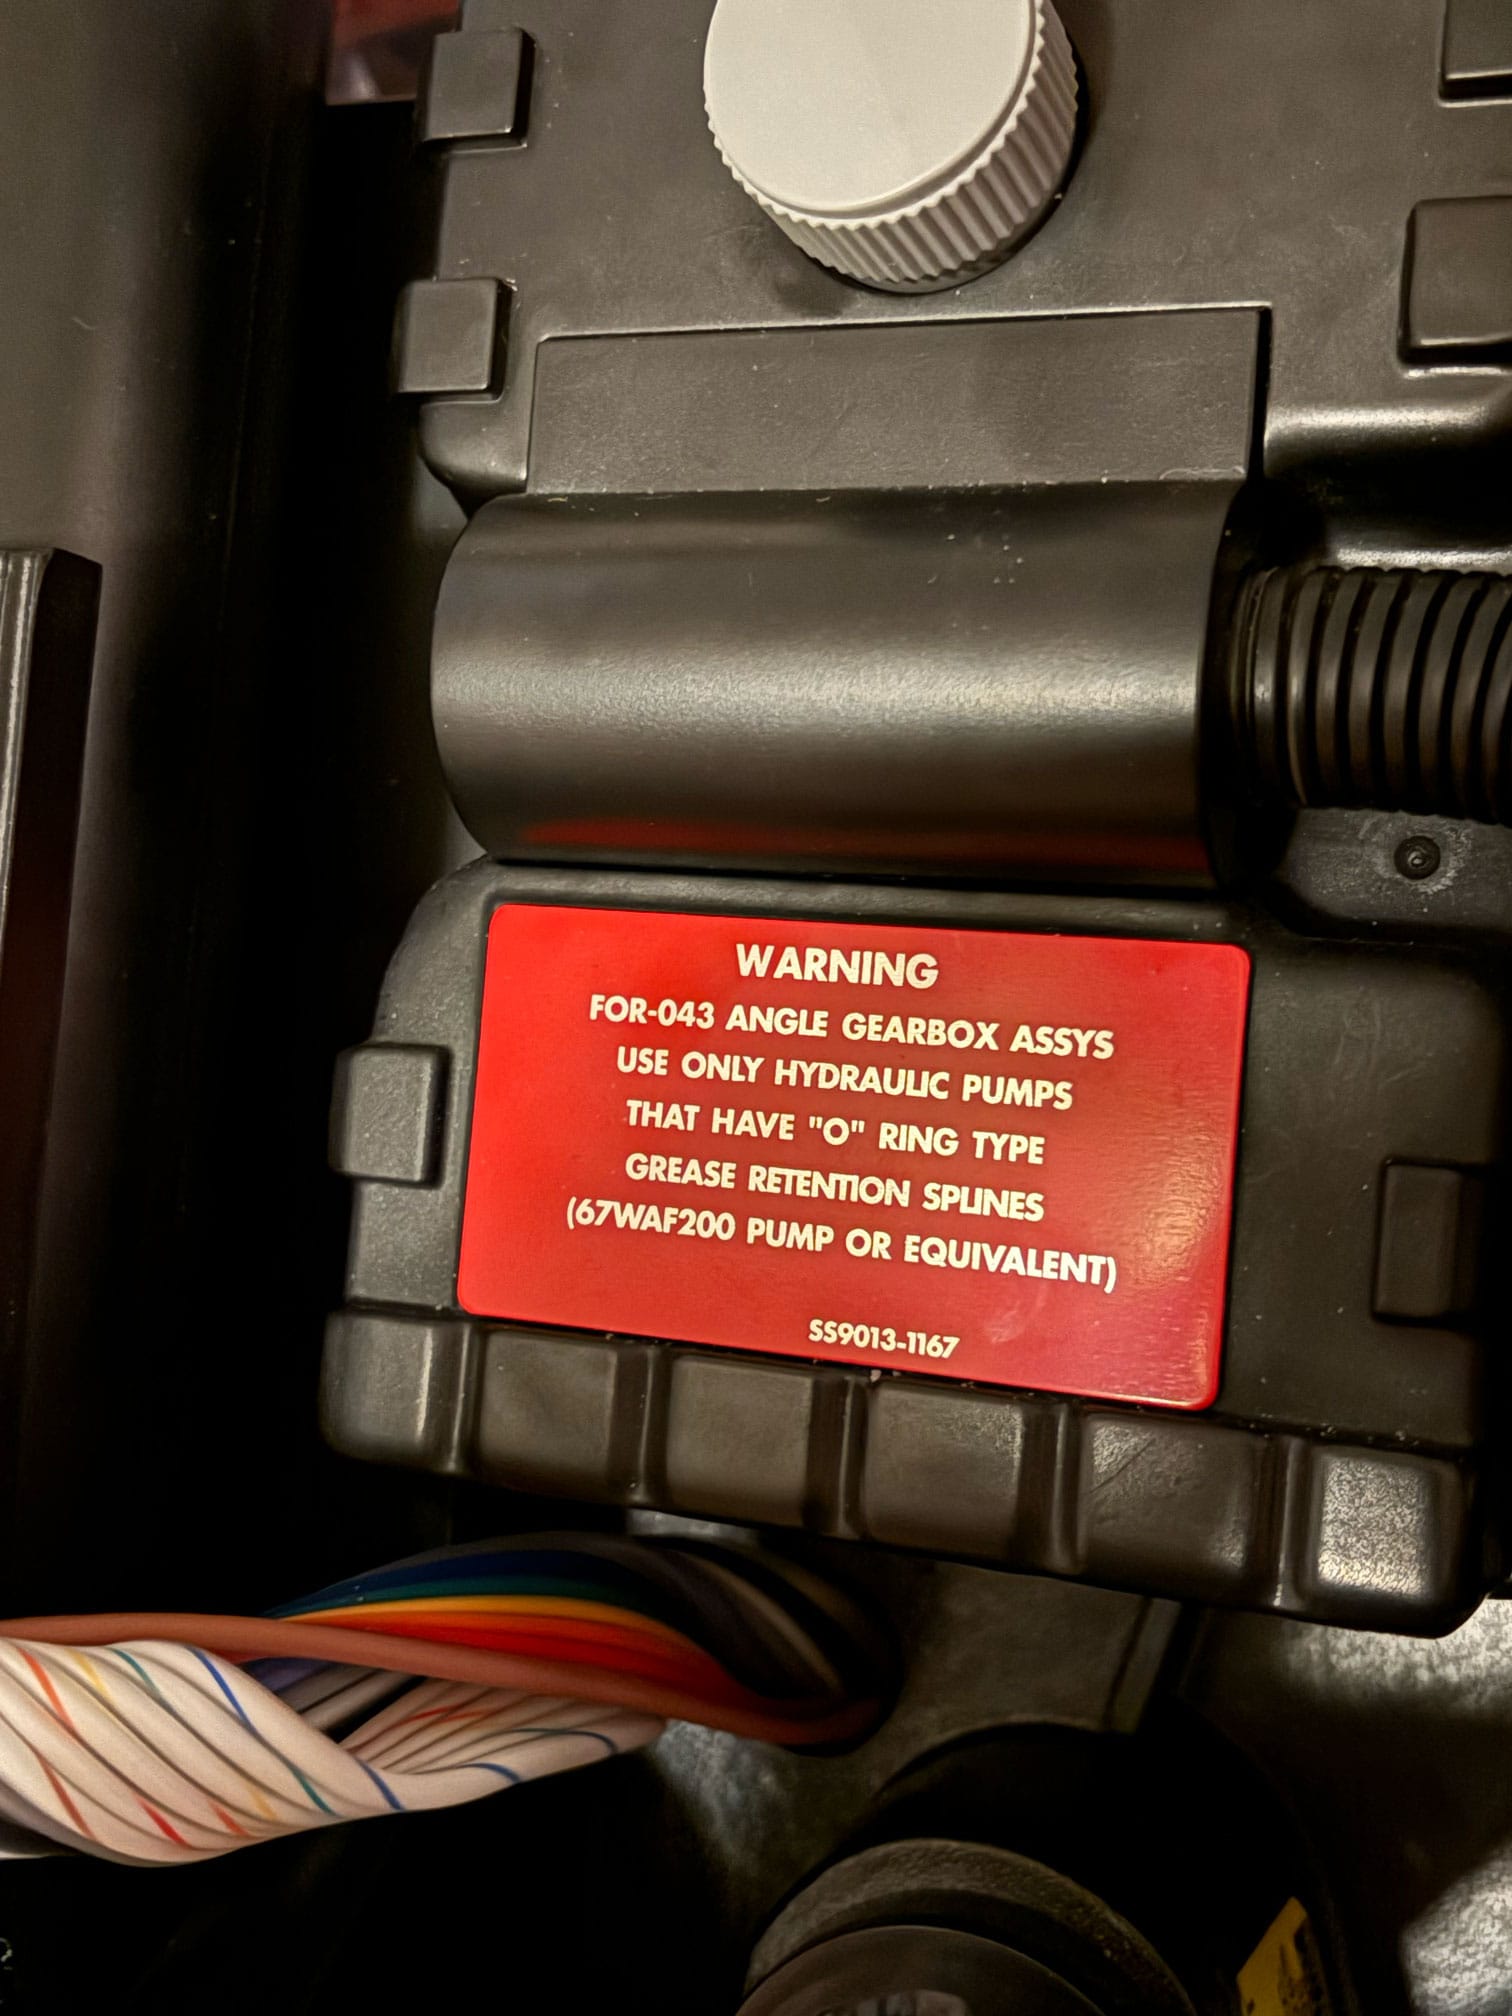
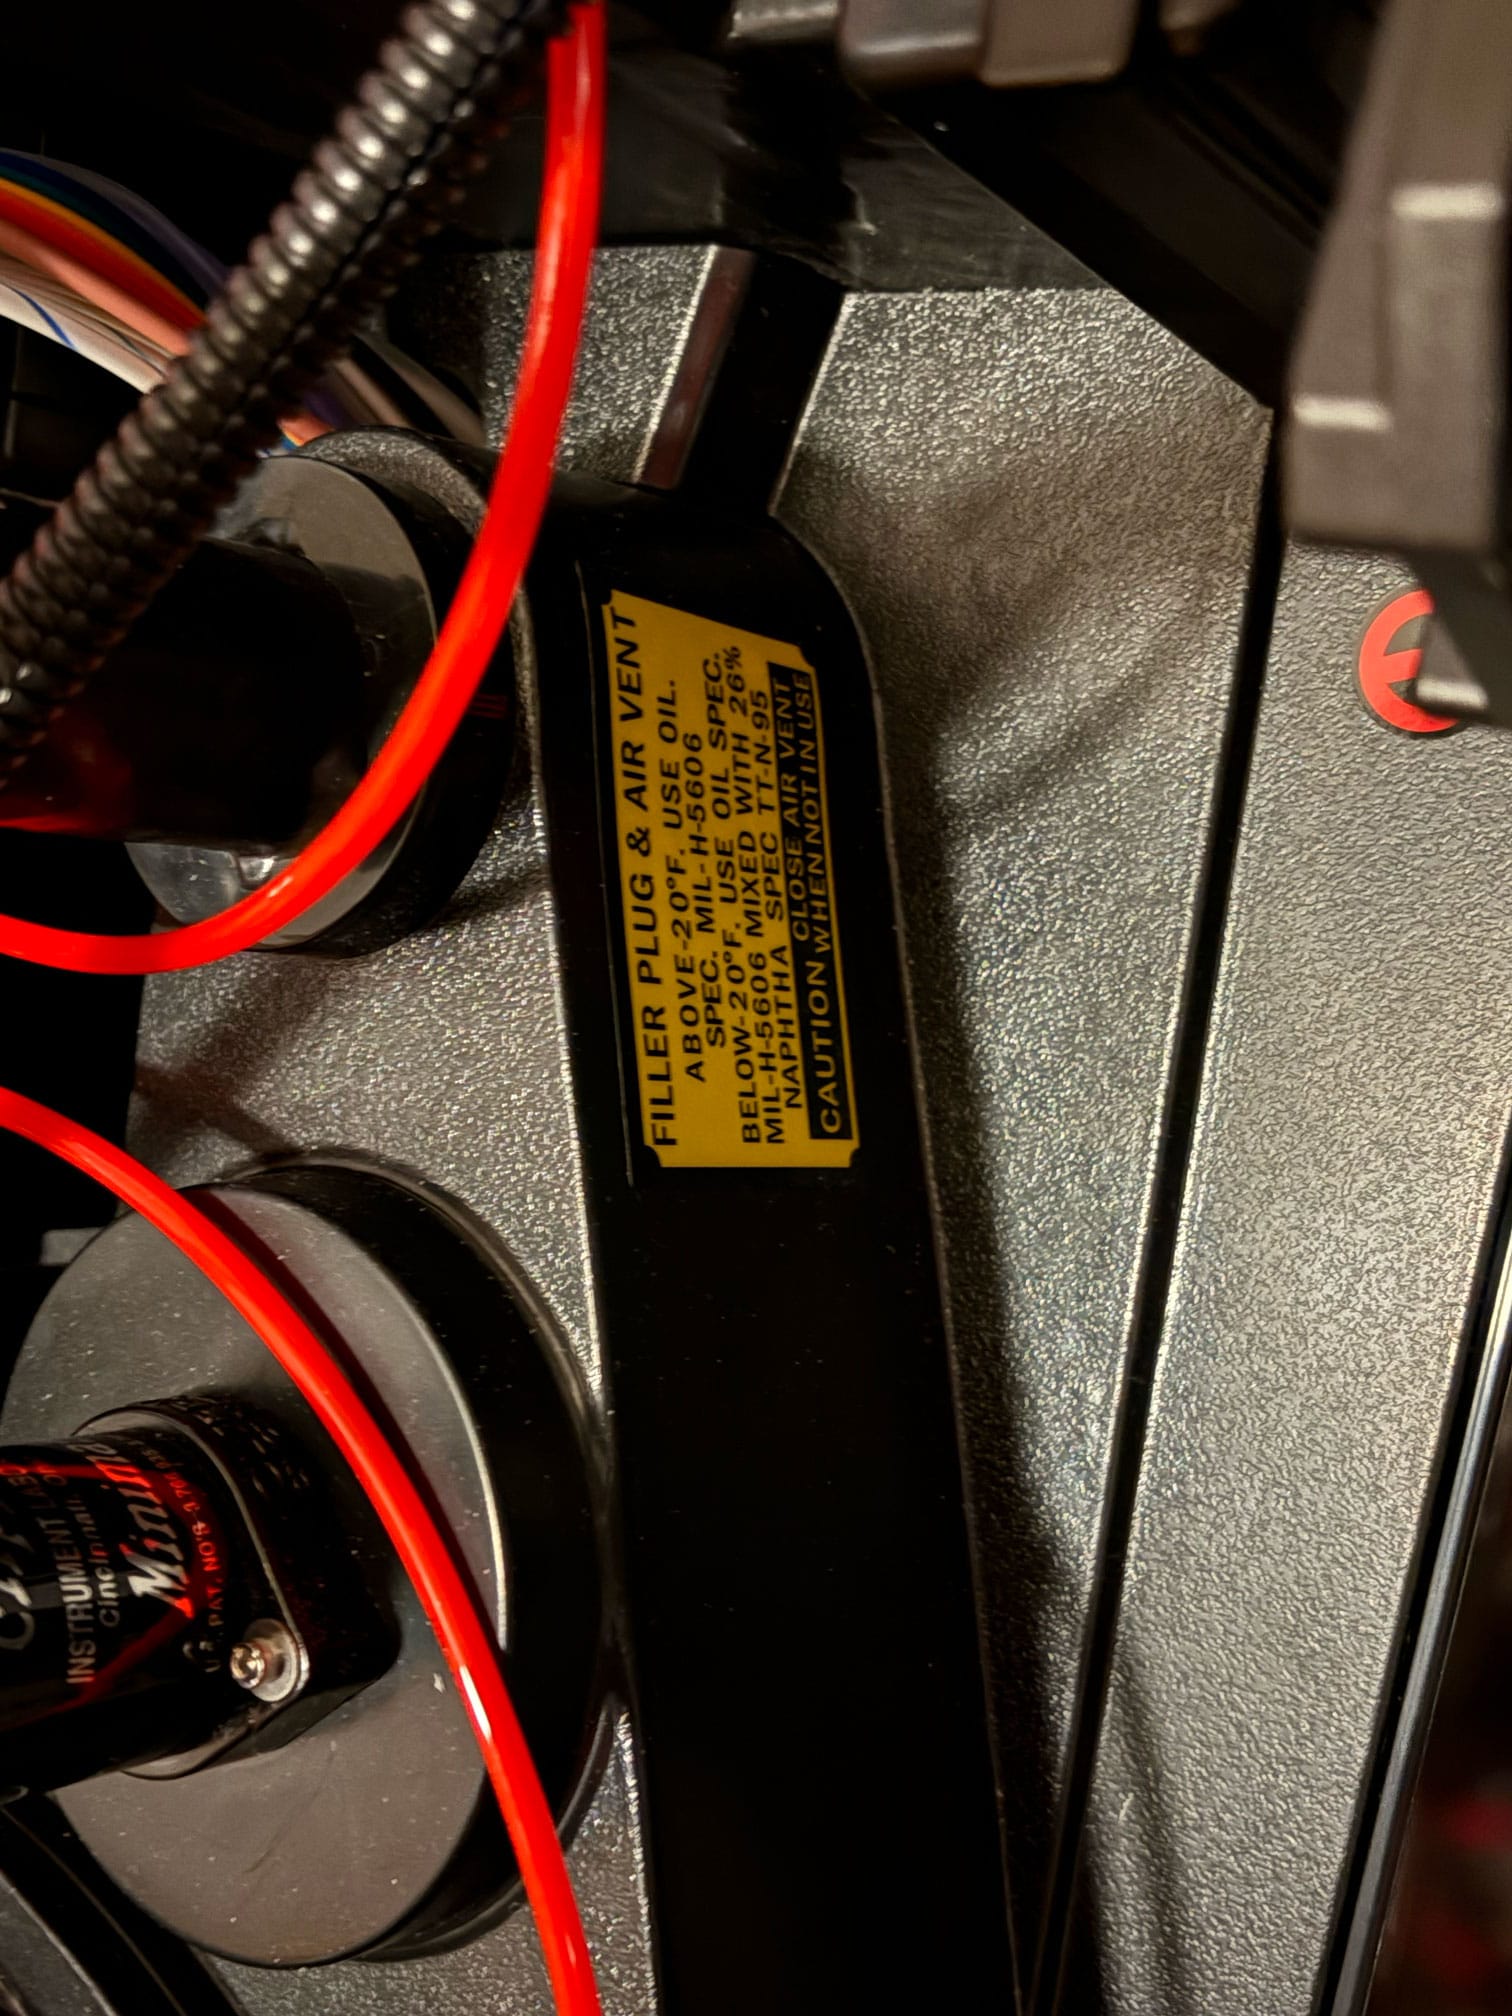
Mack's Factory Beautiful Stickers
I also got a set of lens diffusers from Moby Sign Co. The lenses on the '84 seem better than the Afterlife pack, but they still use 3 LEDs, and you can see each of those rather than the single spot on the movie-used packs. They were thin, stretchy vinyl, more like a decal you would use on a car than a label or sticker, and they were cut to go on the outside, making them reversible. But I had trouble getting them into the holes, had a few bubbles I couldn't get rid of, and in the end, they didn't diffuse enough and are way too bright red. I'm honestly not a fan of these and wish I hadn't bothered with them. This is one of those things that looks great in video or photo, but in person, it tells a different story. They are decent quality, but I'd look for a different way to diffuse the lenses.
Do the twist.
Last thing, that ribbon cable needs a little TLC. I had a hose clamp, so that was an easy switch out from the half-circle piece of plastic Hasbro went with. But while I was doing that, I gave it a much heavier twist, something closer to the Omni pack, and used two small zip ties. It looks a lot cleaner, is more accurate to the hero packs, and is simple to move further from the "toy" area. I do plan to eventually replace the entire ribbon clamp with a GB2-era ribbon. But I want to do those kinds of mods all at once since I don't want to open the pack up twice.
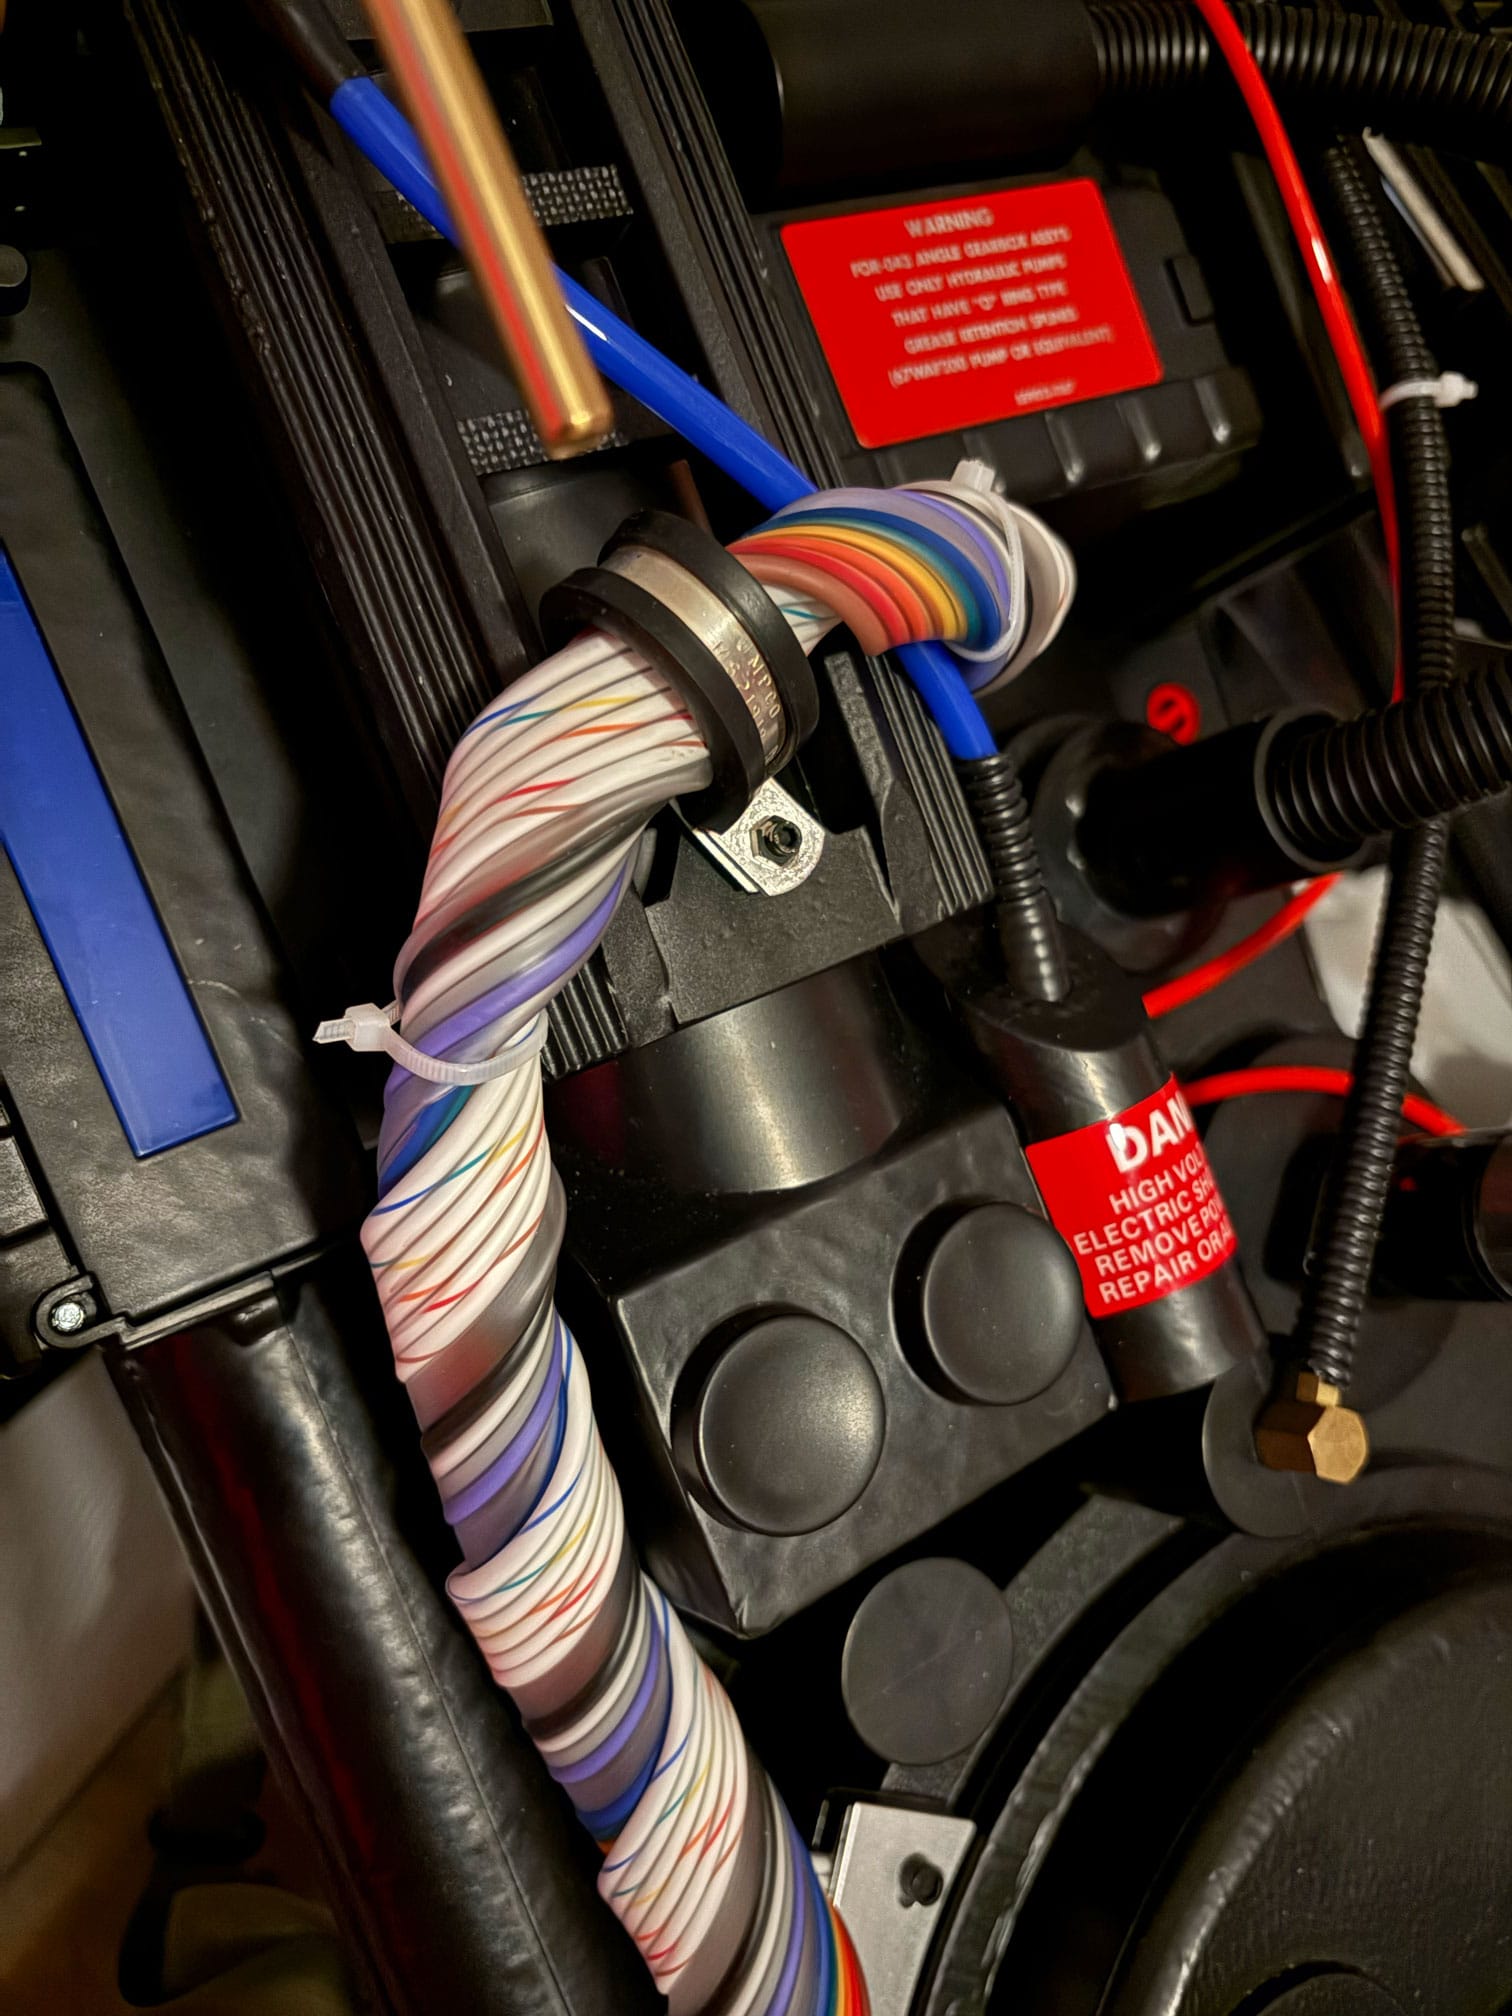
Wrapped
So that is the end of this build log. Already this looks so much better than the stock Hasbro pack, and feels less like a toy and more like a prop. I could easily stop here! But I have plenty more planned. Thanks for reading.
Comments ()