

Hasbro Build Log 3: I Need A Semi-Hero
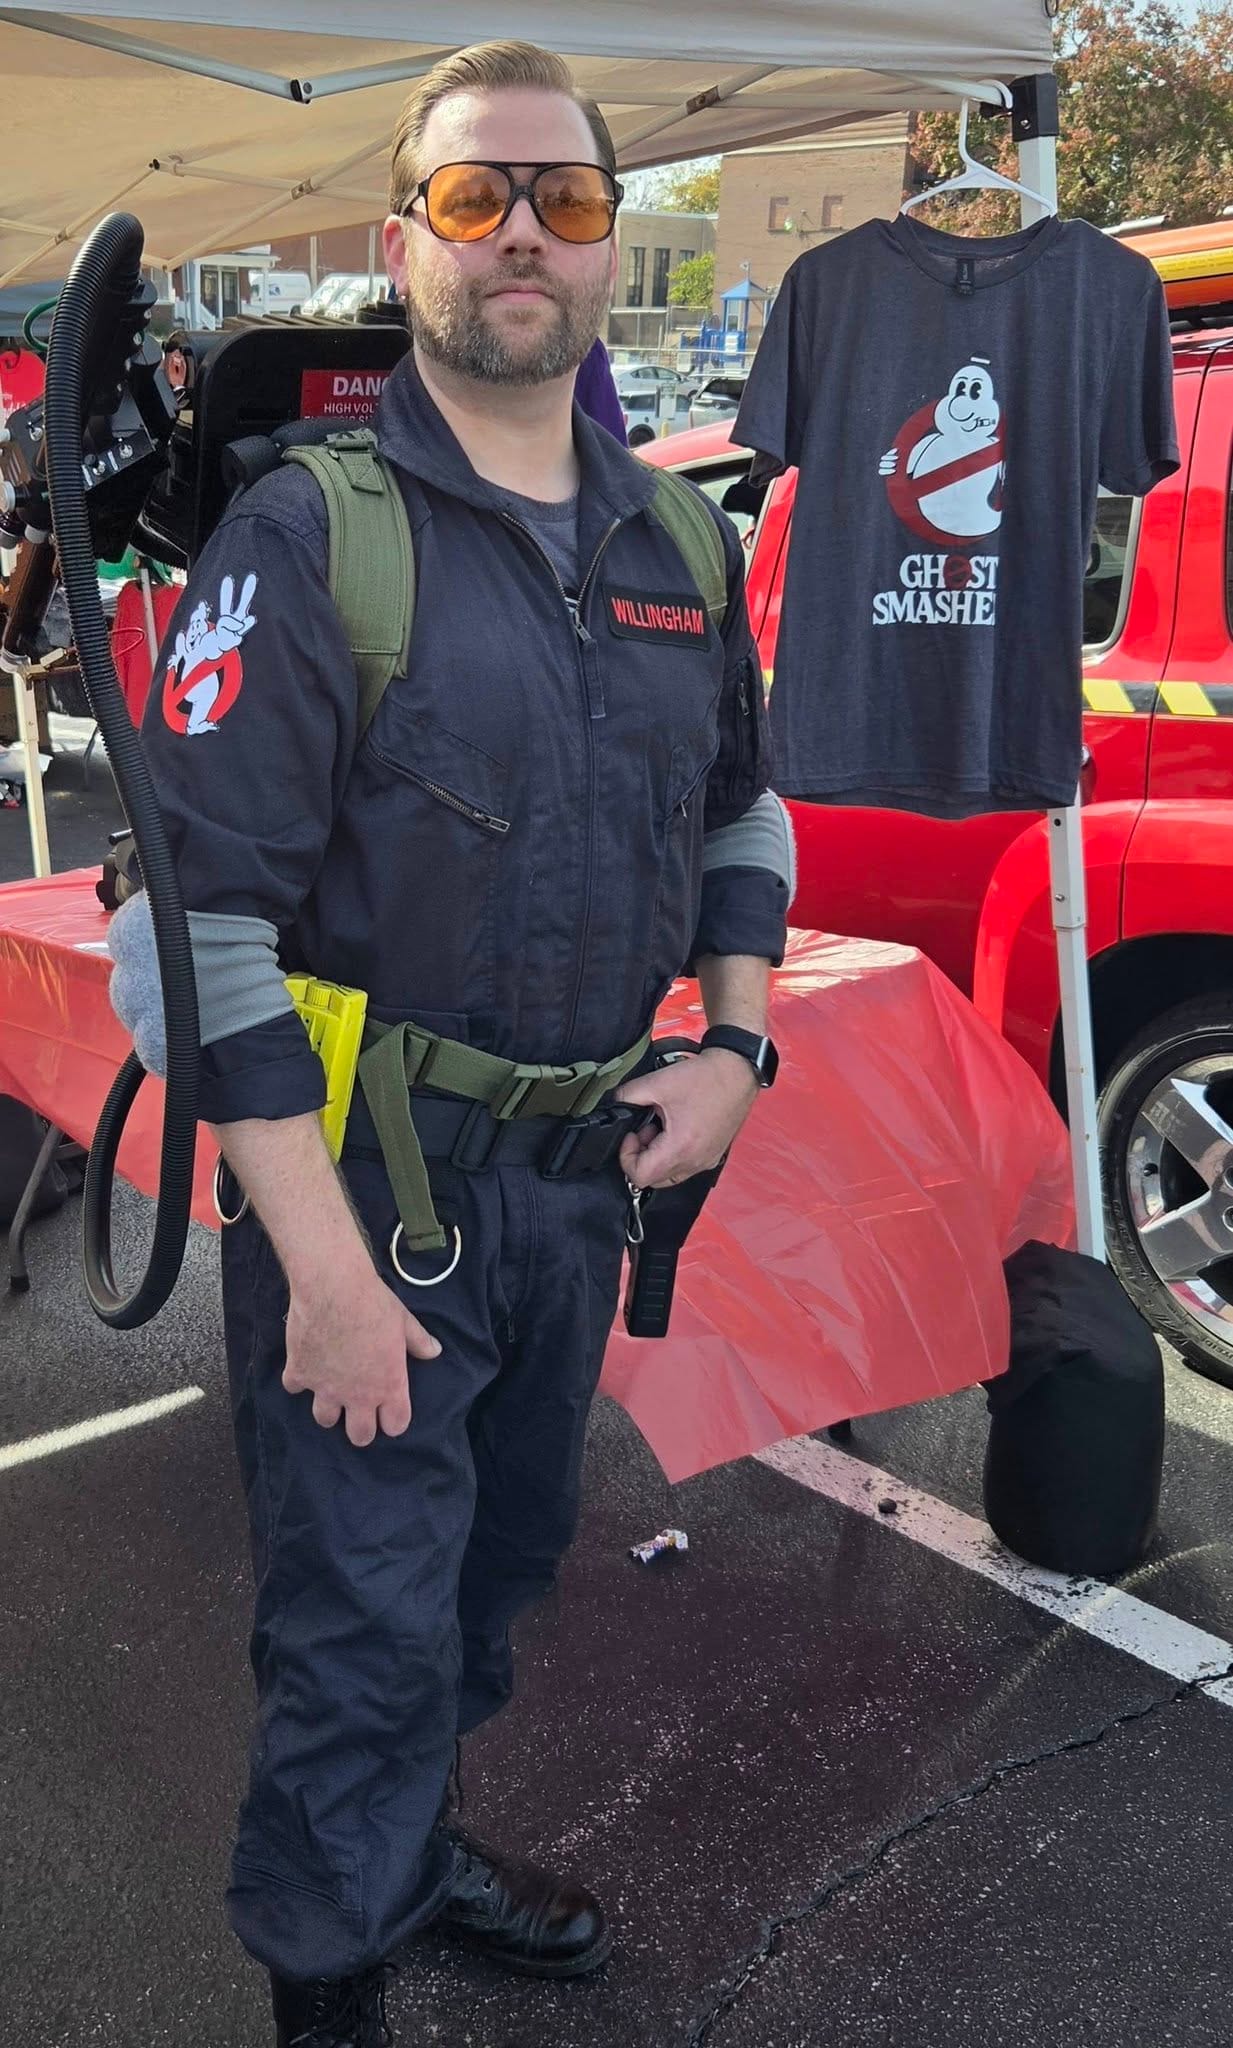
Halloween is over; I've walked miles in zippered jump boots, and thanks to the humid, still-warmer-than-usual Midwest weather, I've sweated through my charcoal jumpsuit multiple times. But every time someone shouted "Ghostbusters!" or stopped for a picture or asked about my pack, I was grinning from ear to ear. You can see more photos of my spooky-season excursions on my Instagram.
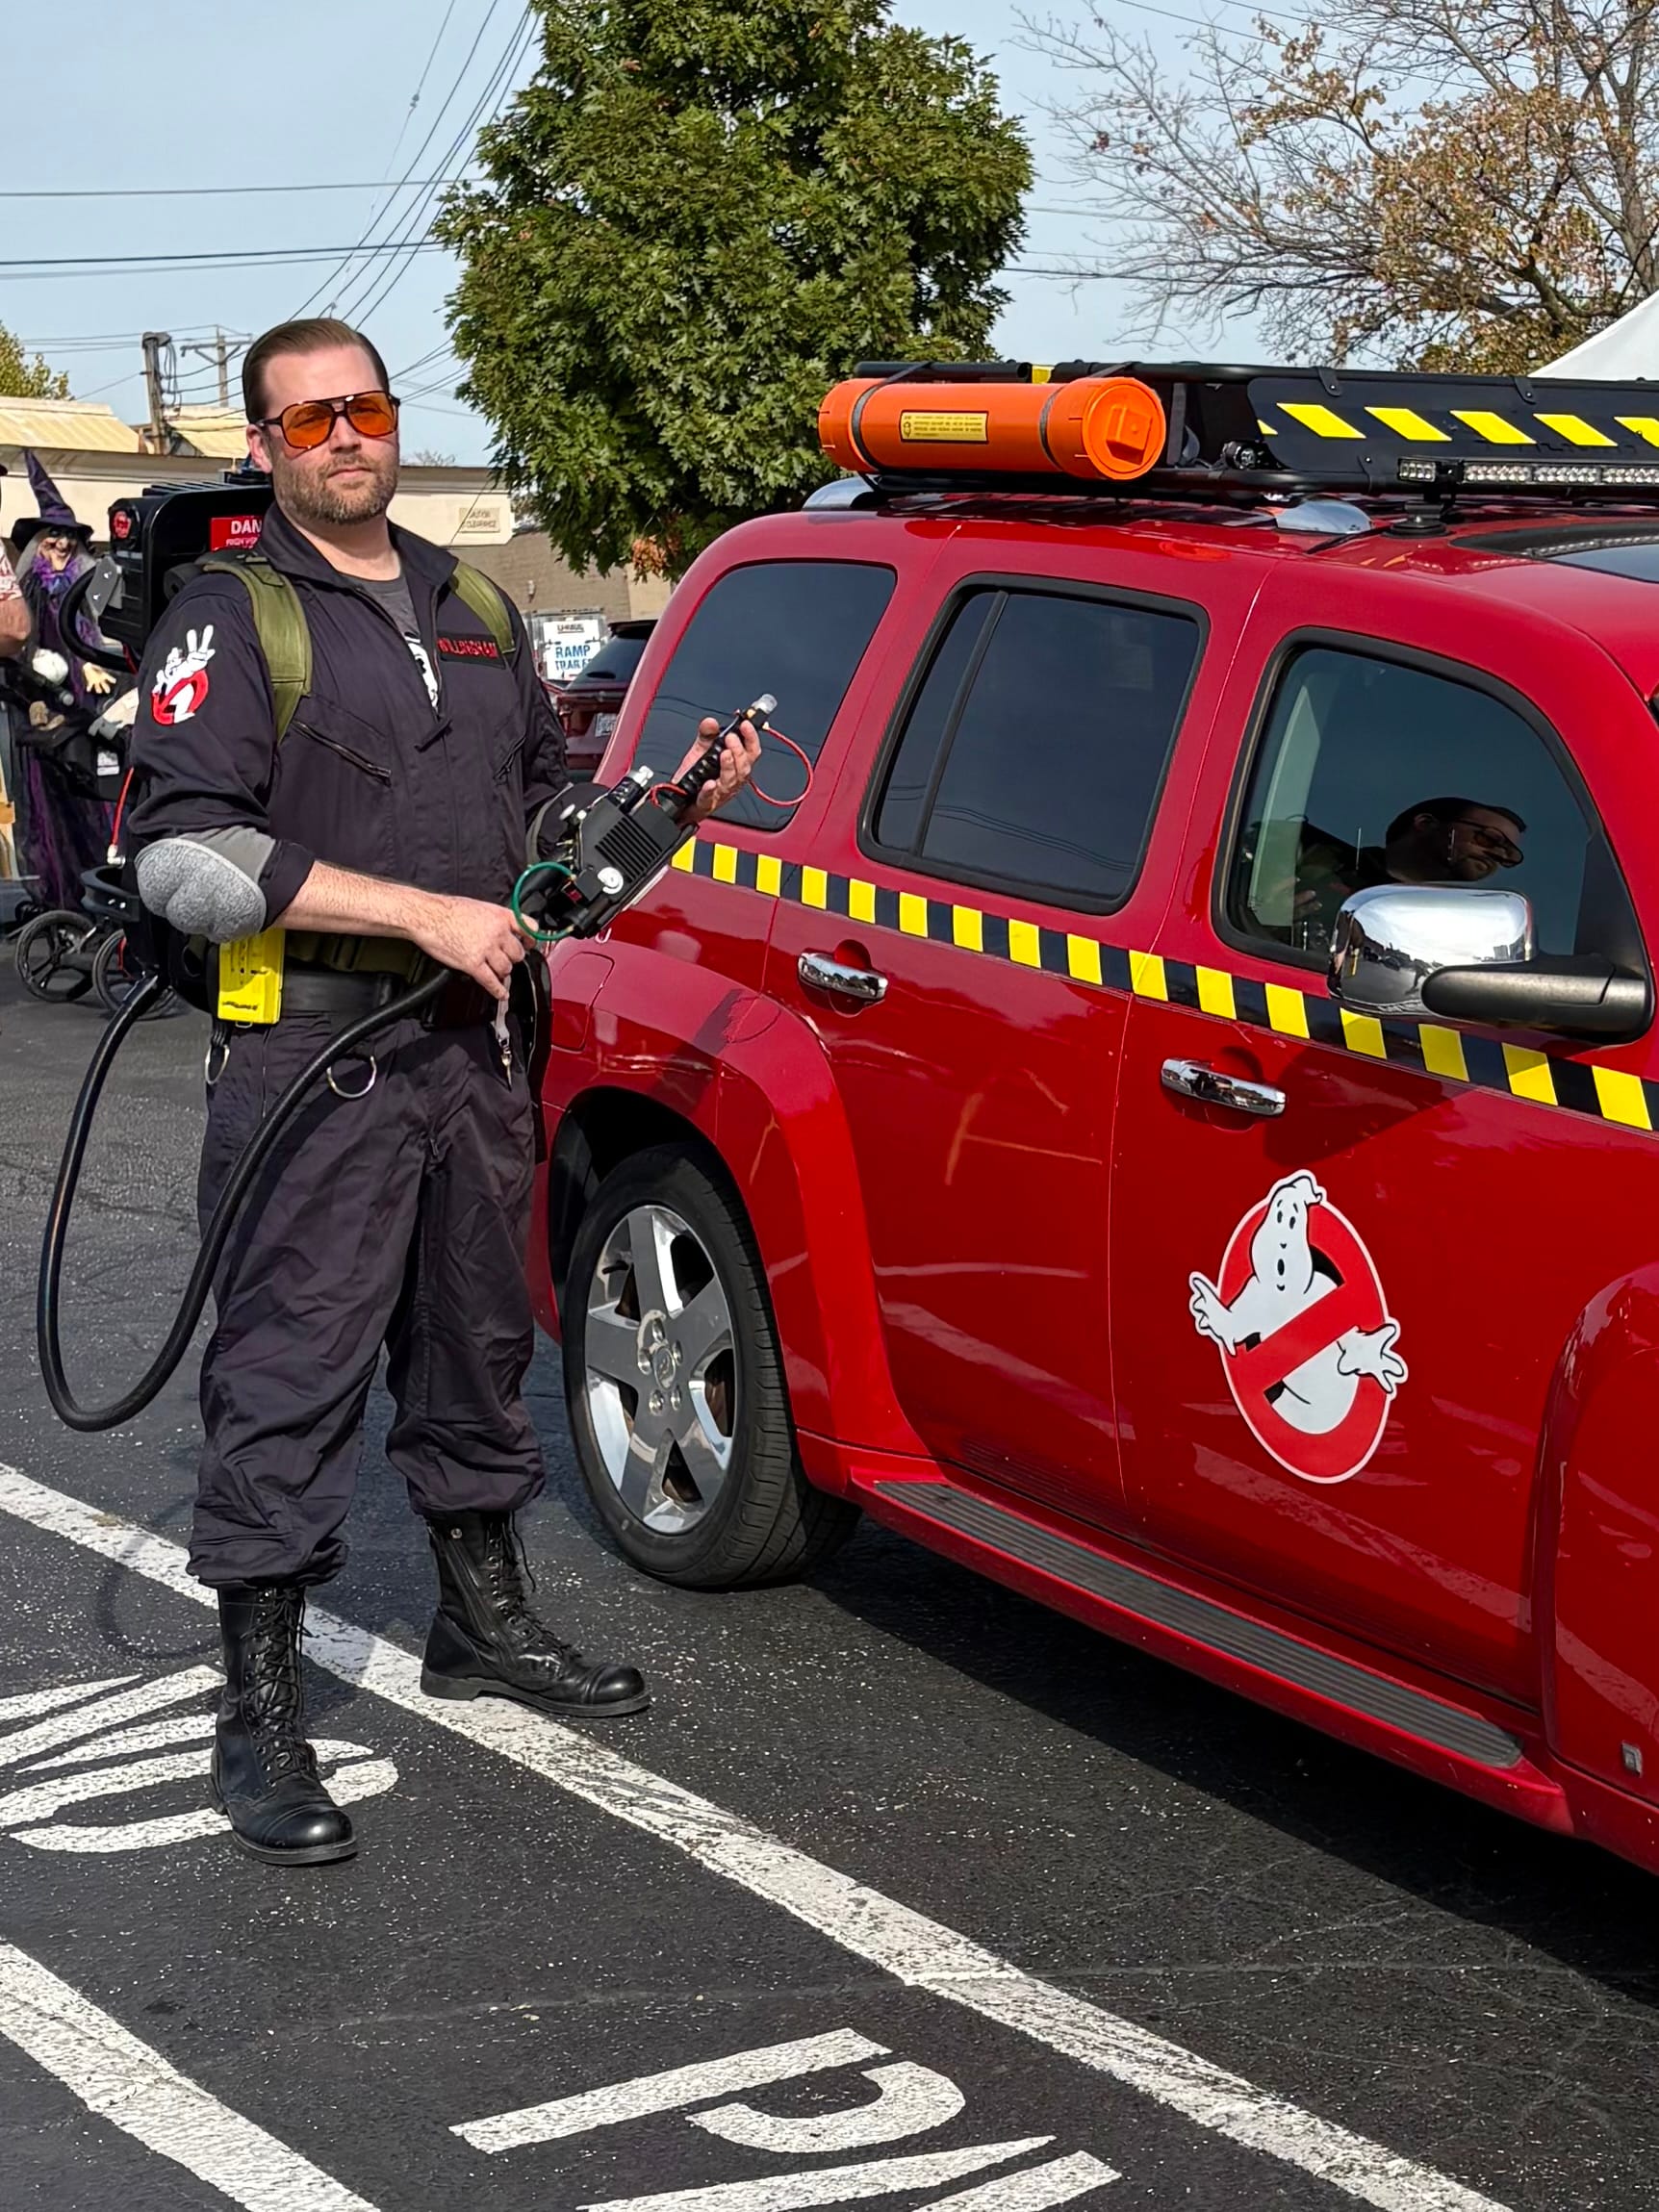
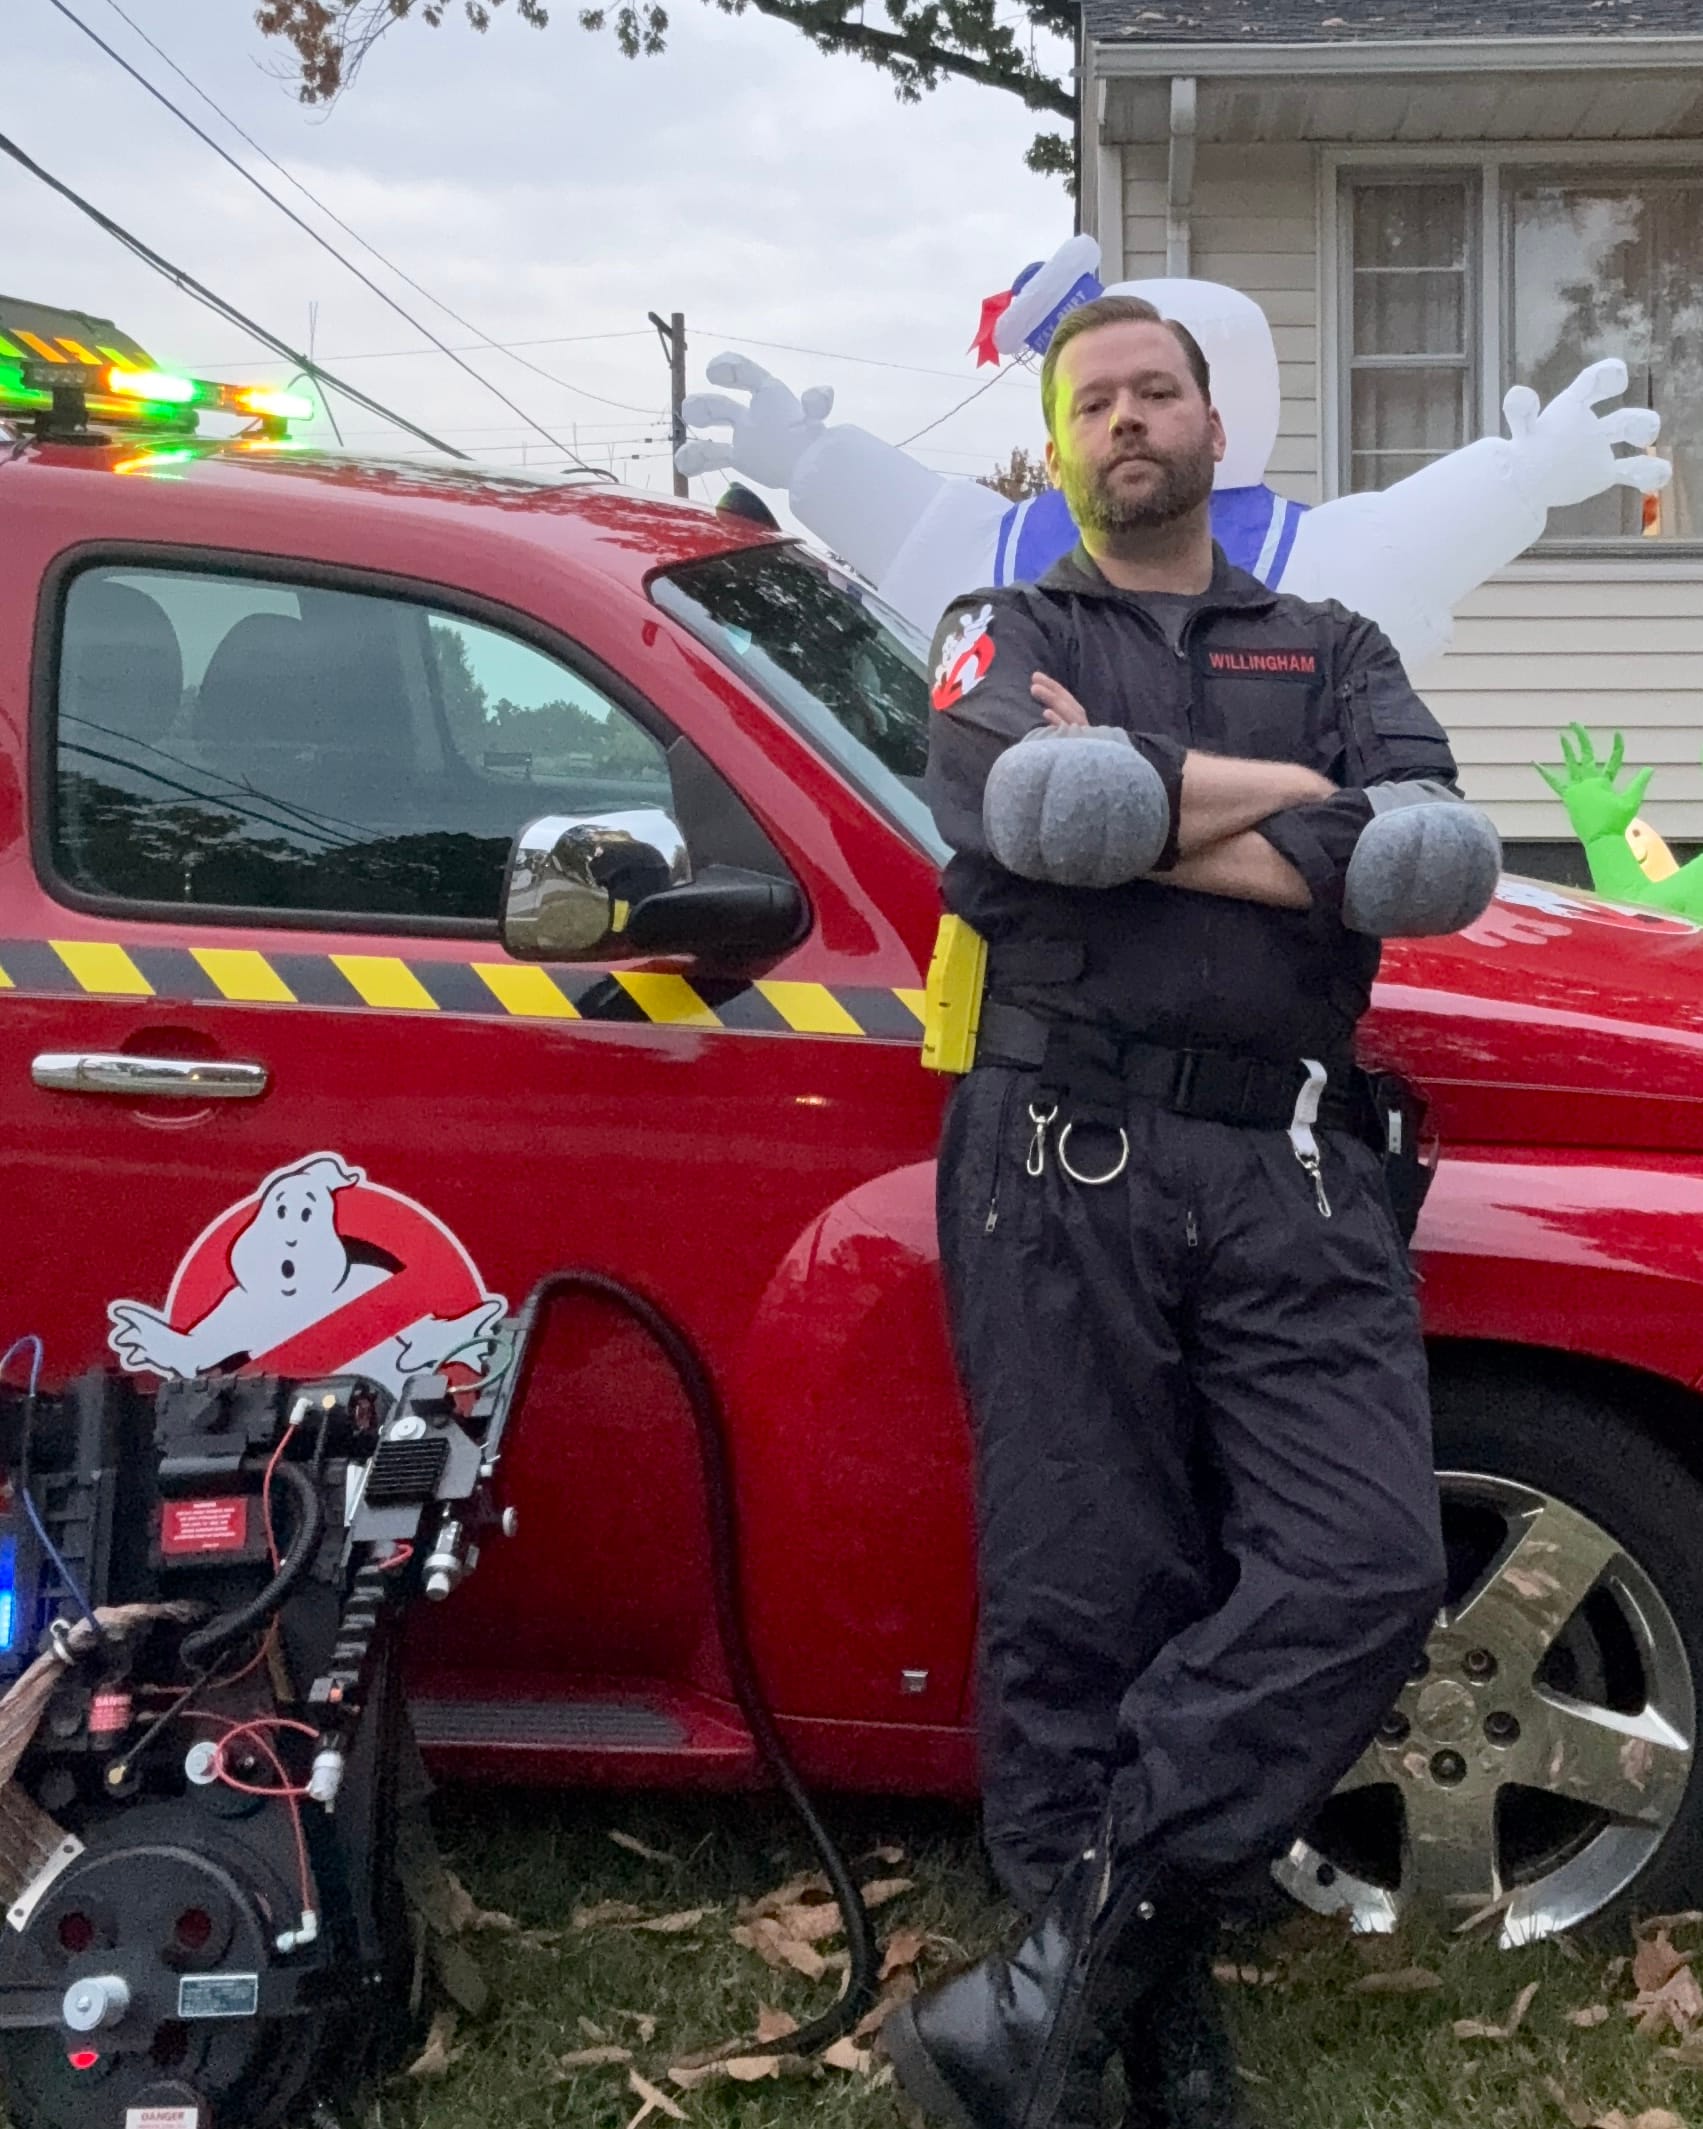
From "84" to a GB2 "Semi-Hero"
Before Halloween, I got my proton pack pretty close to where I want it. There will still be some modding, cleaning up, and little touches, but I'll probably be doing those at a much slower pace from here on out.
This "1984" Proton Pack from Hasbro started as a weird hybrid: sizing errors, leftovers from the Afterlife pack, wrong parts, and odd choices. It is still a hybrid of sorts, mostly because I don't want to make massive changes, and because I'm not a stickler for absolute accuracy. It has almost completely moved from an "84" to an "89", based mostly on the "semi-hero" packs that were largely cast parts and retrofitted like the "Hero" packs with new and different pieces.
First, I tackled the bellows/shock mount, which I wanted to do pretty early on. I complained originally that this was sold as a GB1 pack but used the GB2 and Afterlife bellows with a flathead screw/bolt in it. But once I decided to convert it to a GB2 pack, it still wasn't good enough. The sides were flat, the "brass" color was a hideous orange, and the bolt was flush with the top, making it very clearly fake.
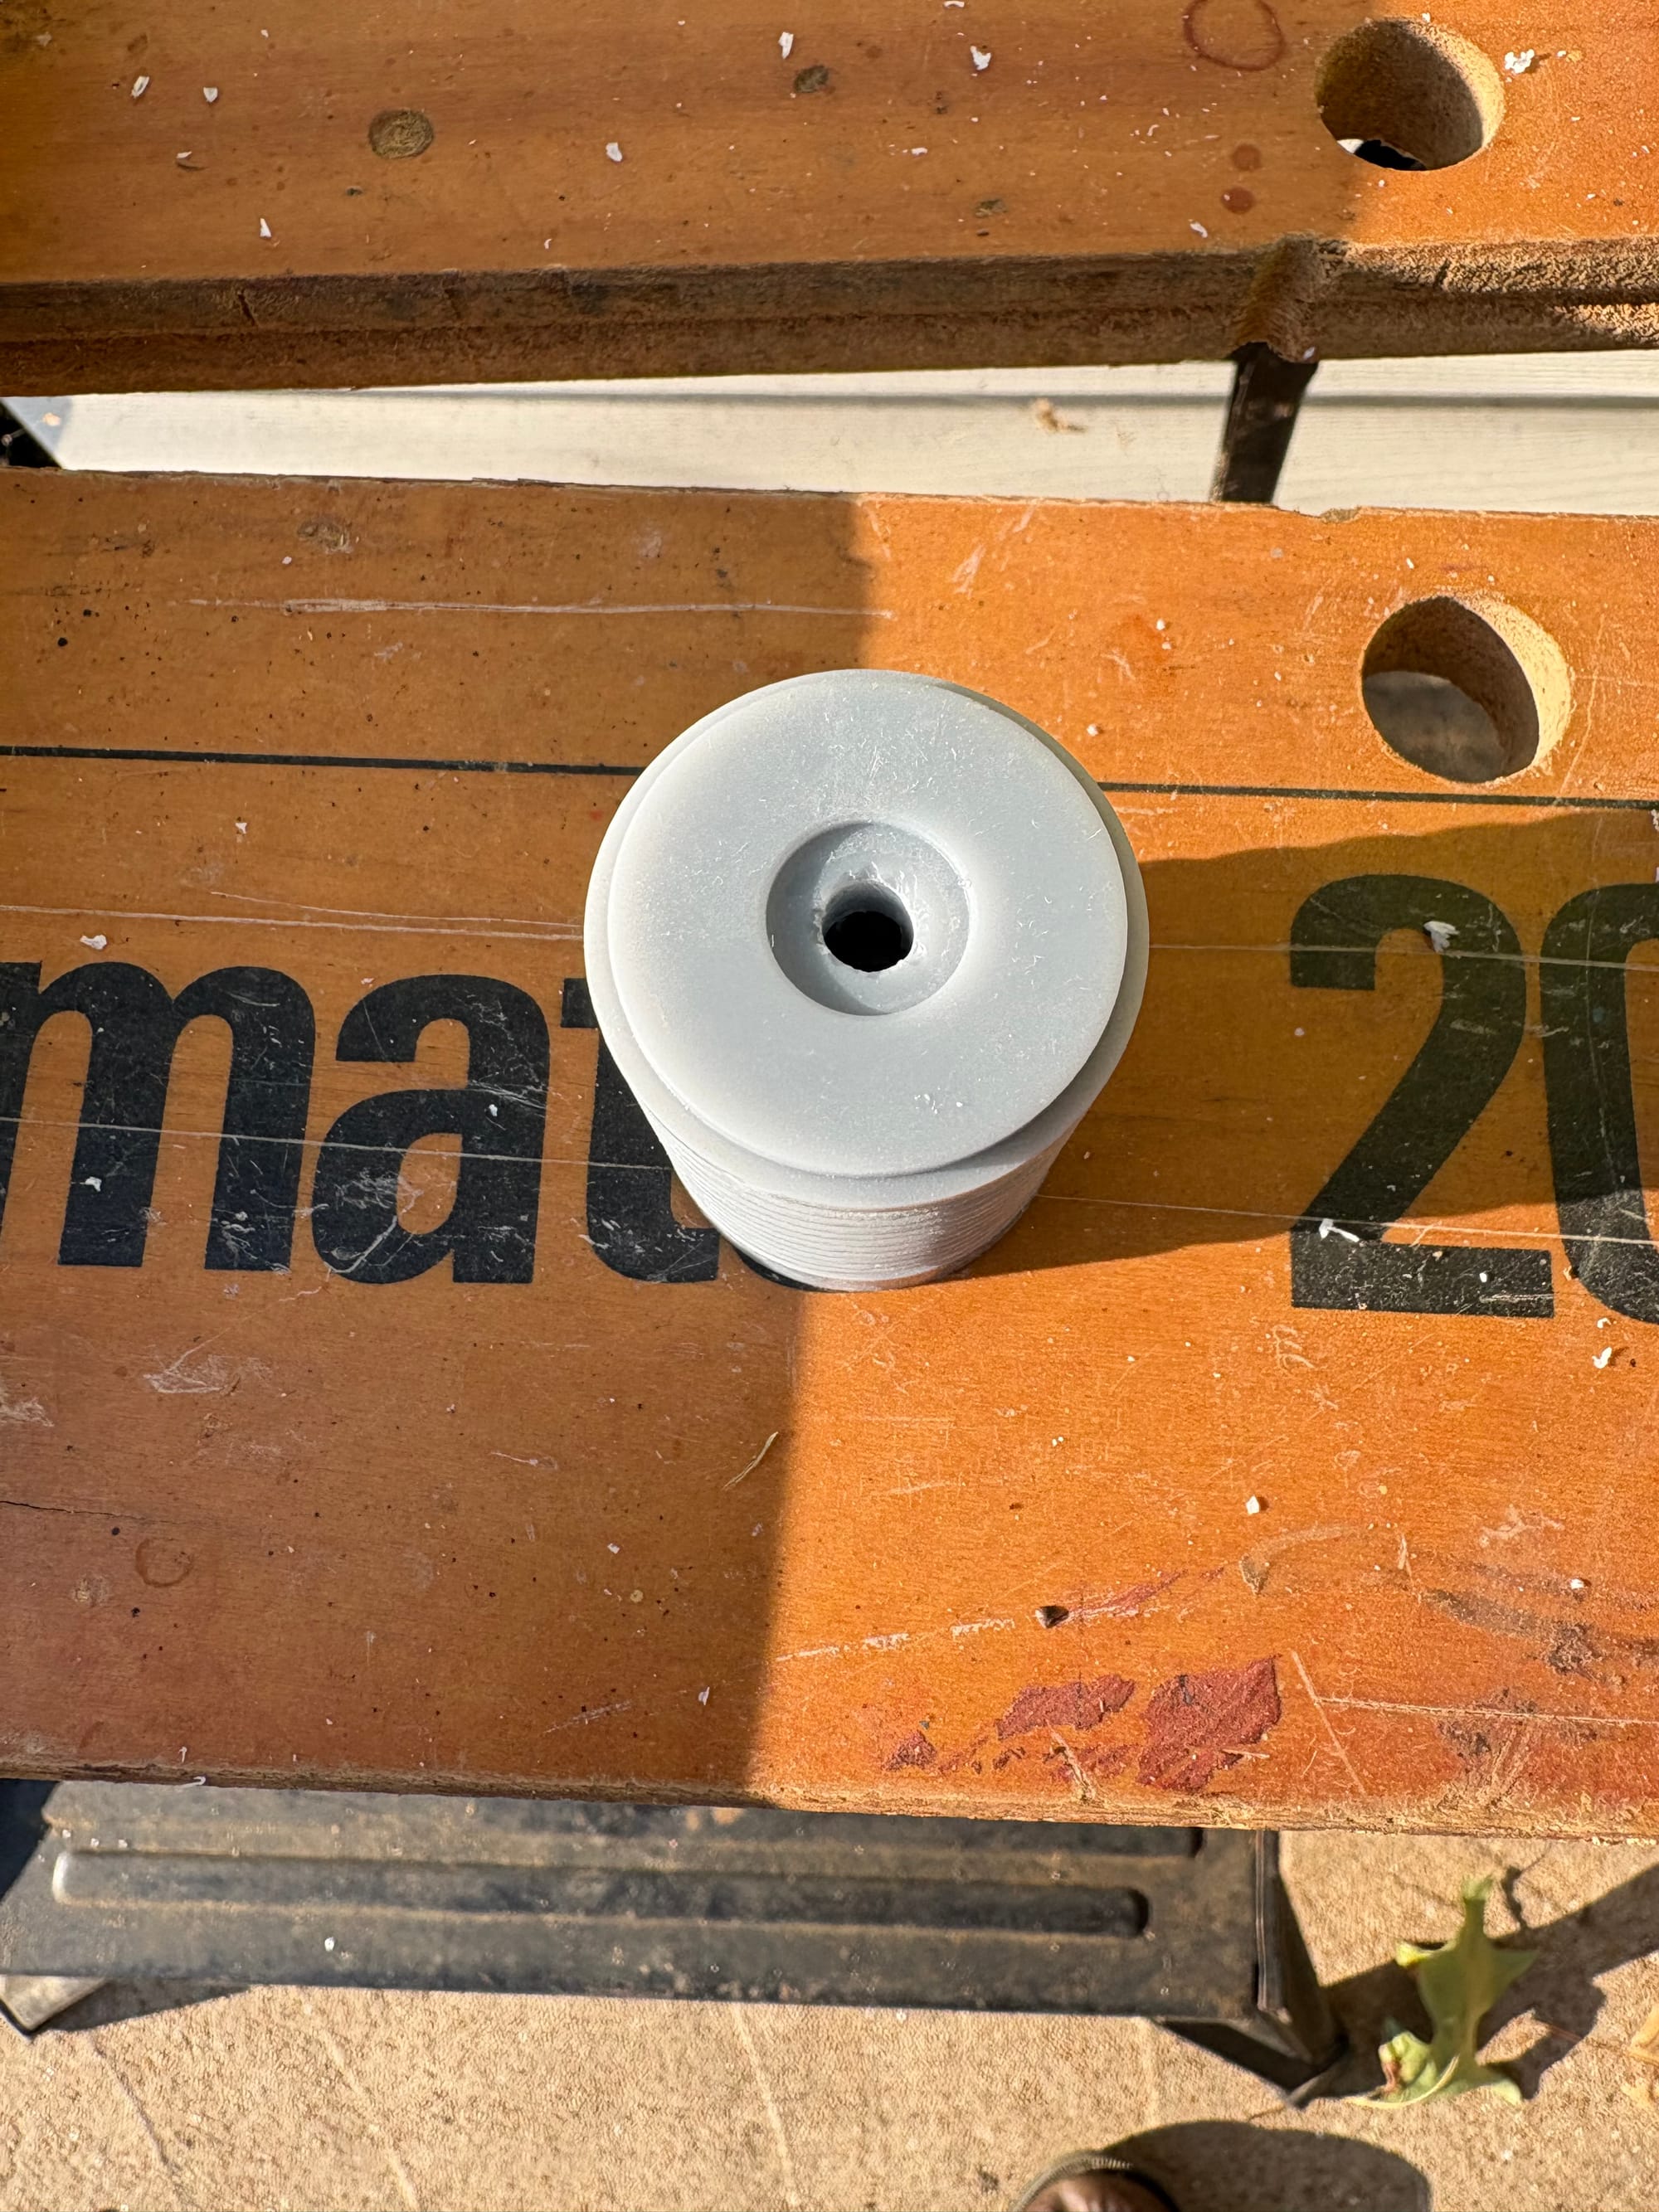
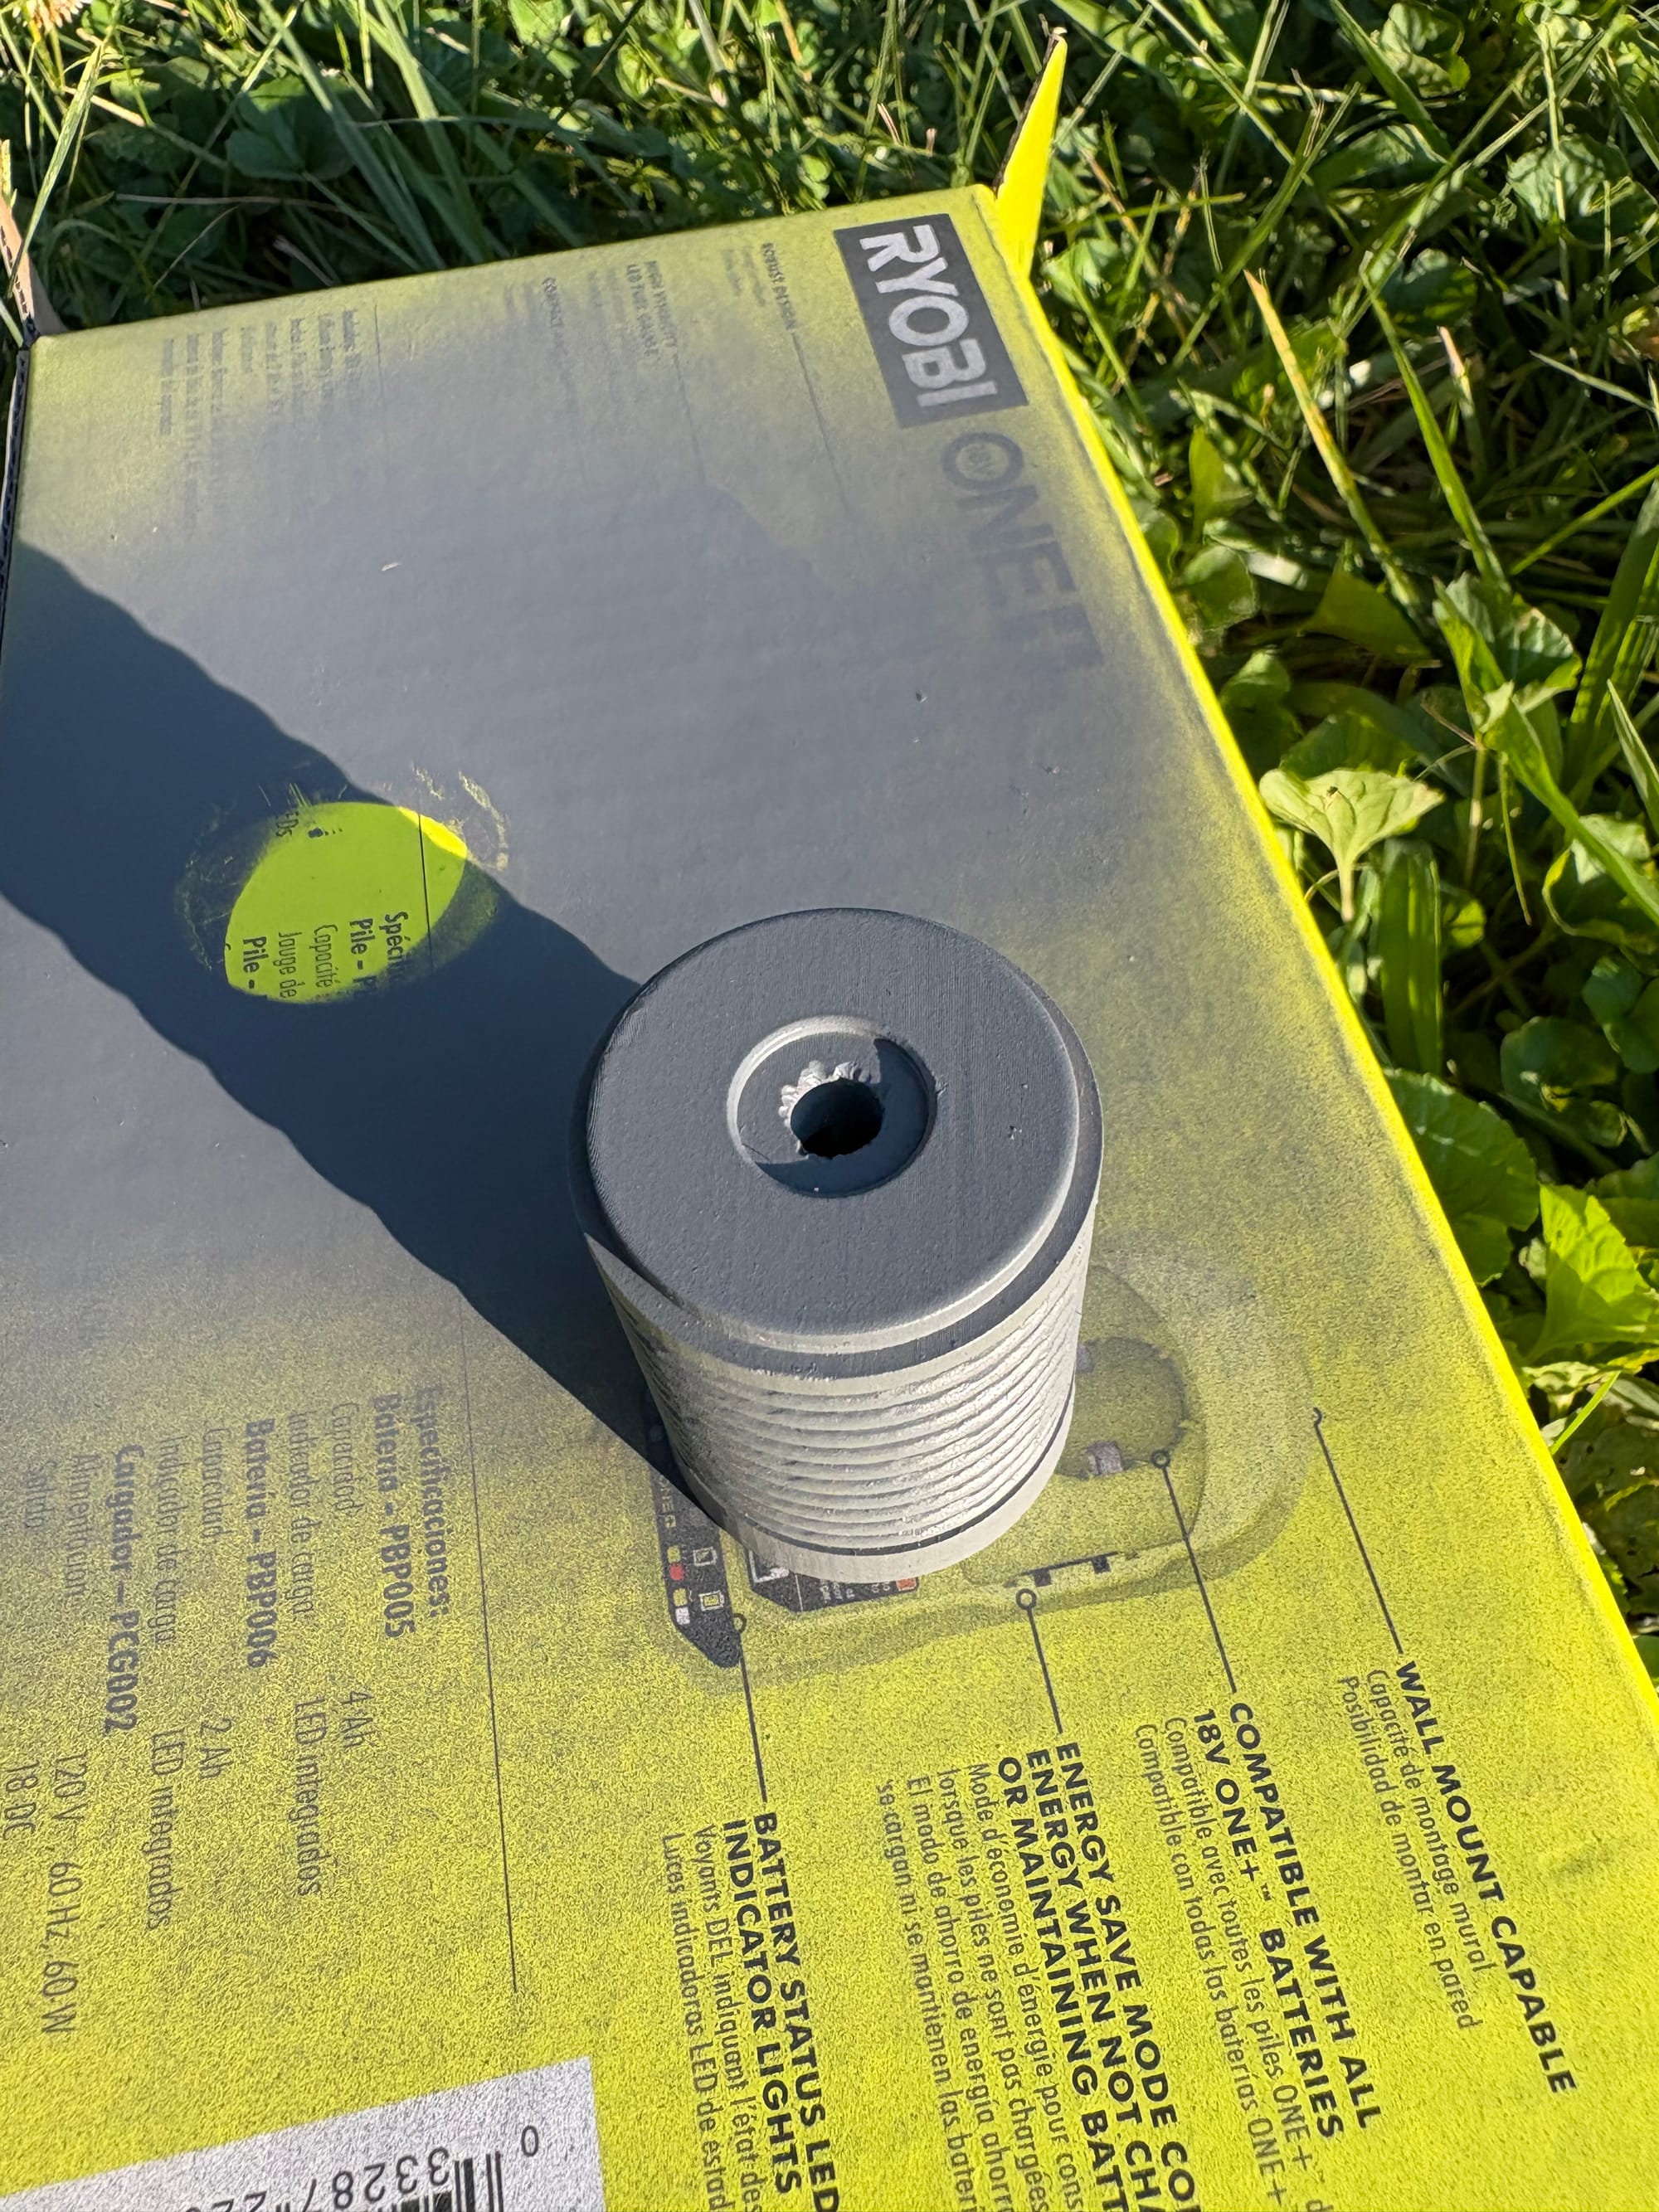
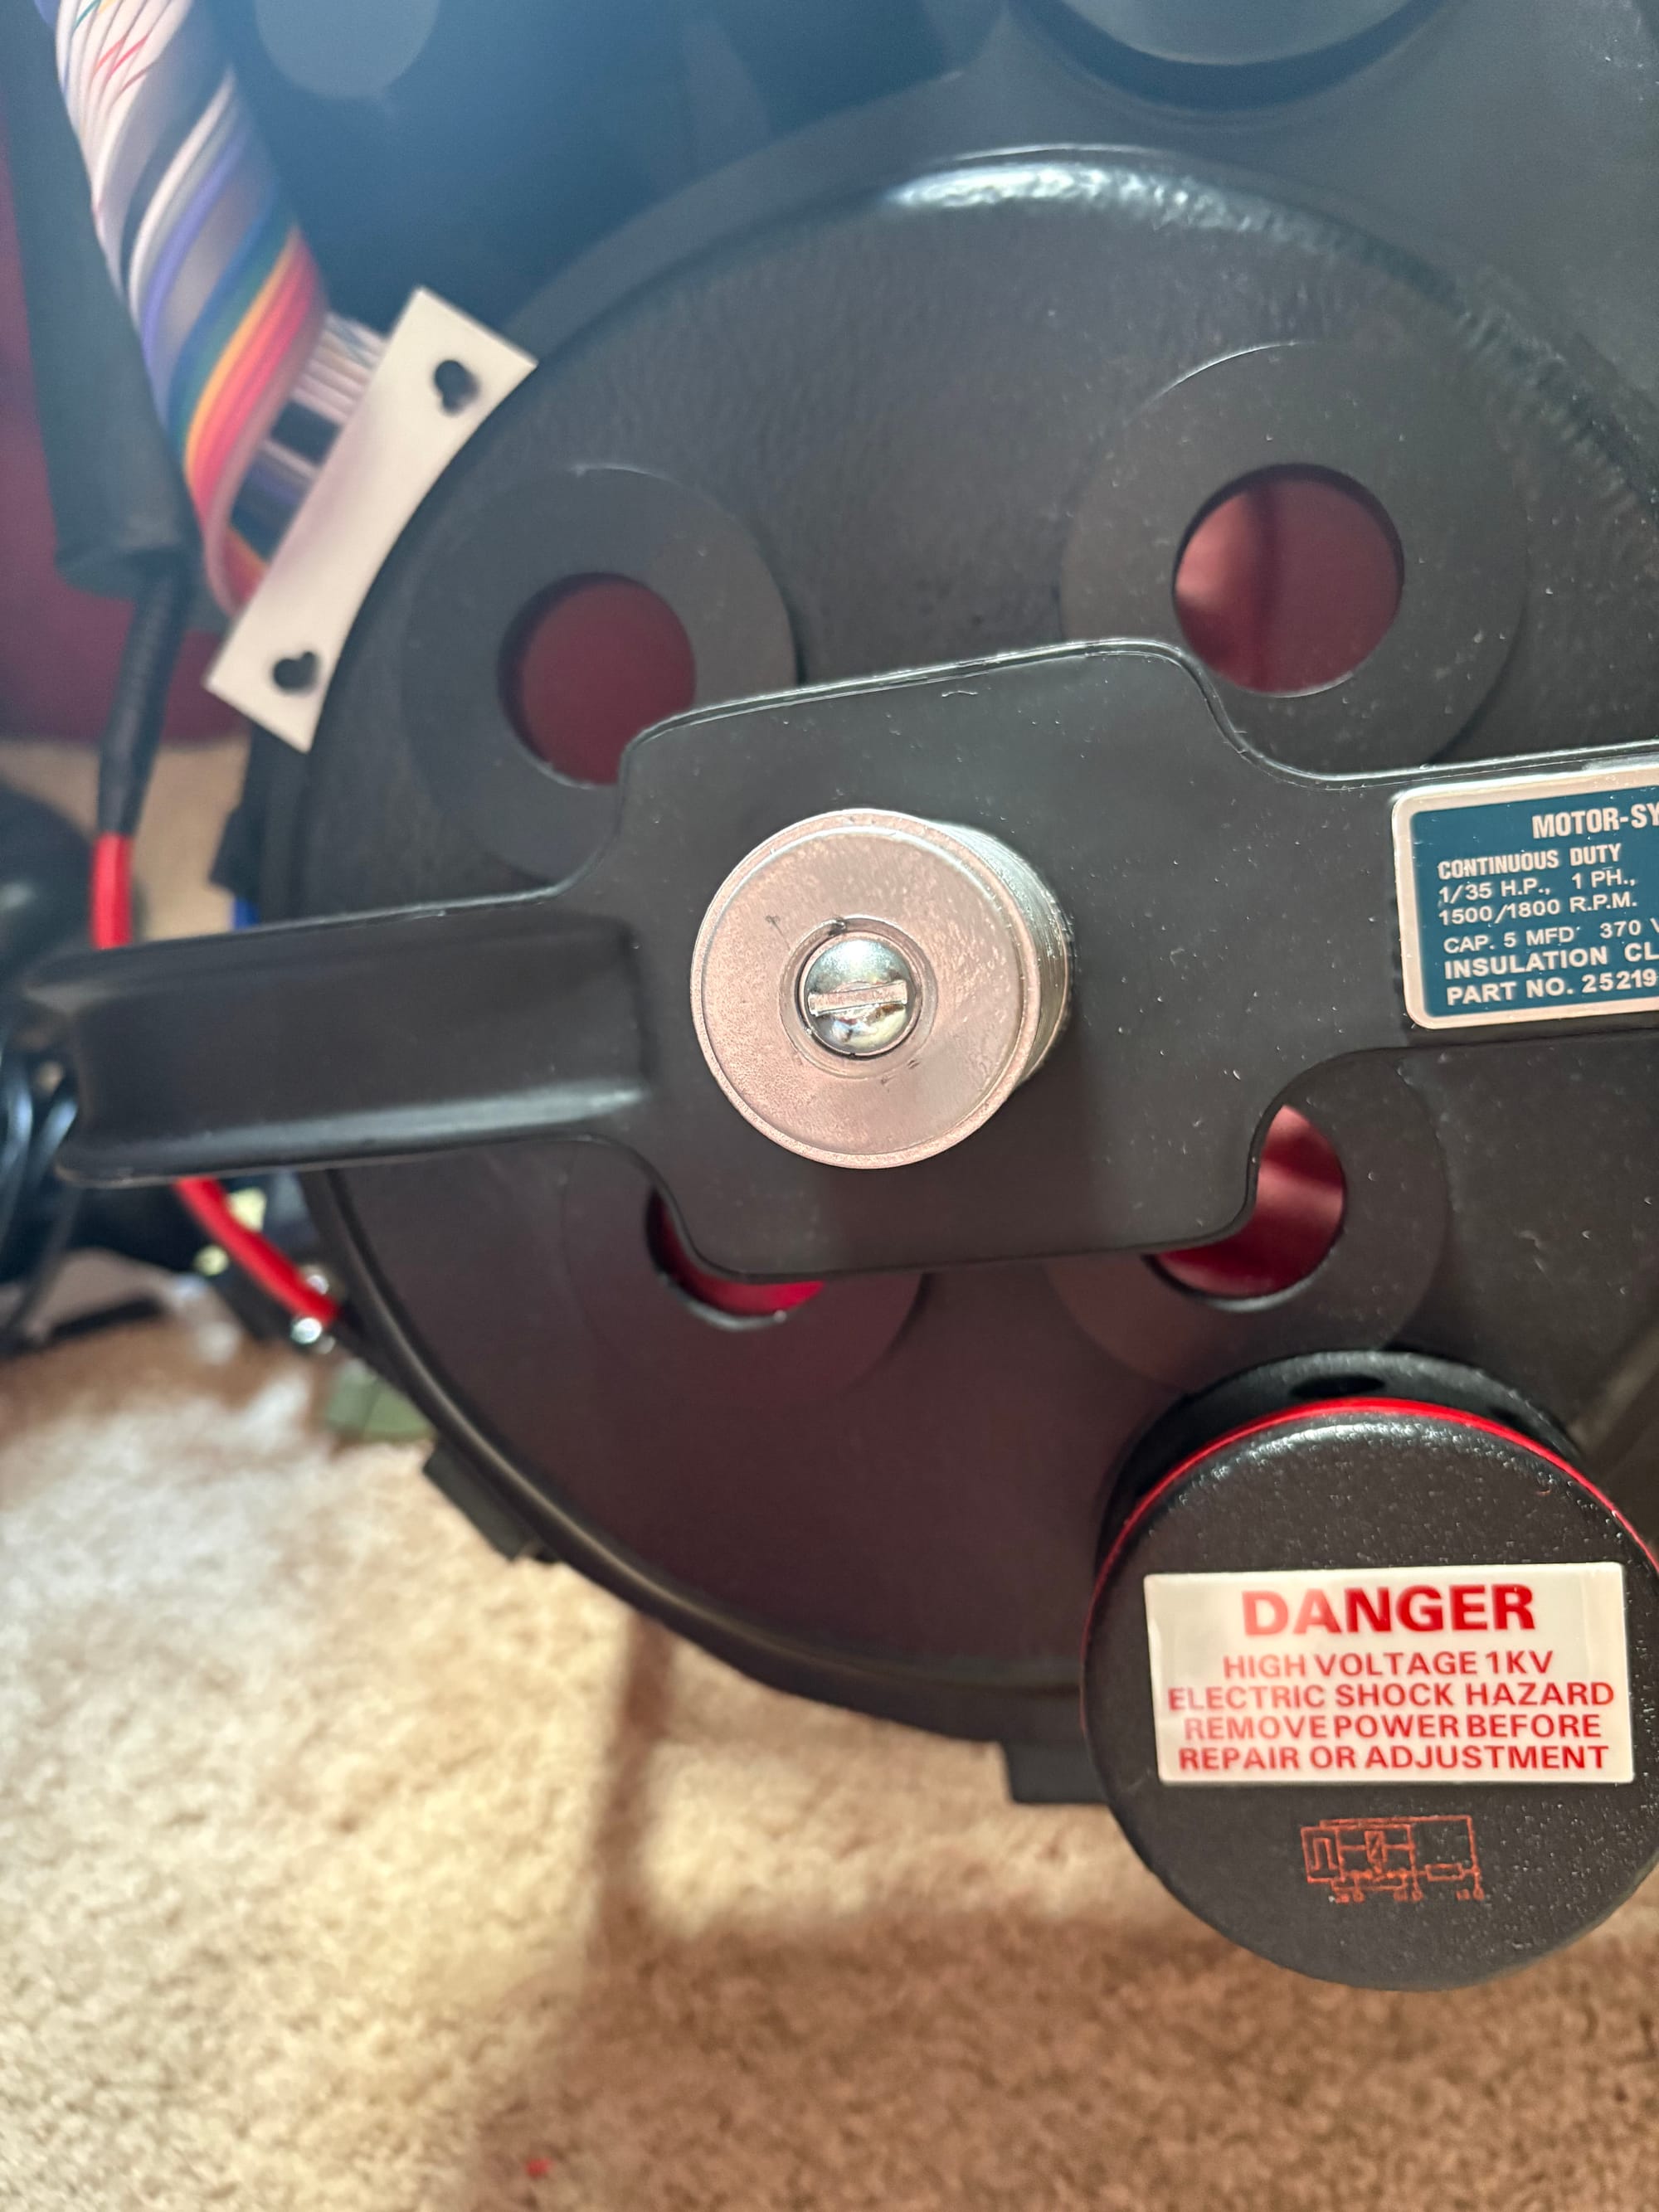
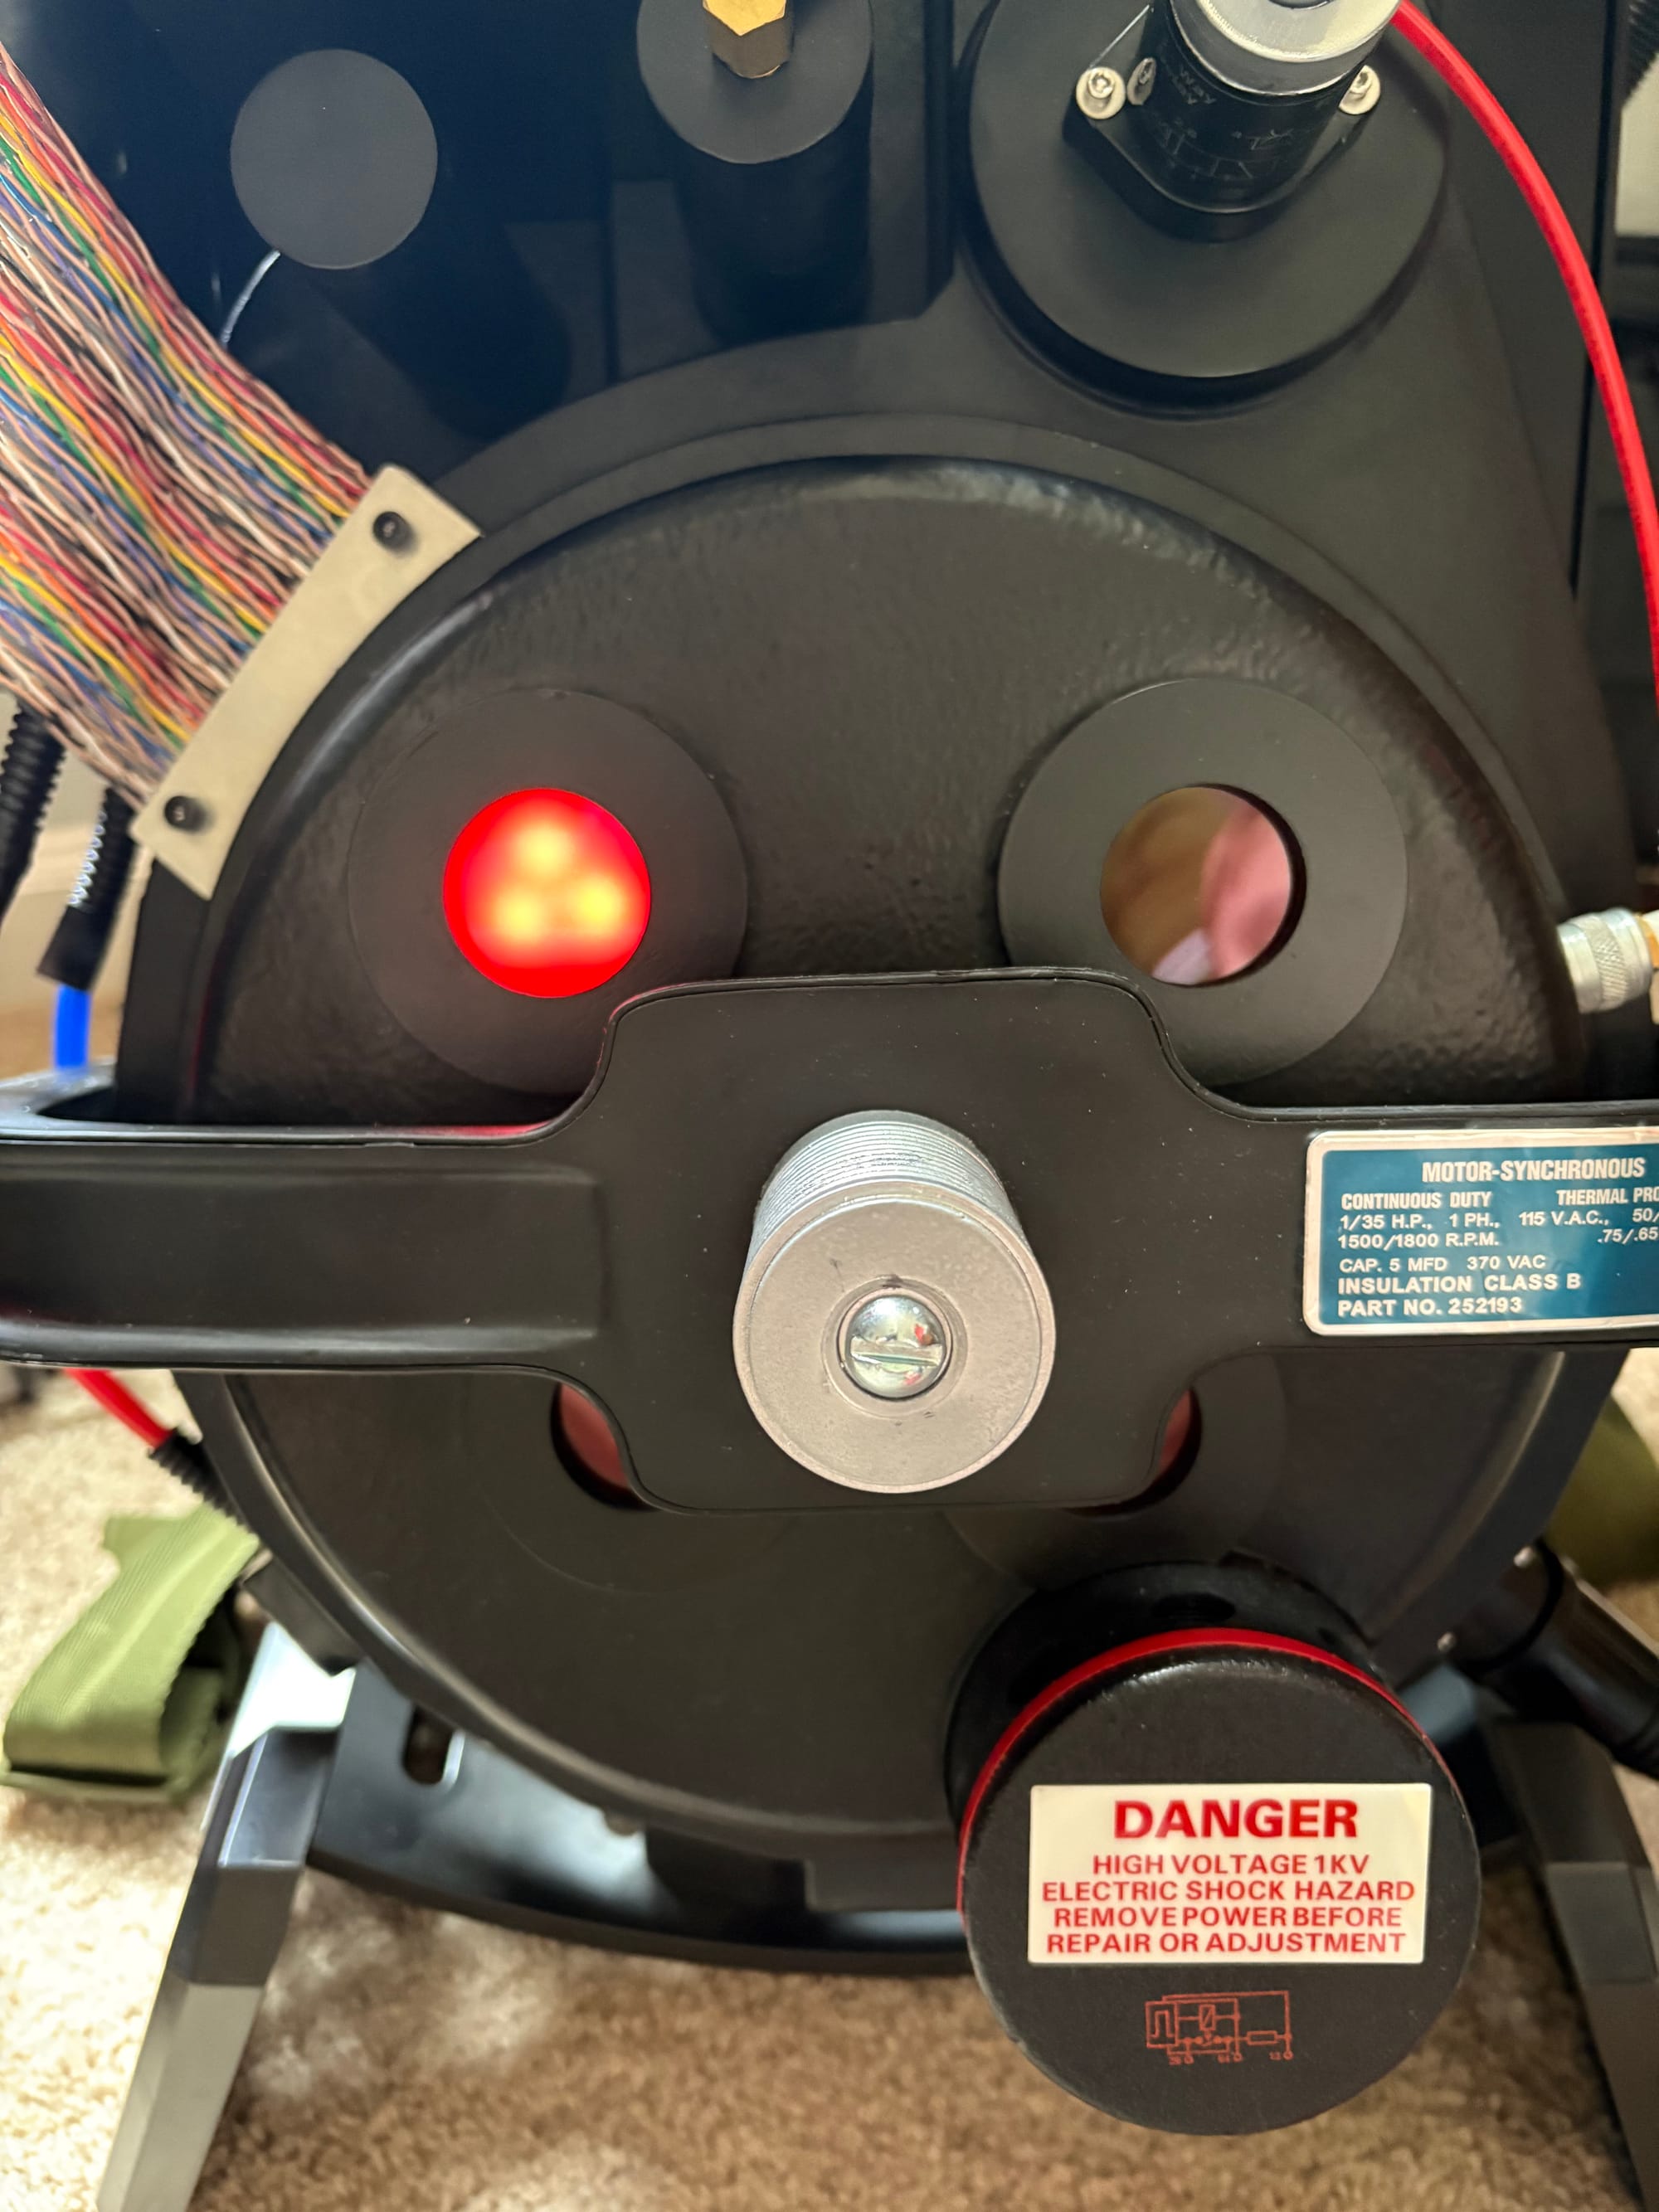
A new shiny shock mount.
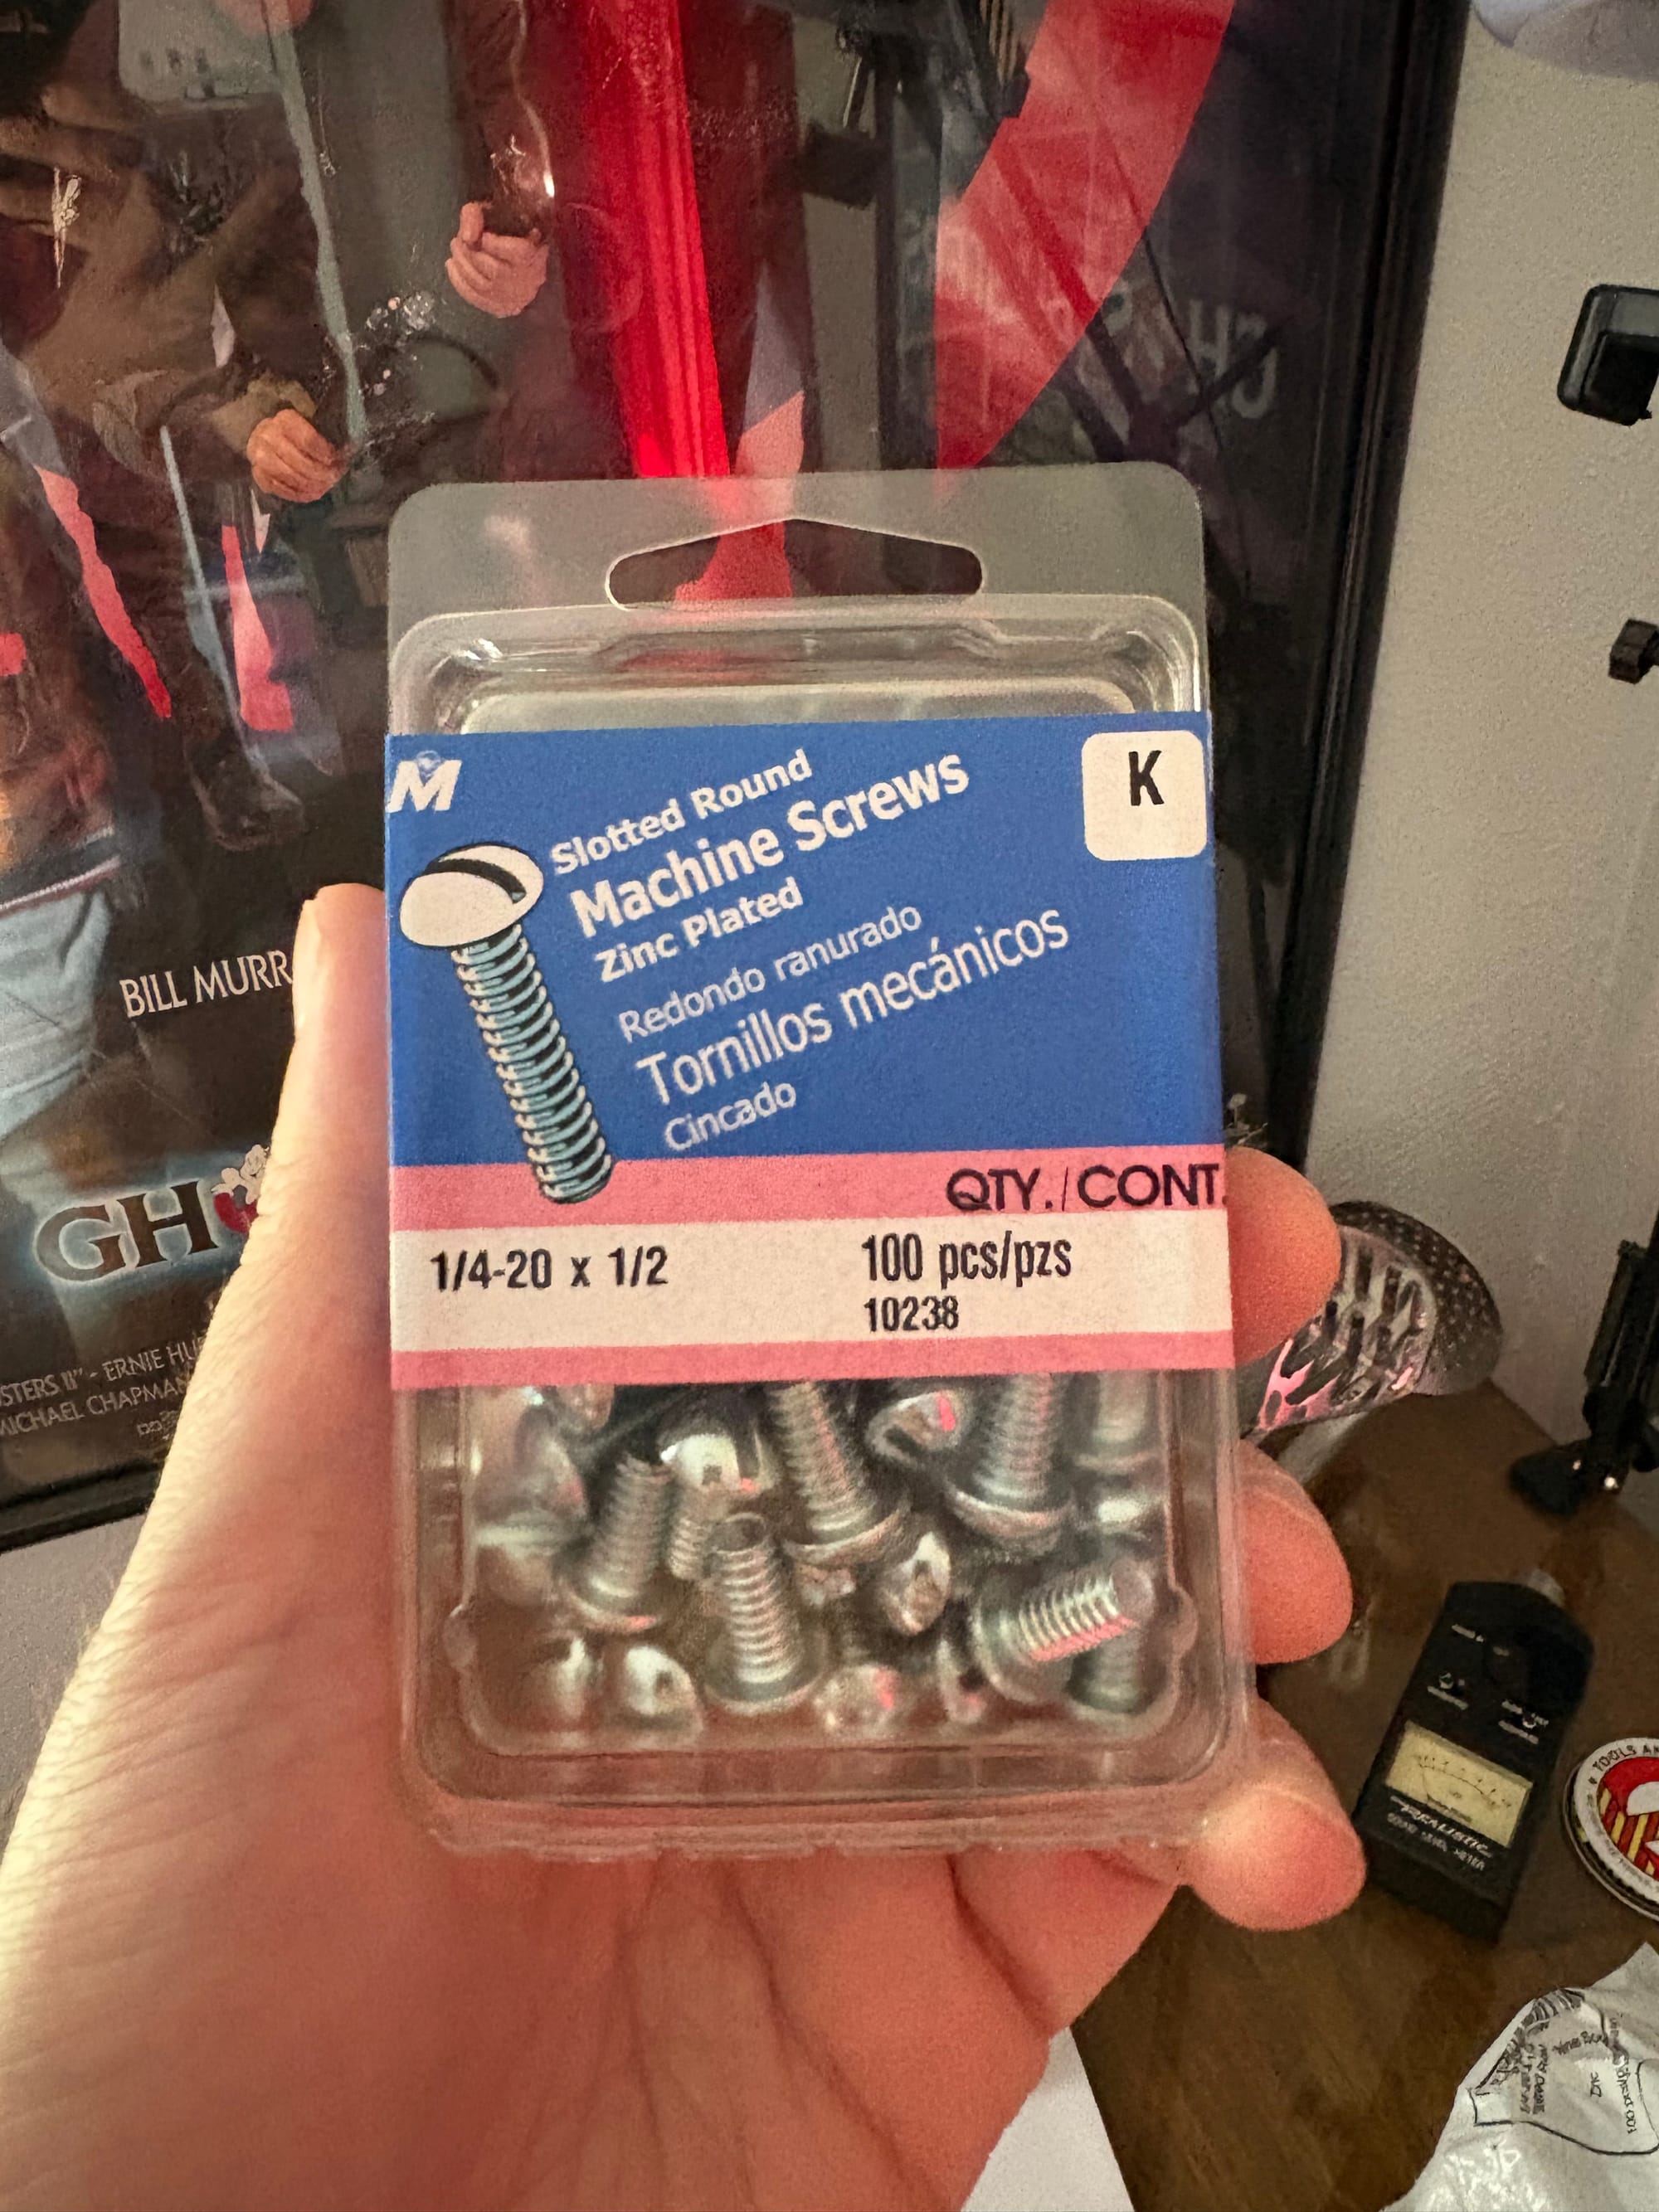
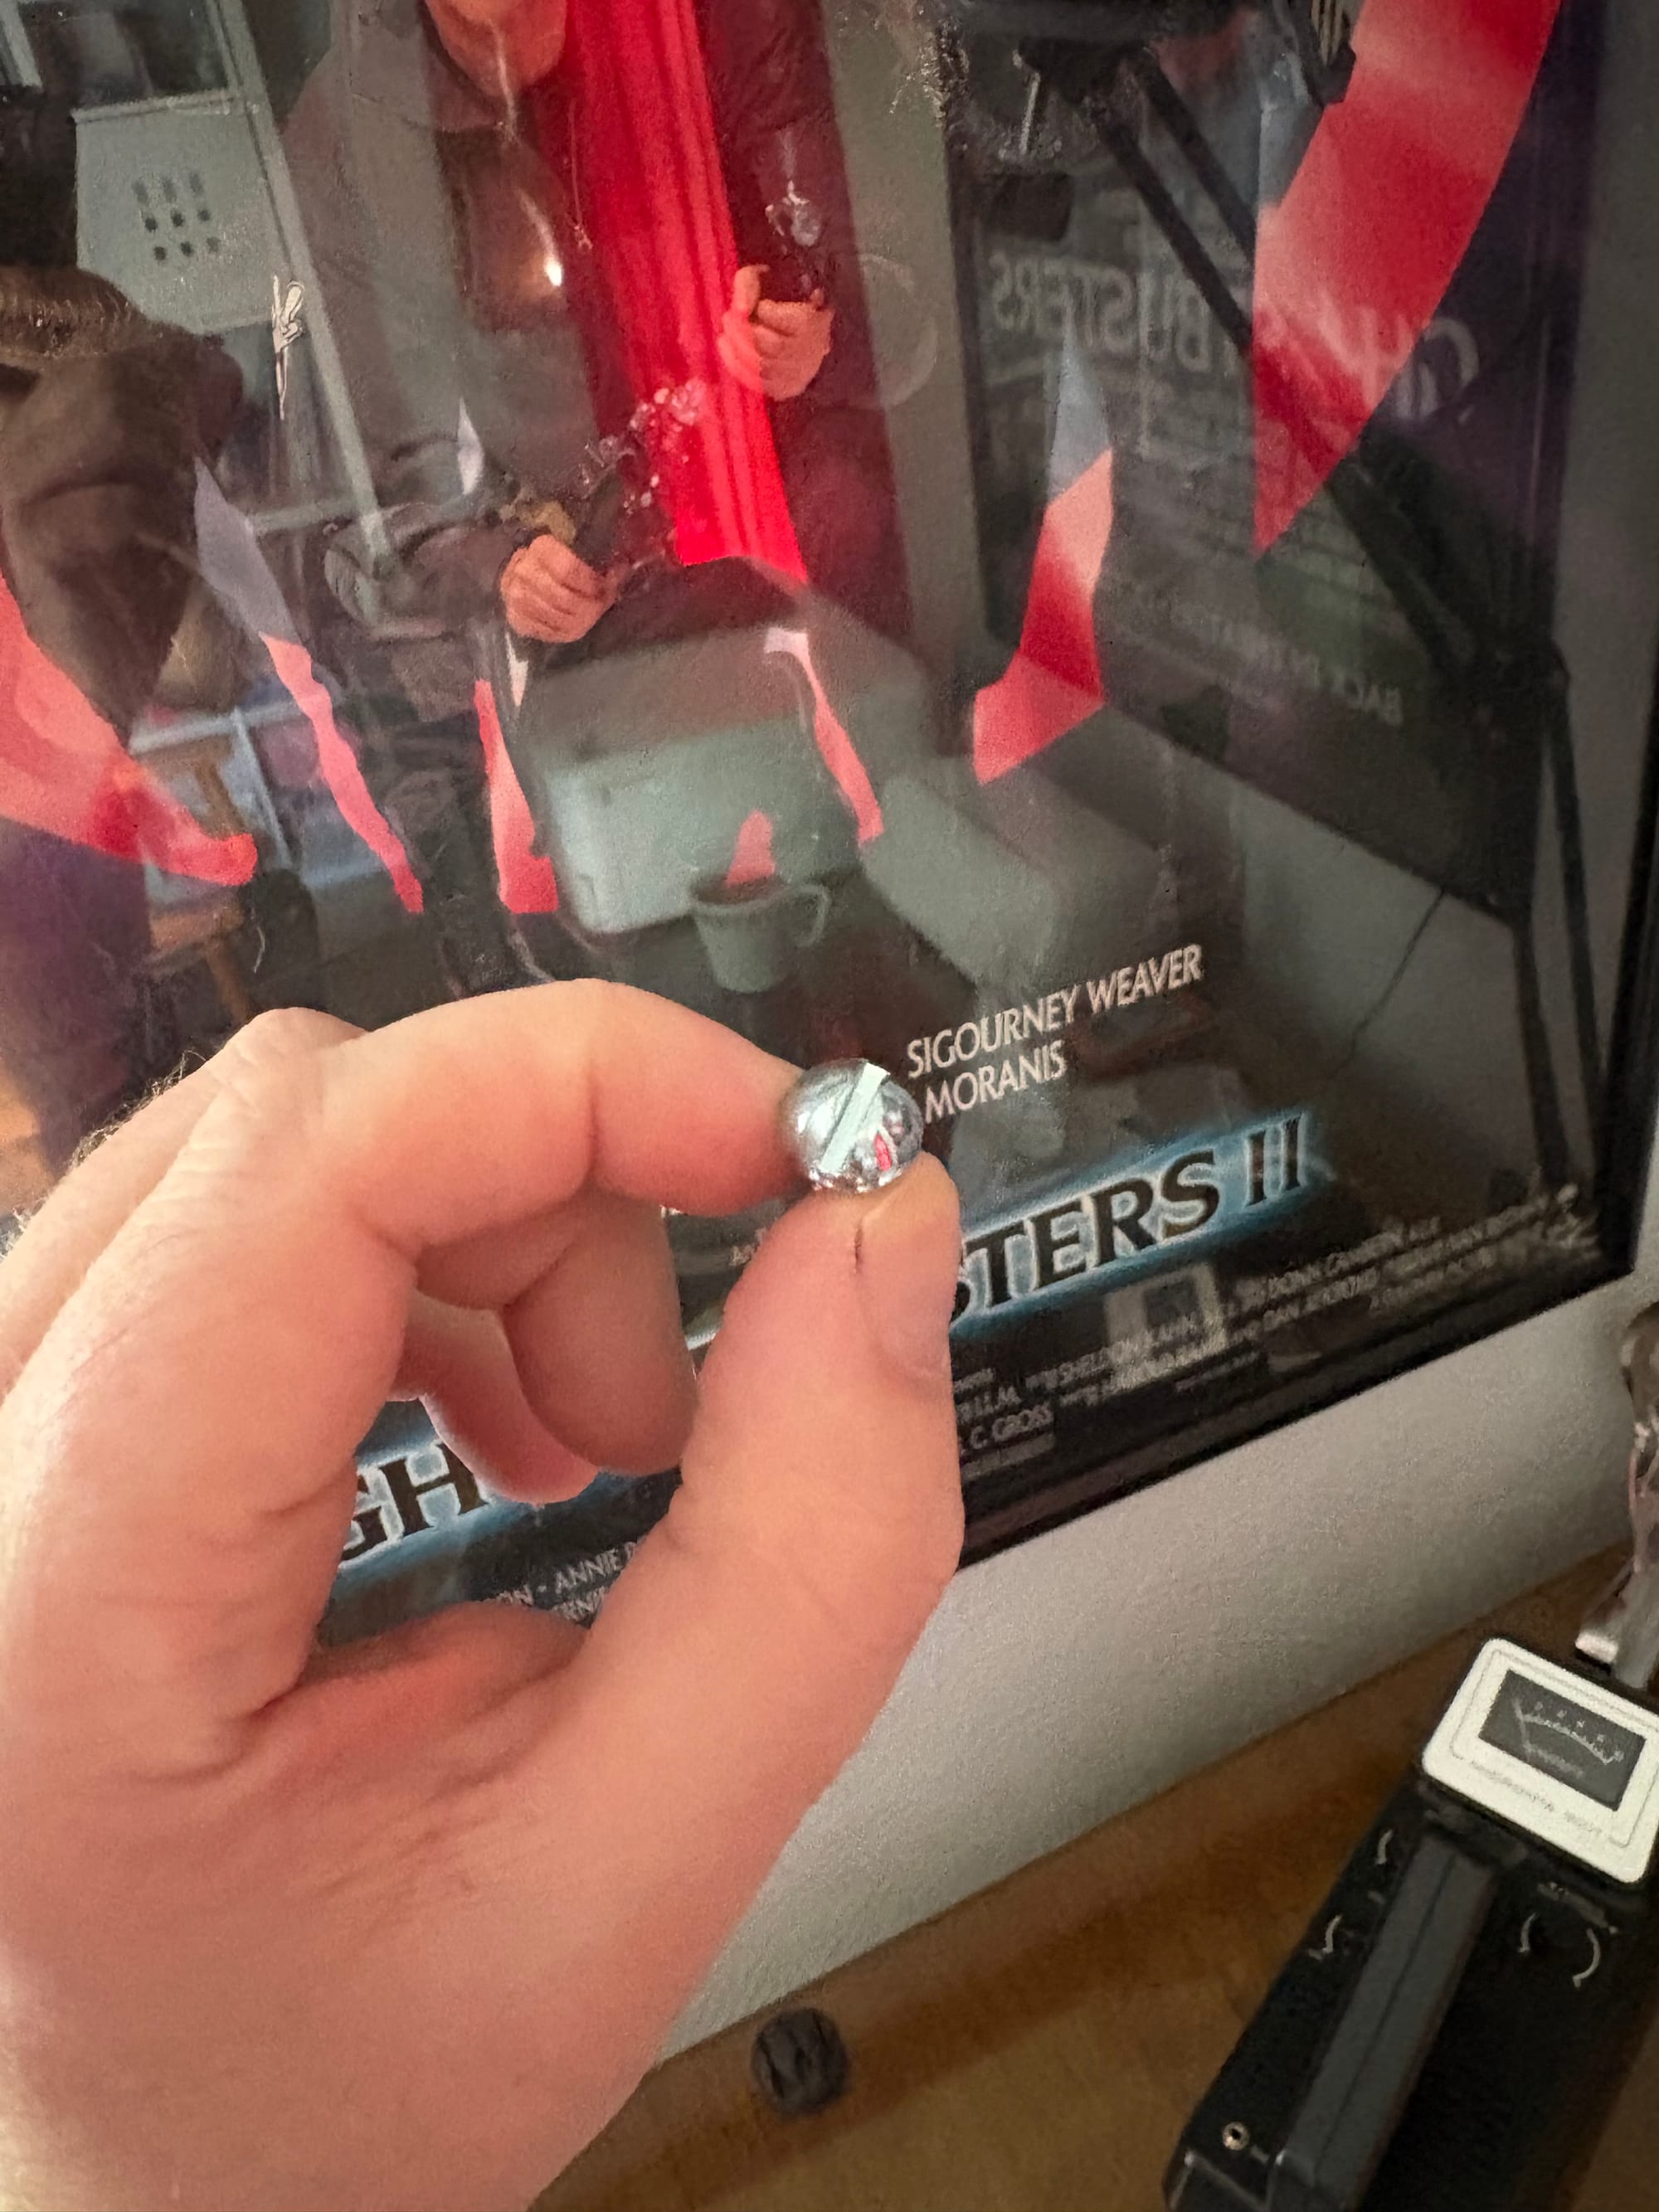
I grabbed a 3D-printed resin GB1 replacement from Chris Bosh Props. It is more accurate in style, size, and shape. Since I was leaning toward Semi-Hero, I don't need to worry about the copper showing on the sides either, unless I am mistaken; they are completely silver. I drilled a hole on the top, cleaned it up a little, gave it a good coat of primer, then hammered silver, and then a coat of regular silver. Then I screwed in the stubby but accurate flathead screw I purchased. The resin part had mounts for the bolt used on the original Haslab or Hasbro packs, so I swapped it out and put it back on my pack. I think the real screw sells it the most.
The Ribbon Cable
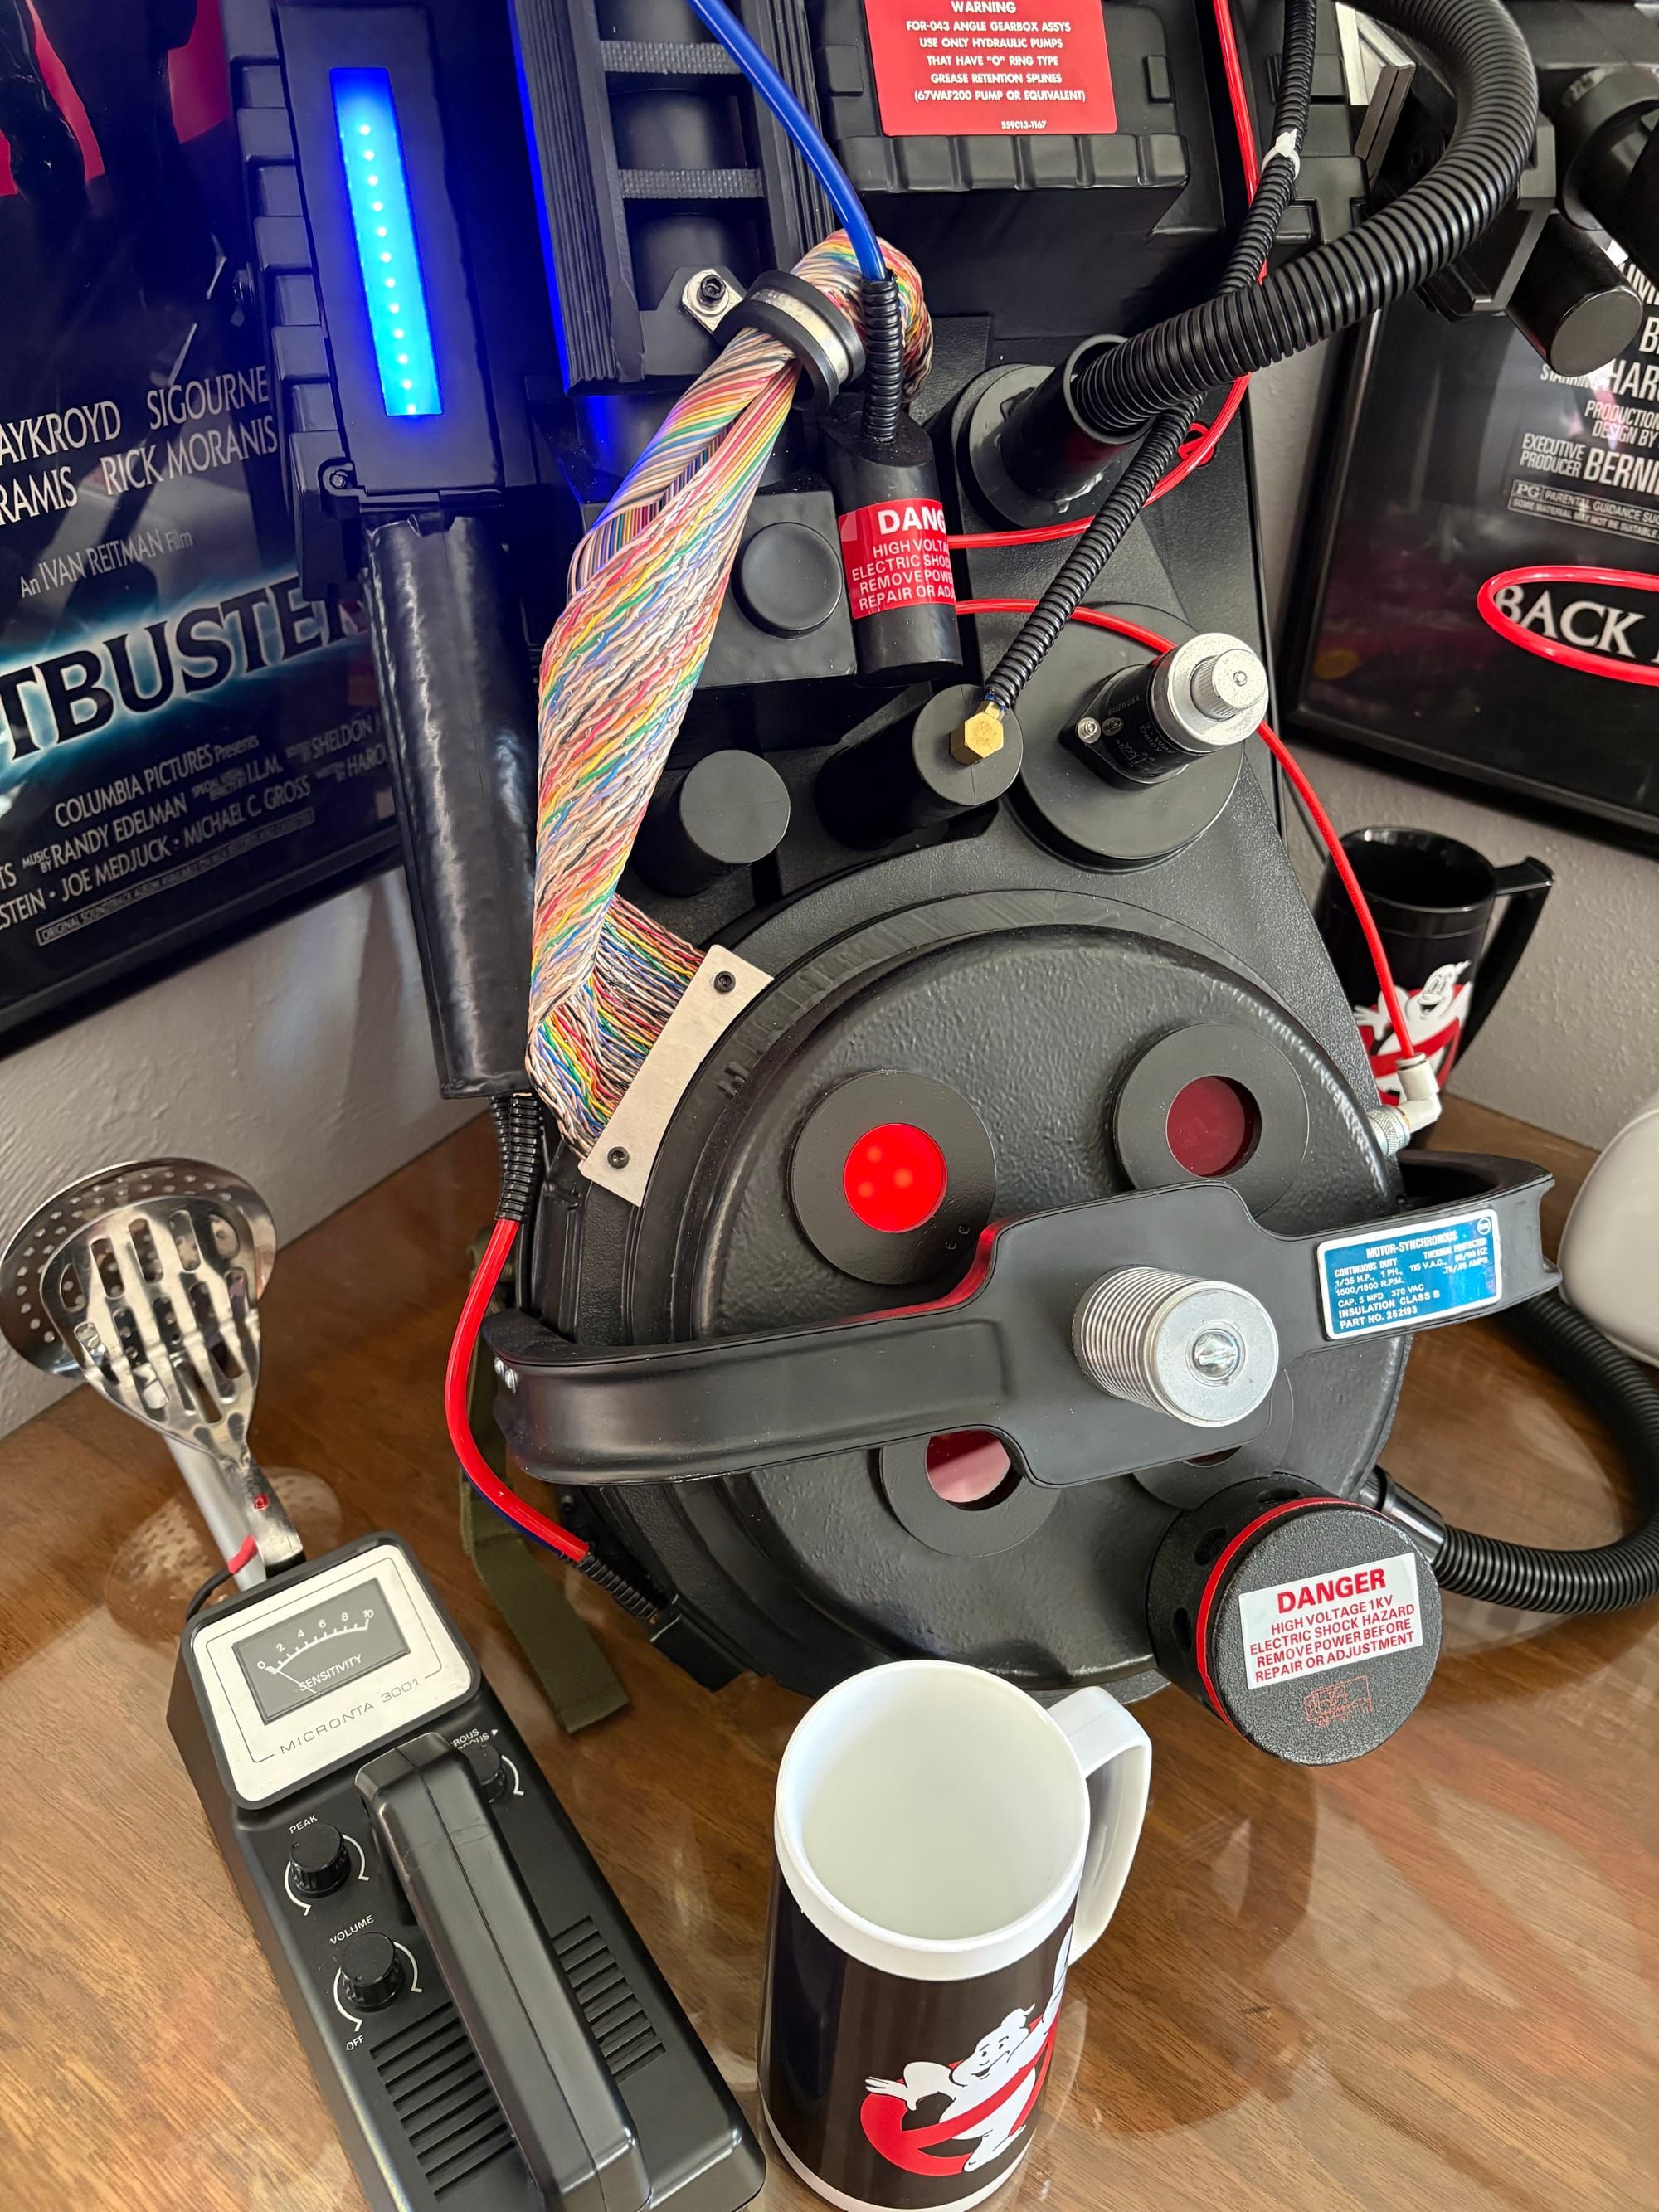
But the biggest and most obvious change for the GB2 packs is the ribbon cable. It changed from the tightly wound, bright-colored cable in the first movie to the more muted-tone Spectra cable with a much looser wrap in GB2.
I did this in the wrong order; it was a little messy to get the wrap I wanted. I started from the inside, and I should have gone from the outside in. I started by opening the pack and removing the "motherboard." There are a lot of screws, and for some reason, a few of the pack pieces are mounted to it. But it is easy to remove; don't forget the bolt through the cyclotron, and remove that nut too.
Once off, there isn't much in the way; the electronics are very sparse in this pack. A few pegs hold down the original ribbon cable, with a strip of plastic over it and a few screws. The new cable was much longer than I needed, or maybe it wasn't, and I would have had a better idea had I started with the clamp. But I folded it in thirds like the original and used the mounts to hold it in place.
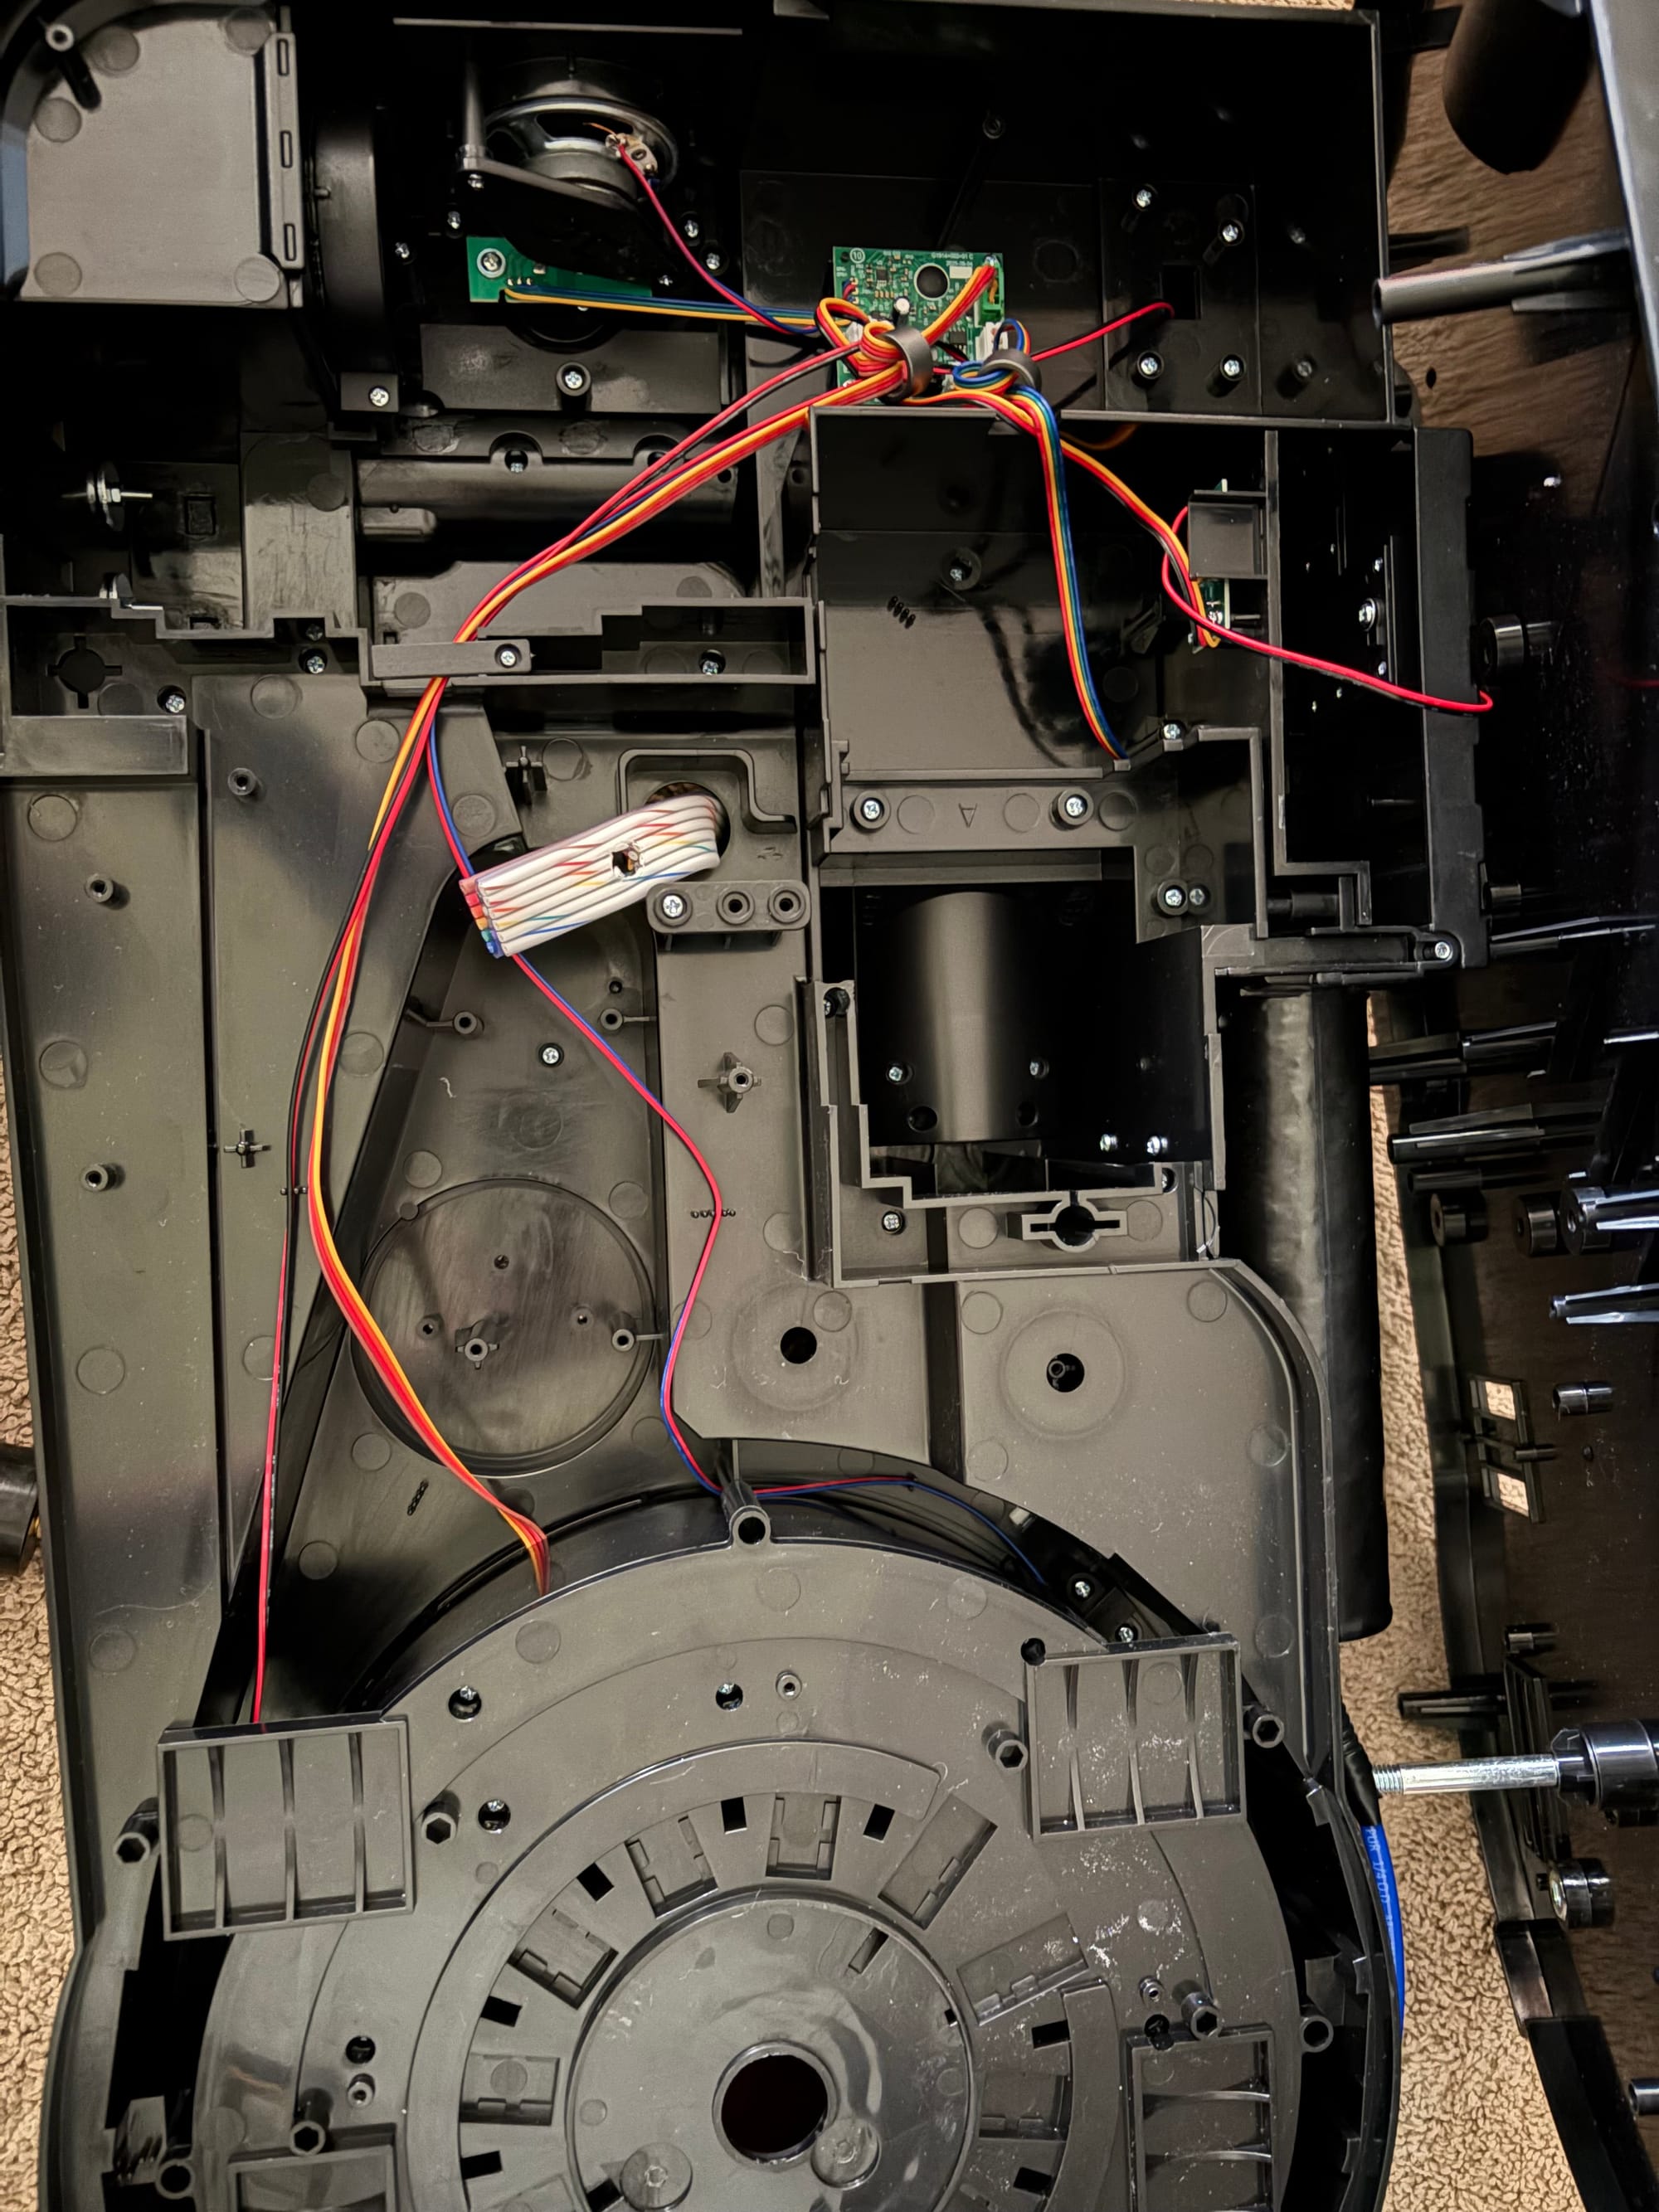
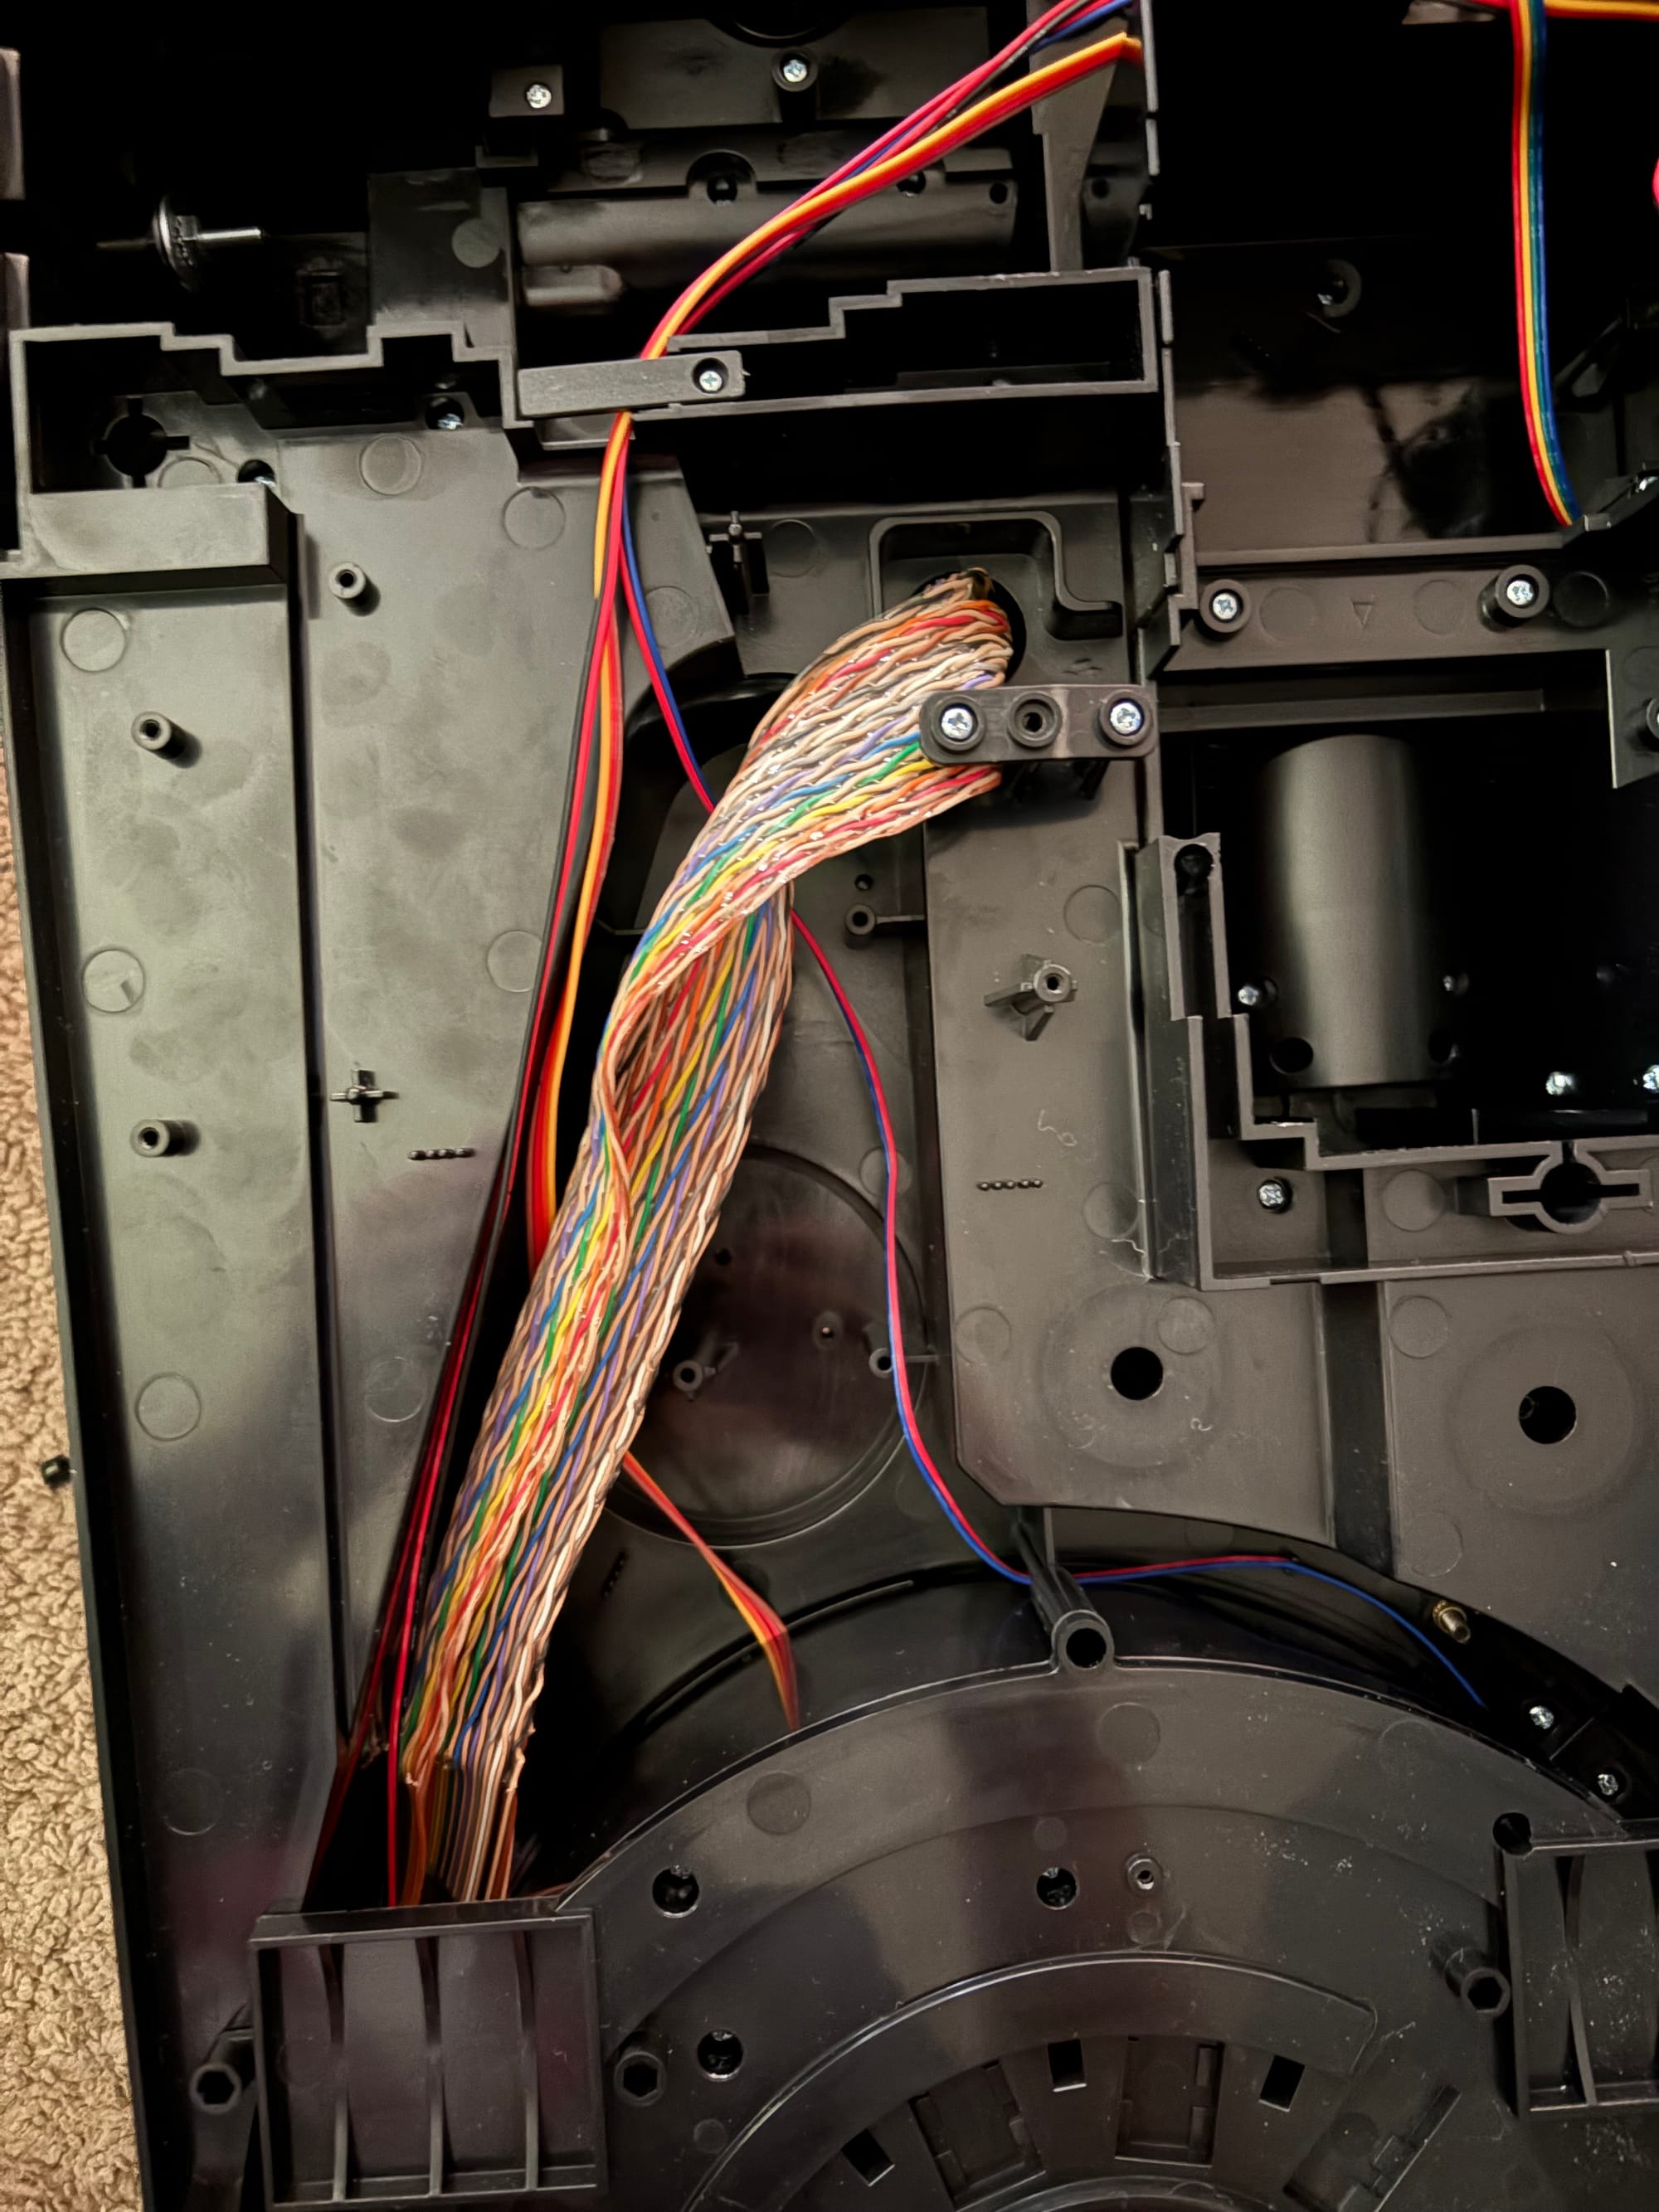
Feeding the cable through the pack. There was a lot more to work with compared to the original included cable.
After that, I fed it through the pack, through the clamp on the booster frame (which had to be turned down to match the GB2 packs), then held it down with a new clamp at the cyclotron.
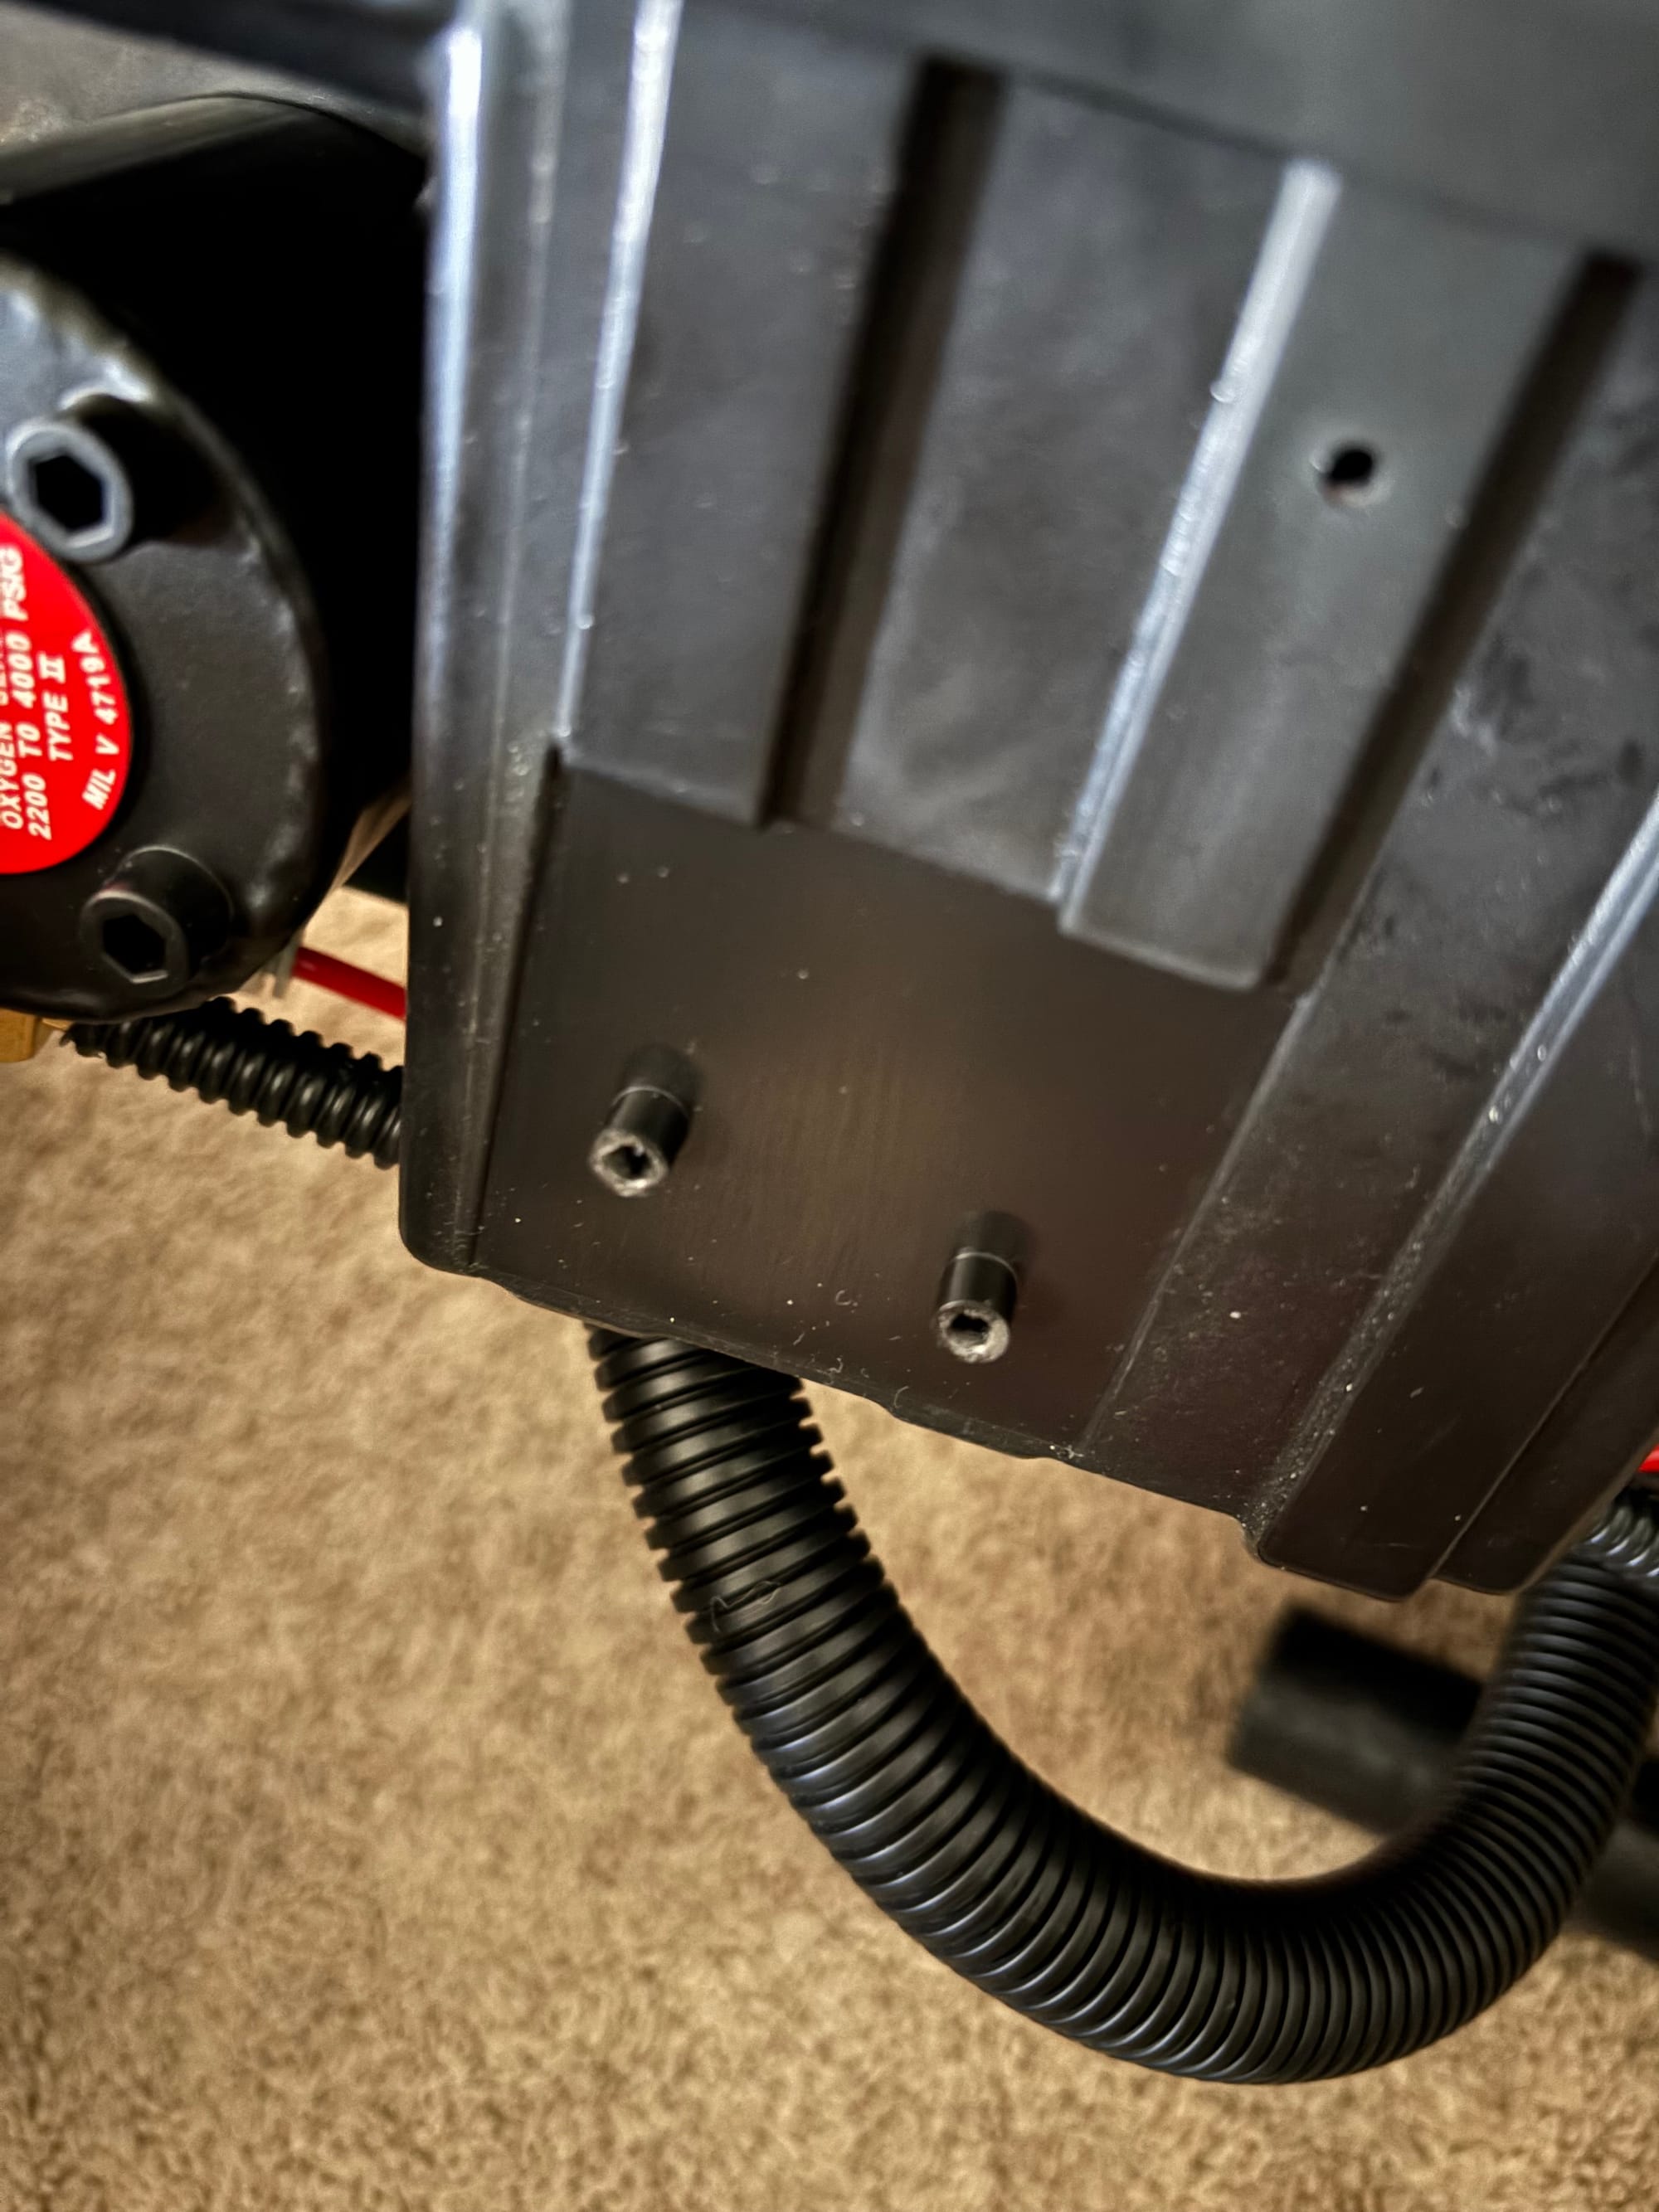
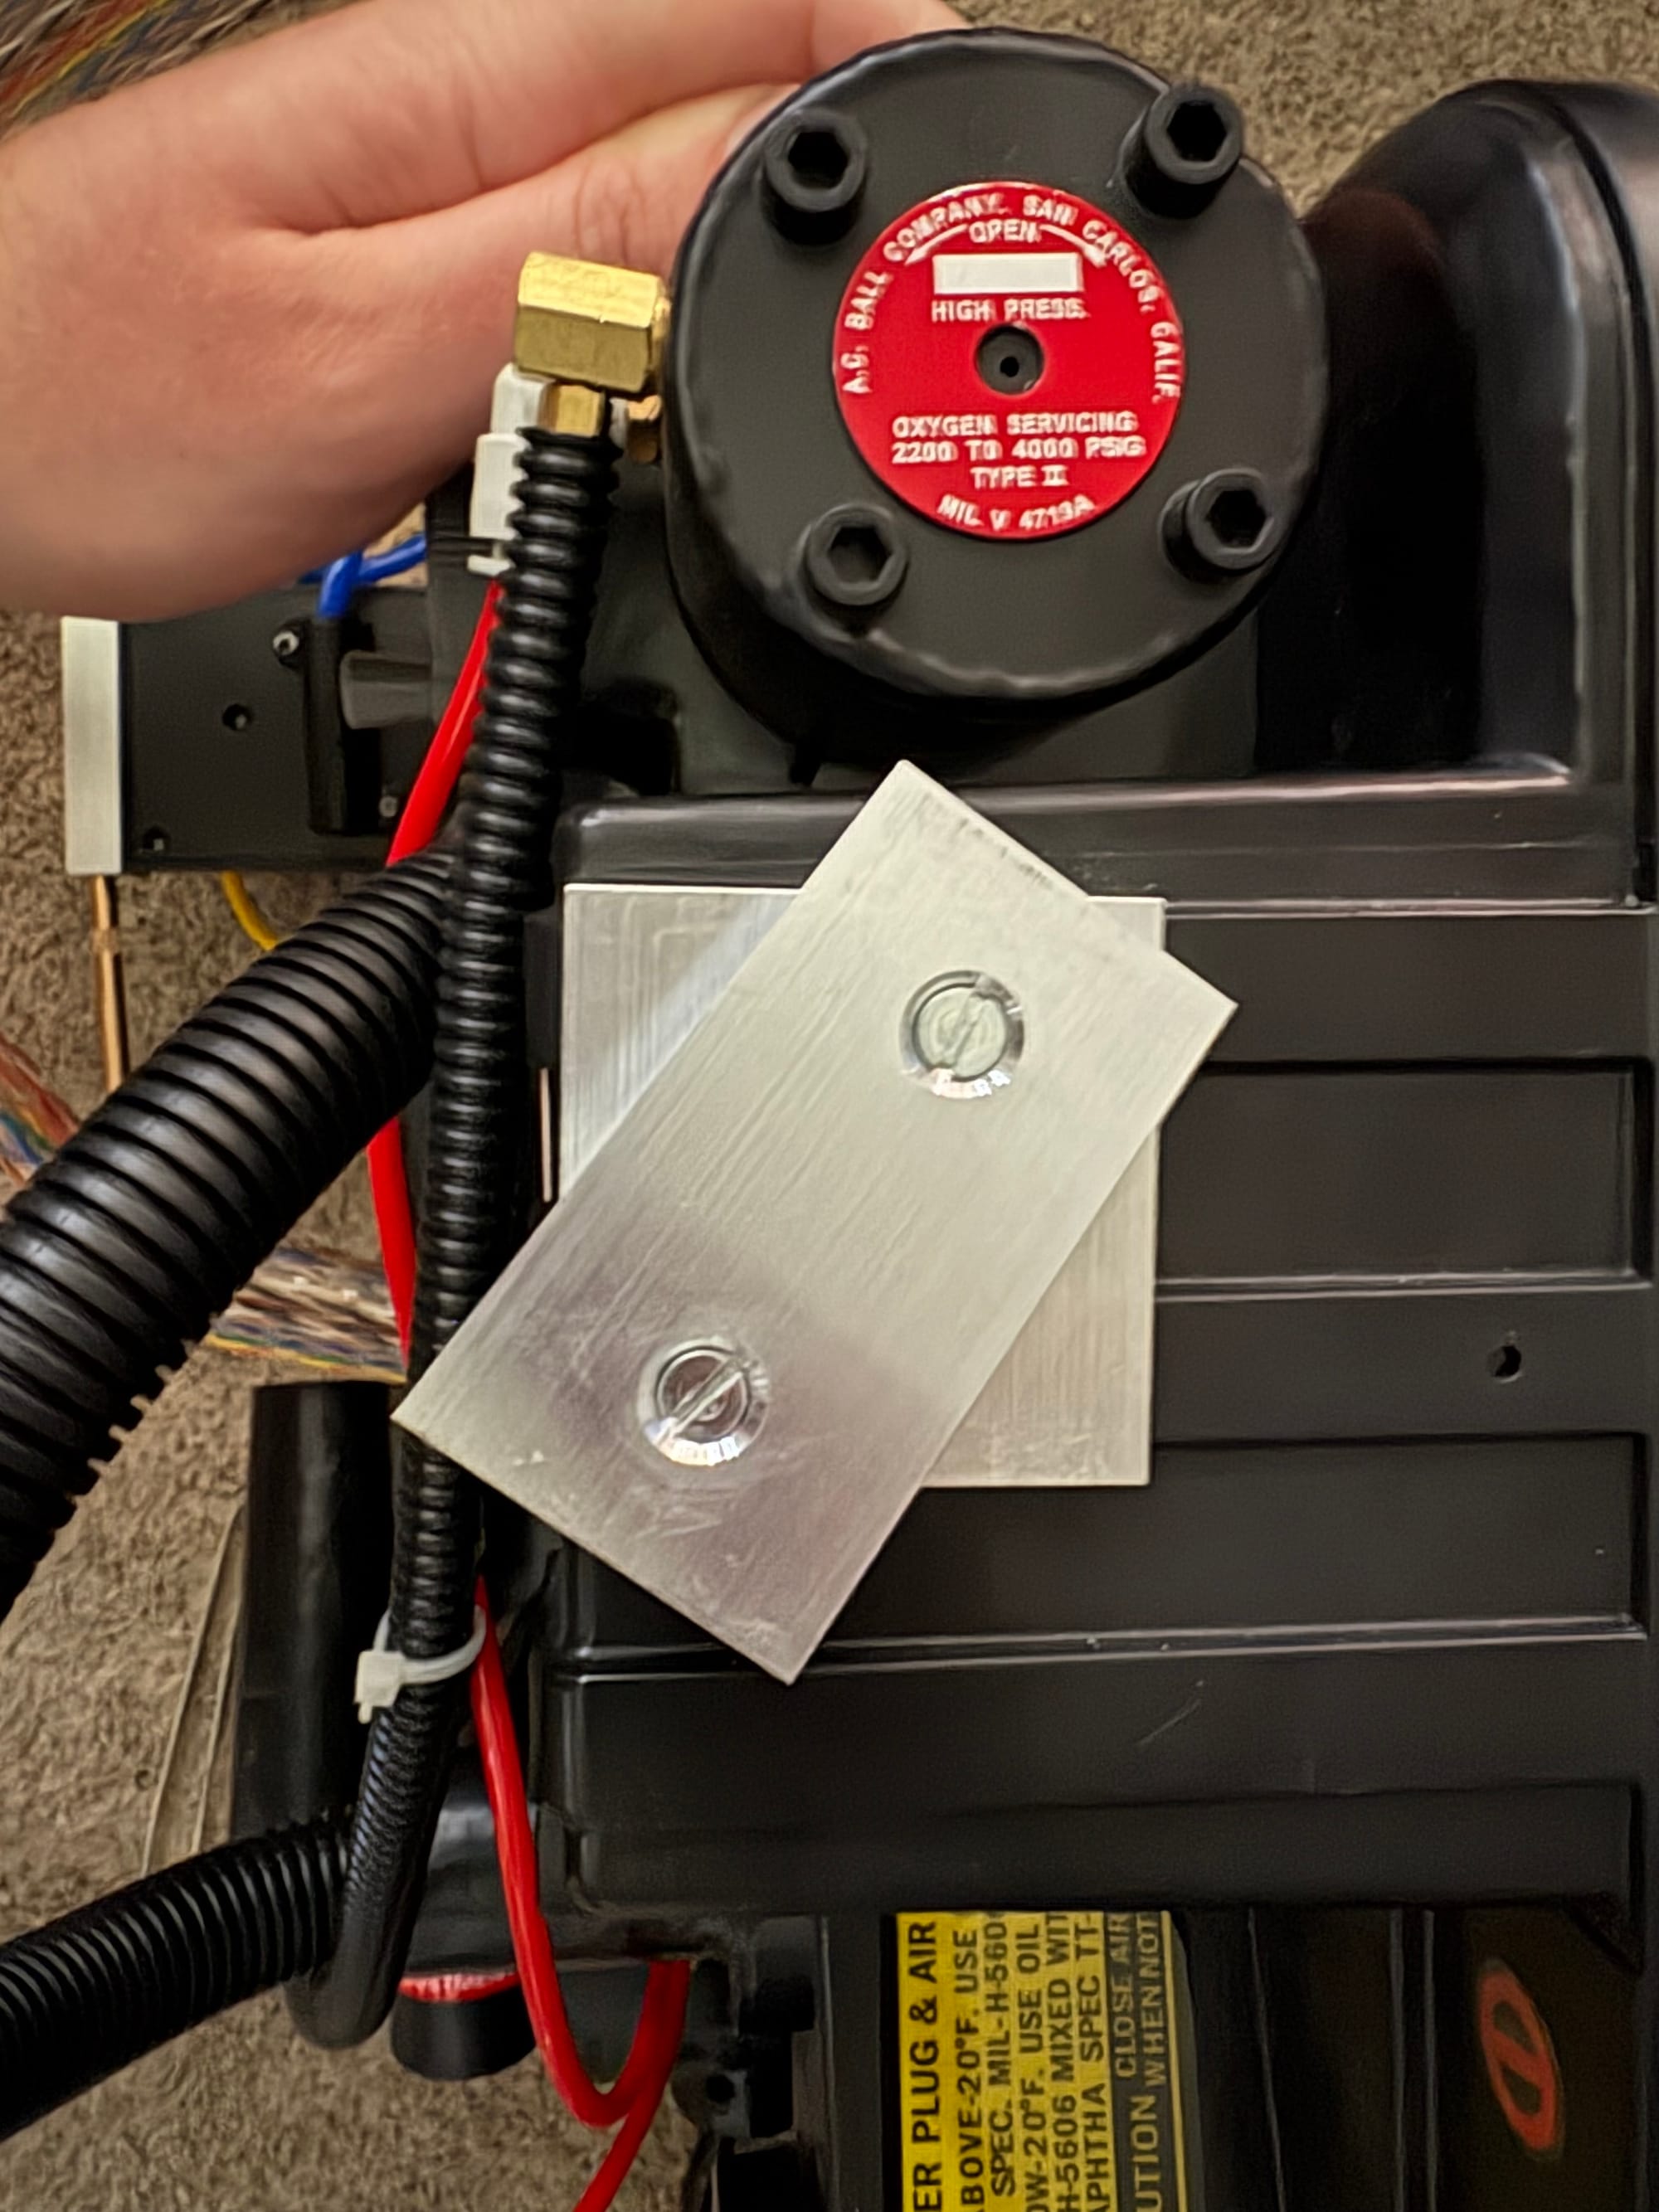
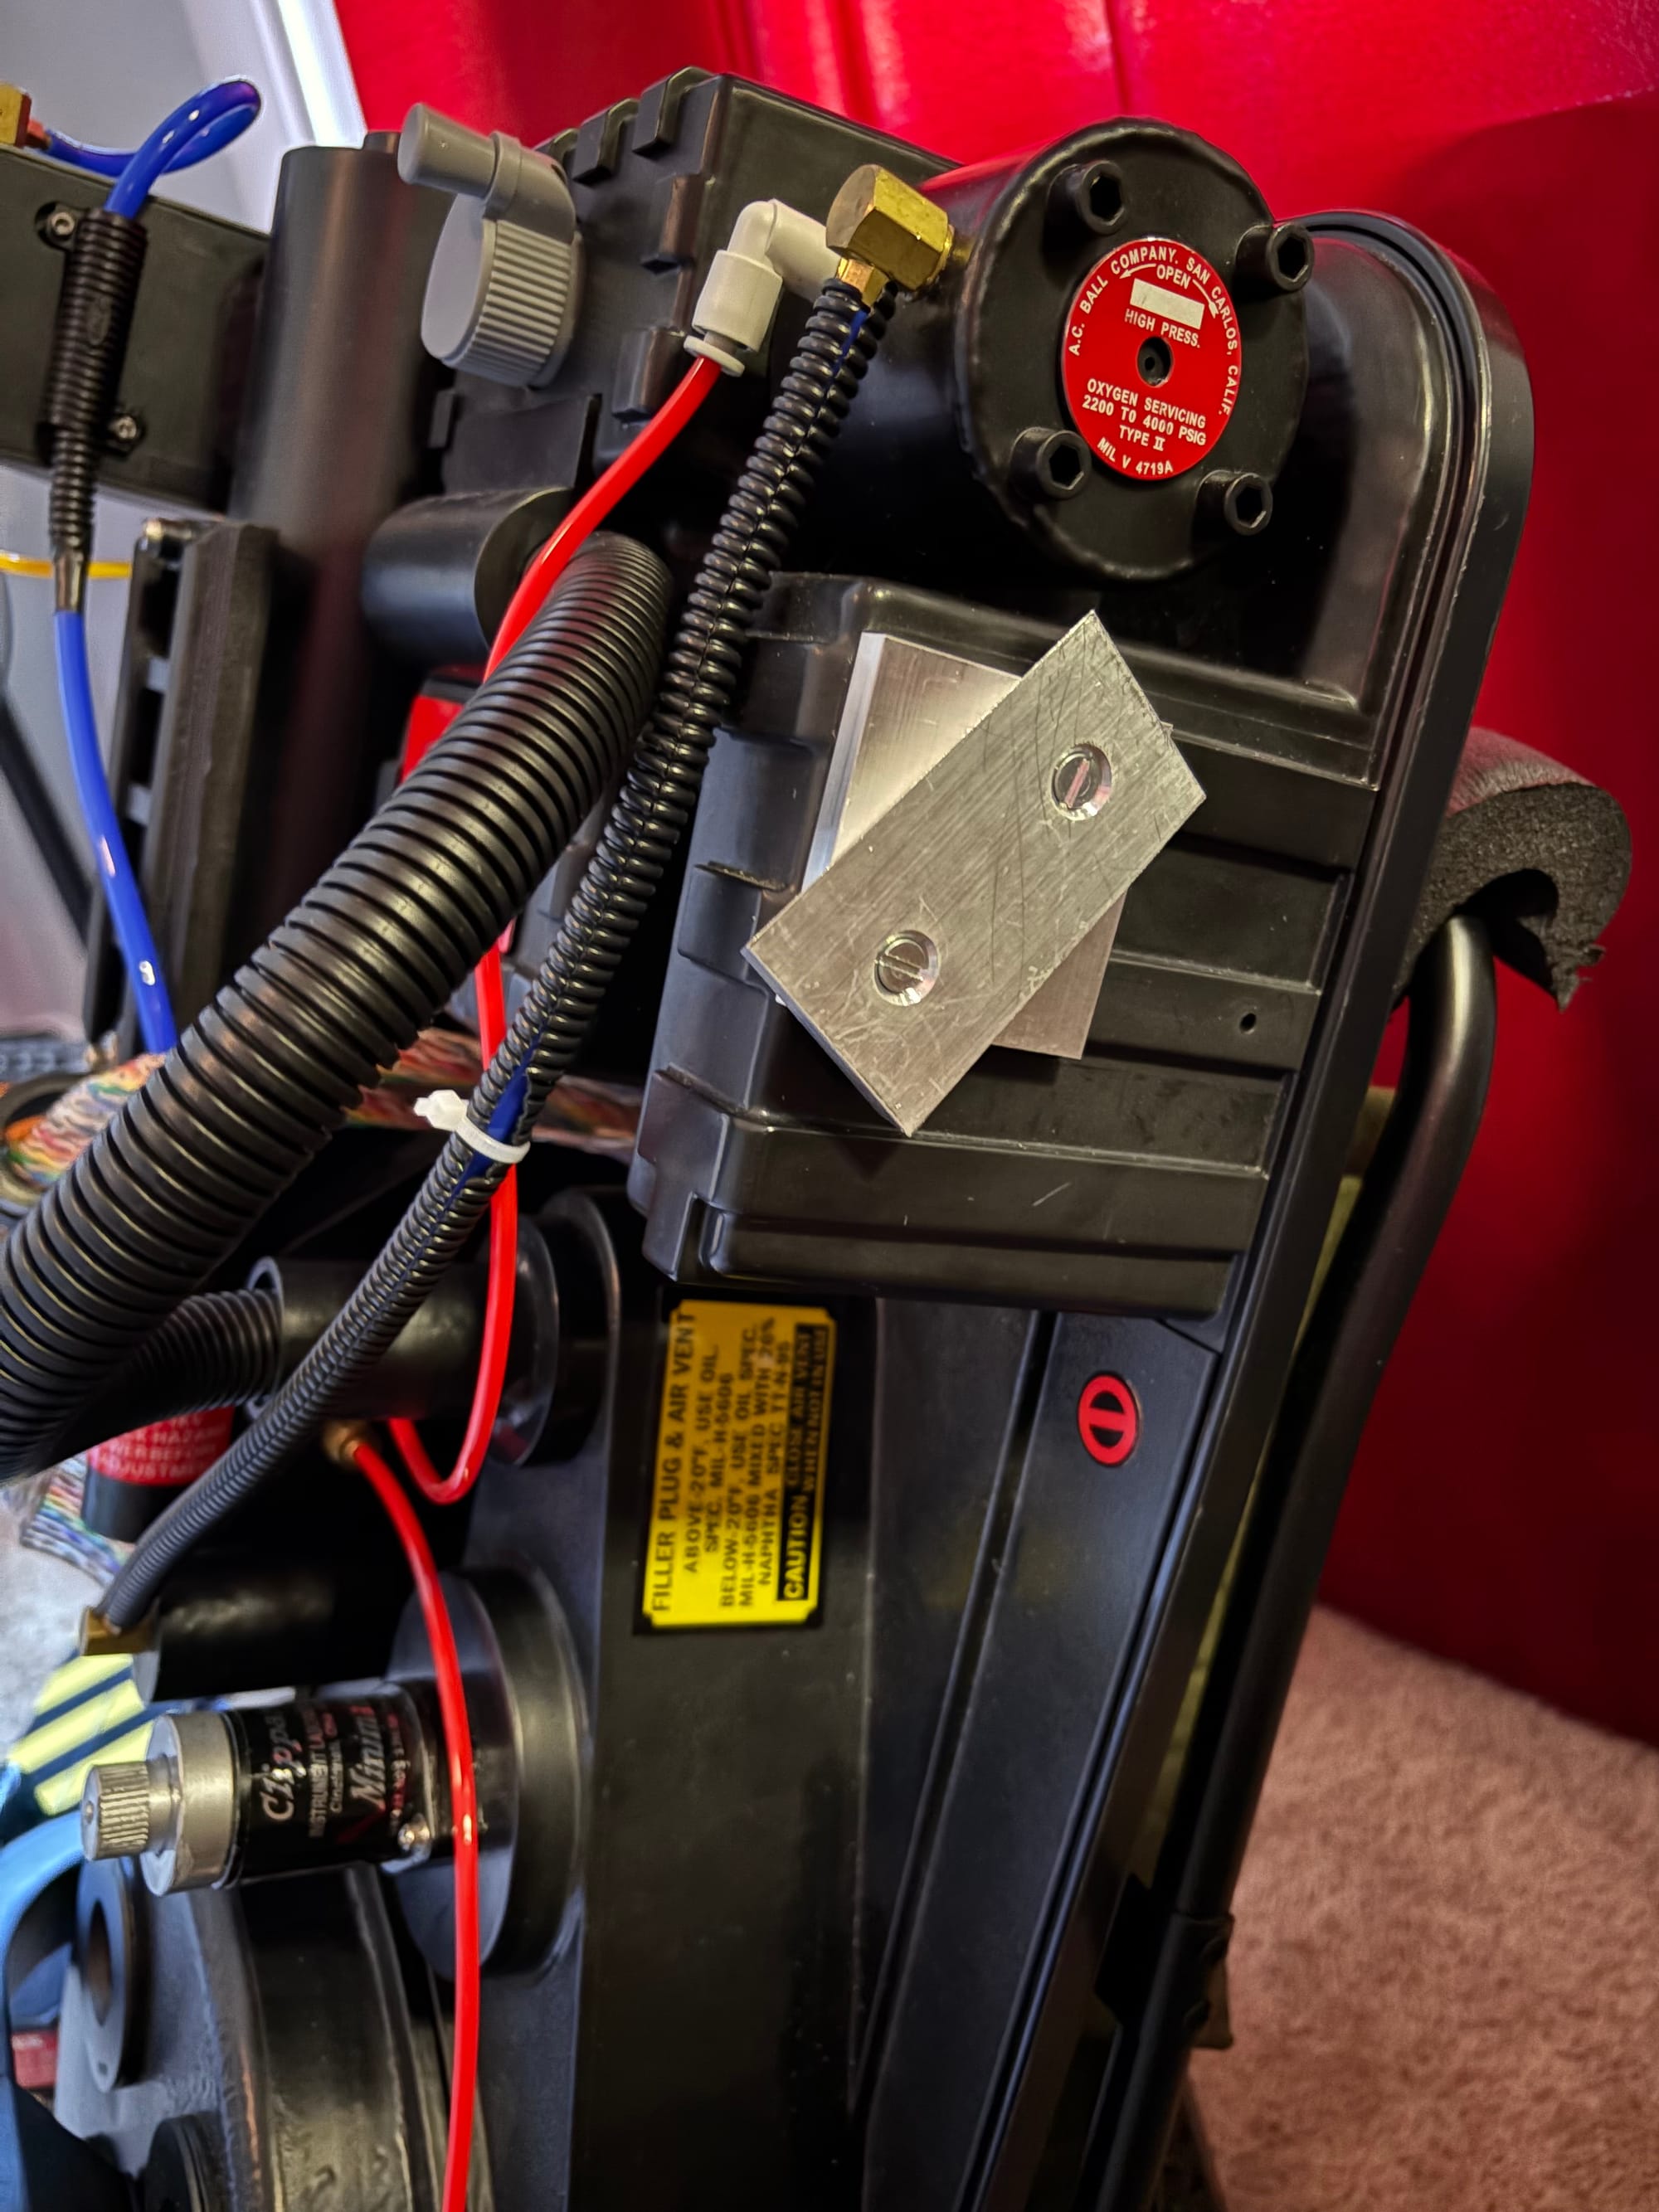
This new clamp from Charlesworth Dynamics is a cut aluminum hold-down that matches the stock Hasbro one that is plastic. This means it can use the same holes as the original and can apply enough pressure to the switch that activates the "alarm" for a loose cable. I was only supposed to slightly widen the holes, push in some expansion threads, and then attach it to the pack. This method makes it easy to remove. But it was tougher than it should have been; one side wouldn't line up, and when I got the little slot wide enough, it was too wide. But it did go into place, and it's holding fine. There was the option of using the bolts and having the whole thing held tight with nuts on the inside; if you never plan to change your ribbon cable again or care if you ever hear that alarm again, this is the smarter choice.
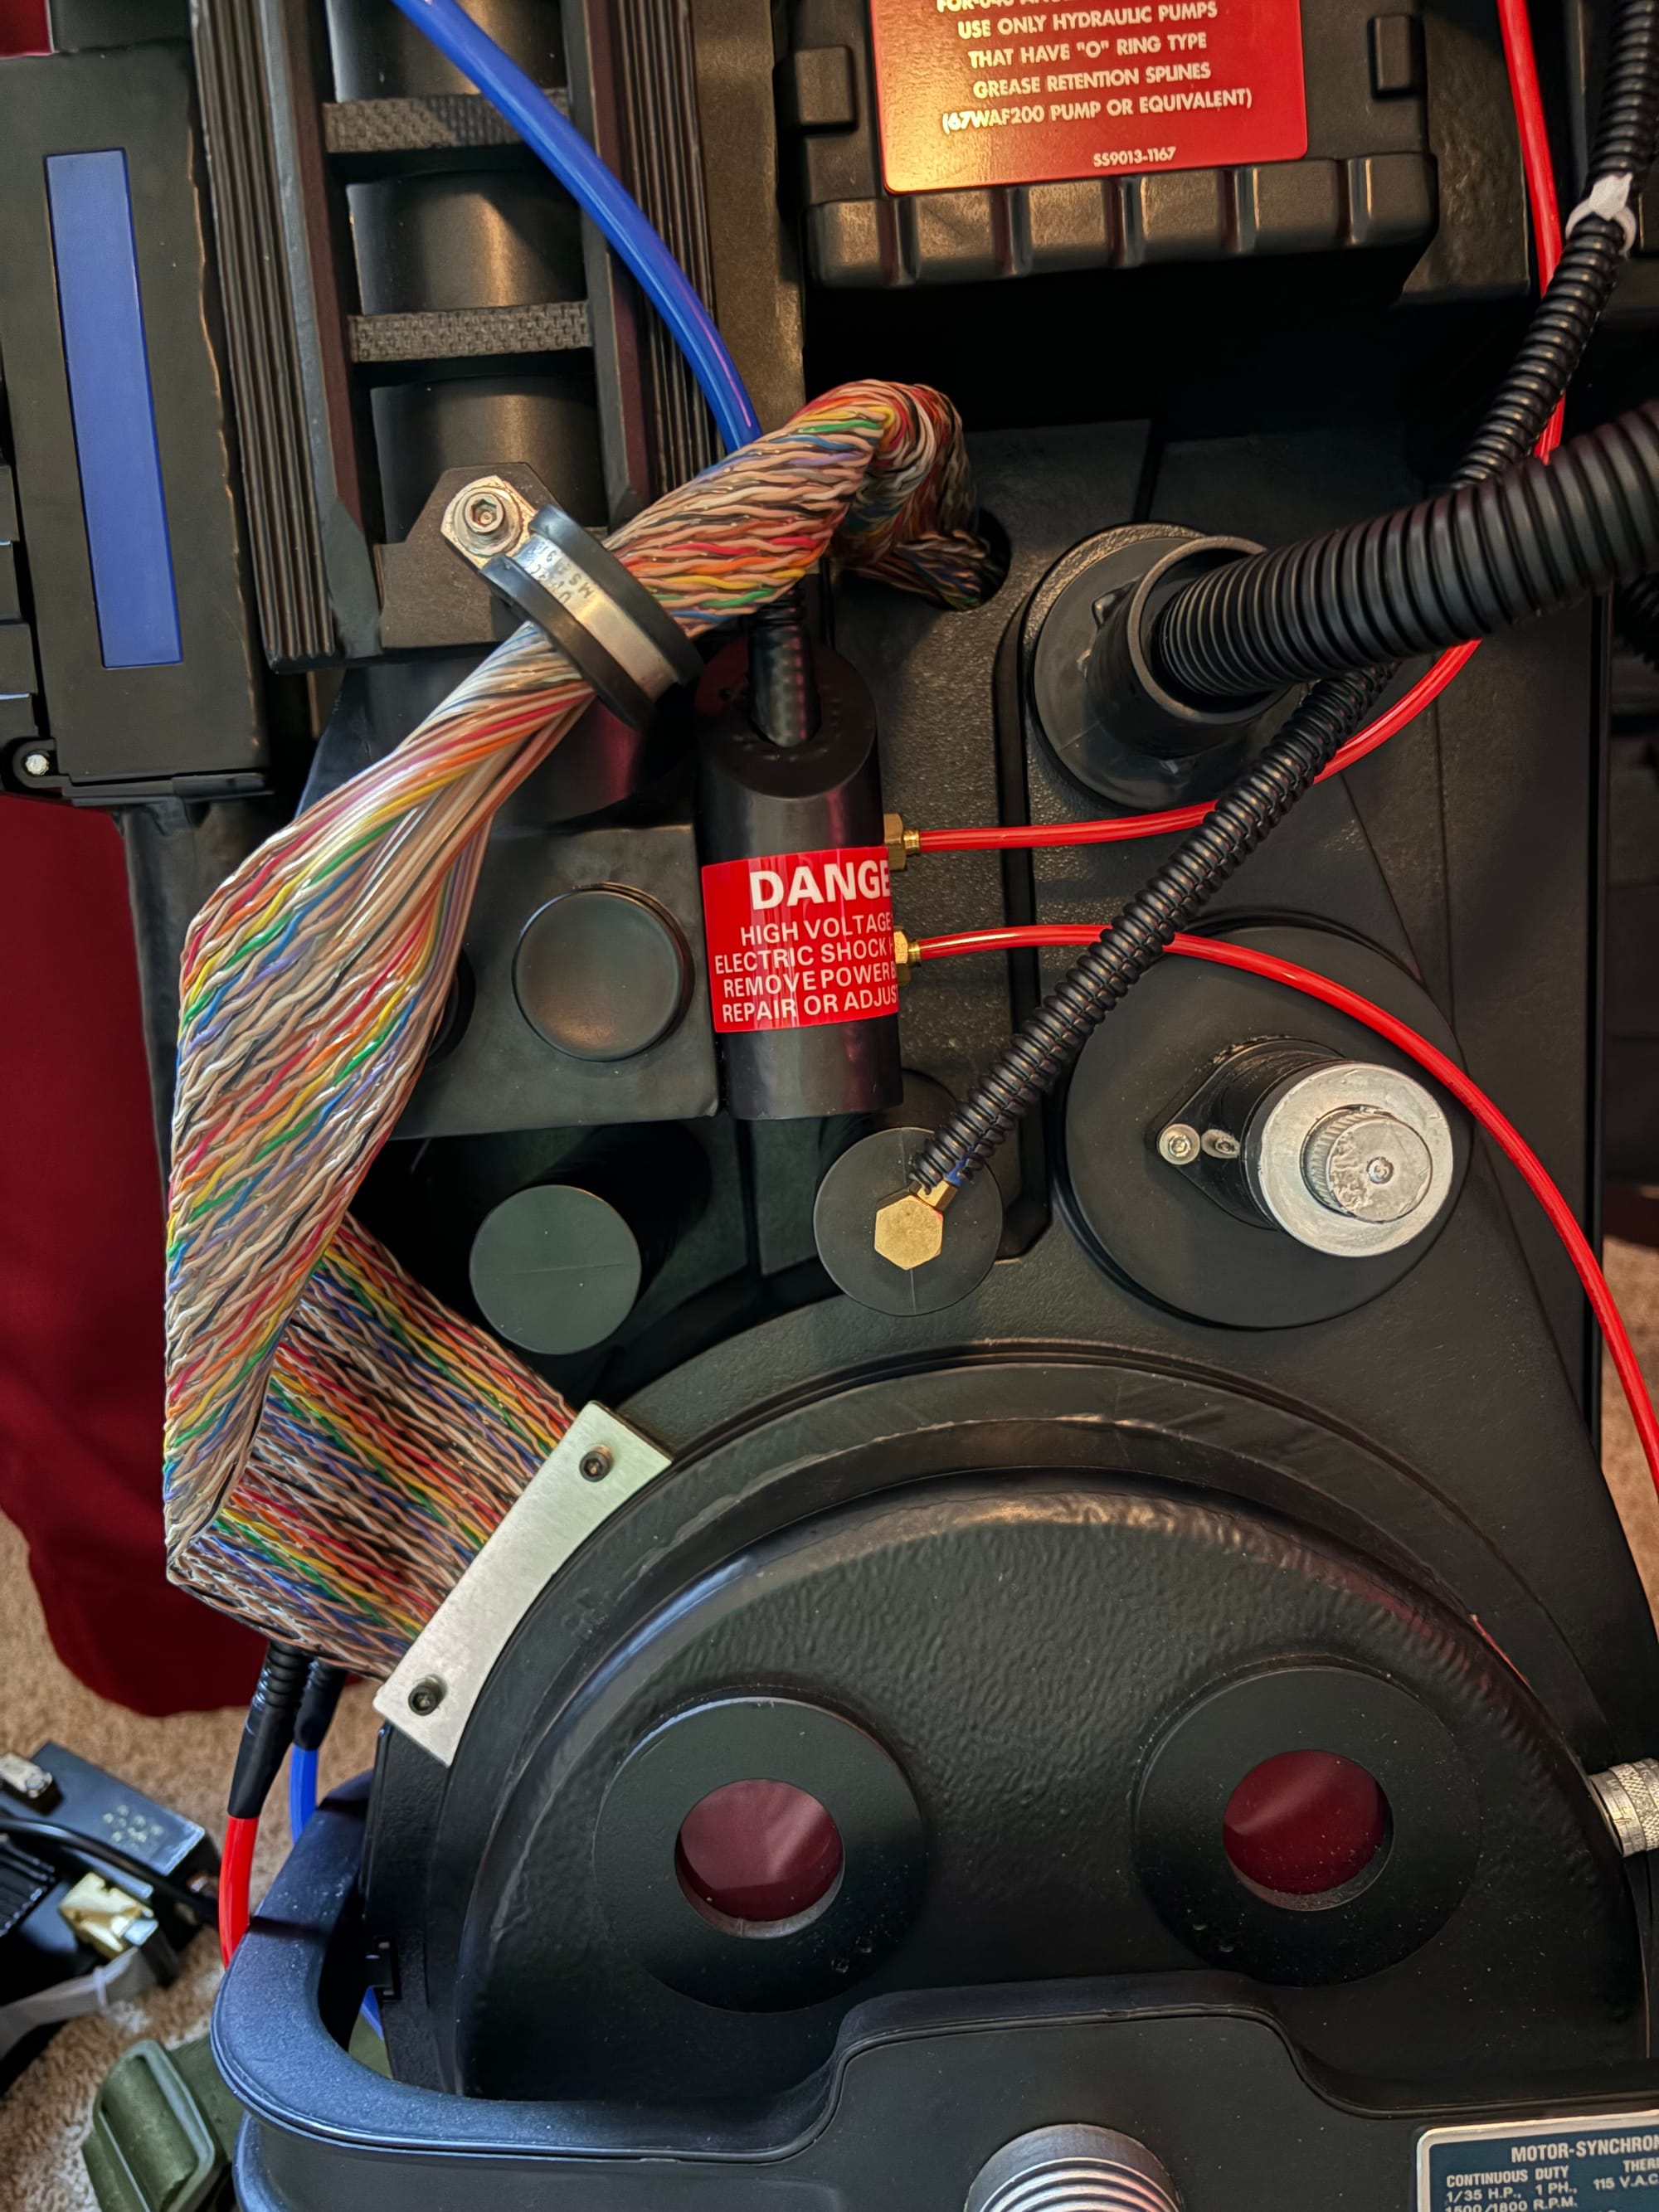
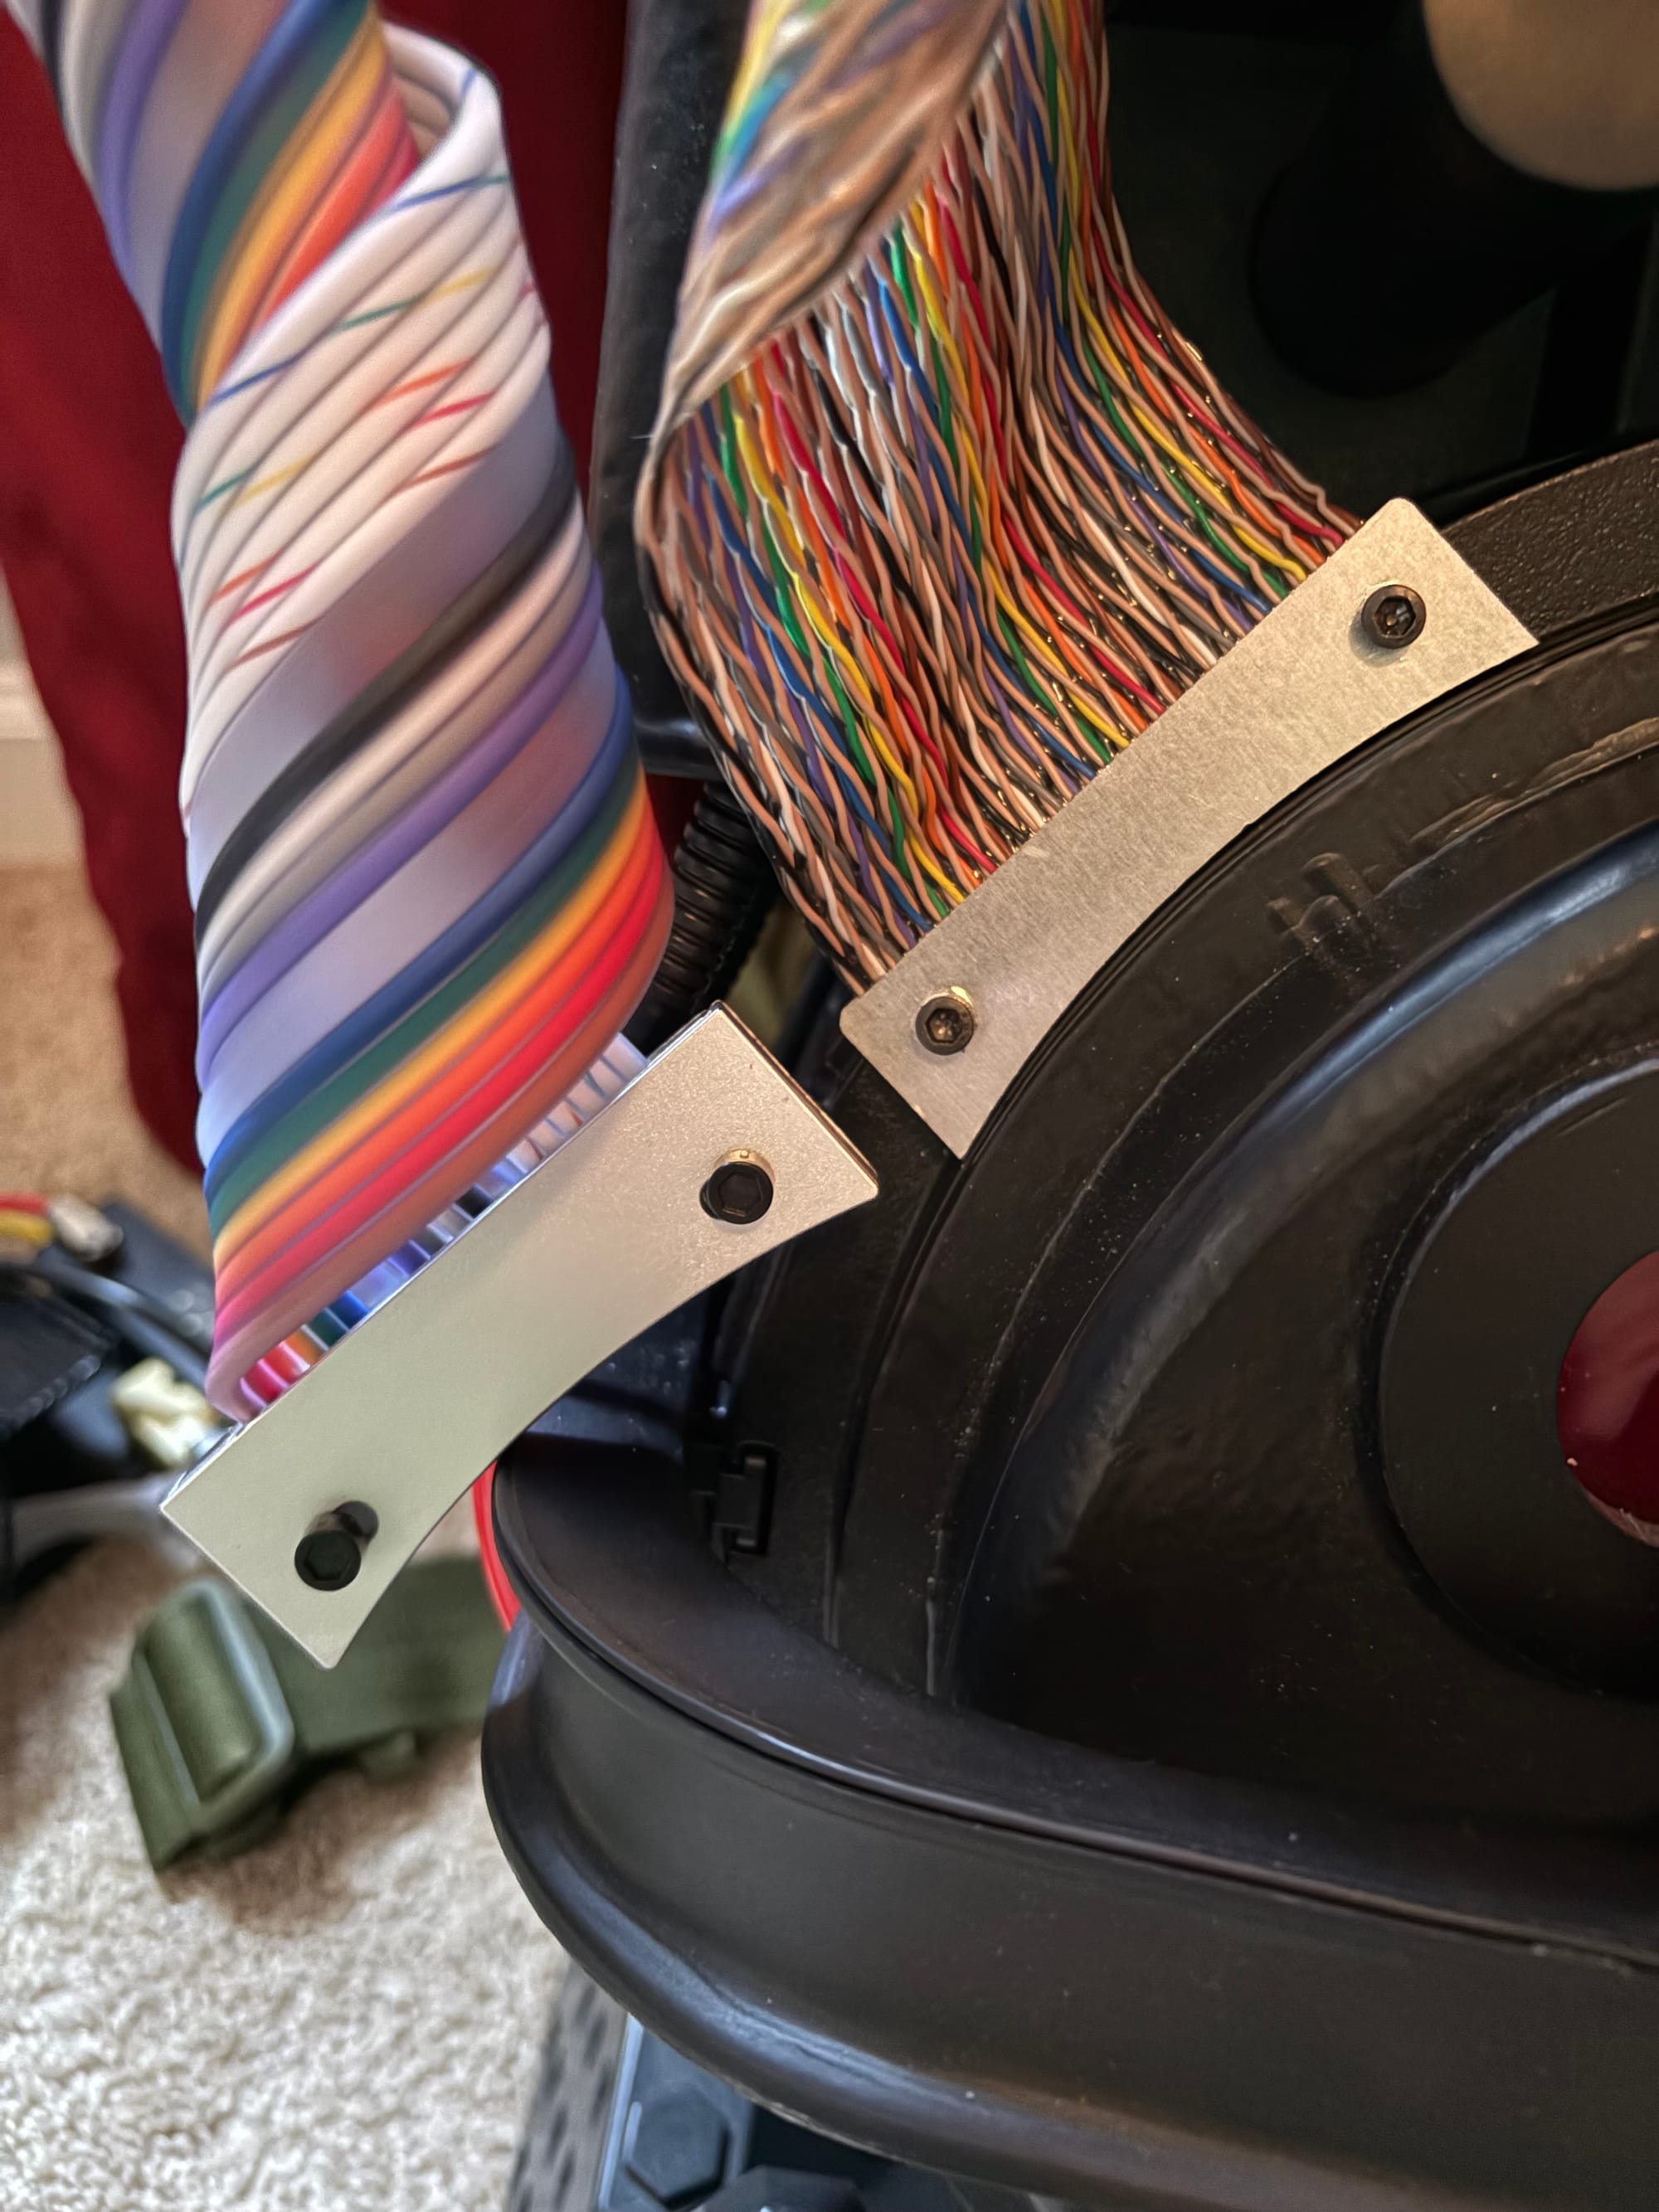
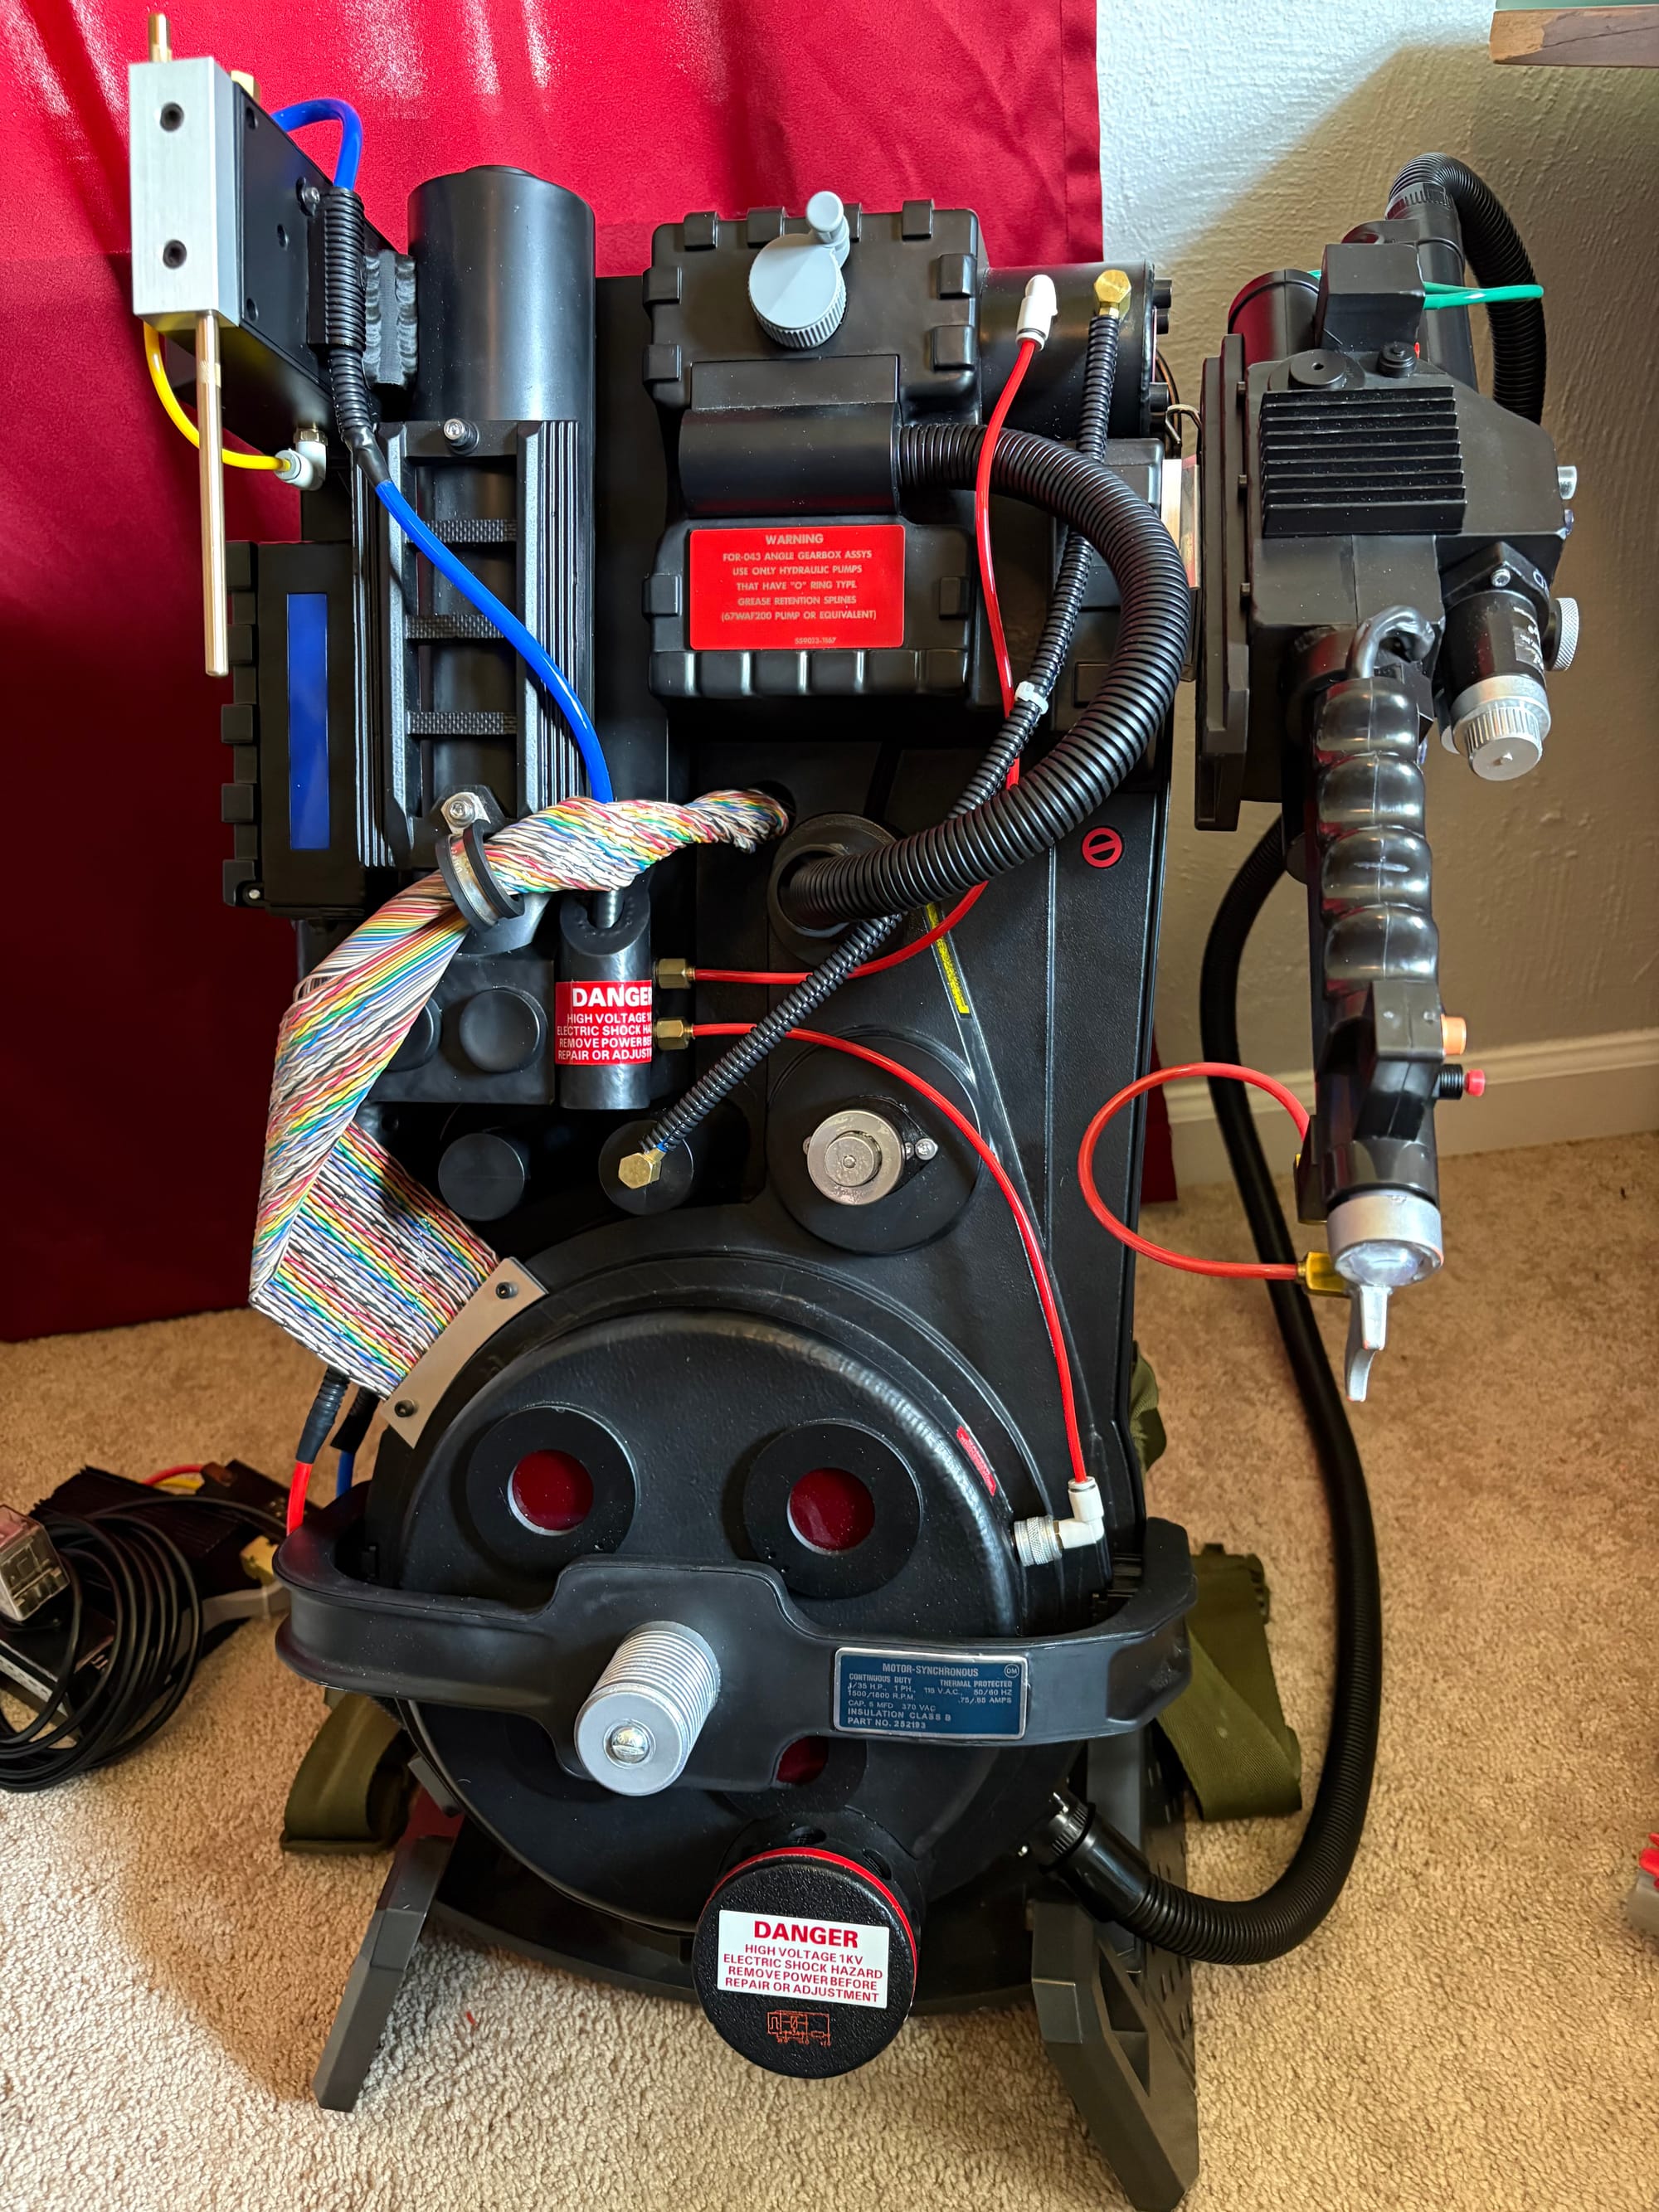
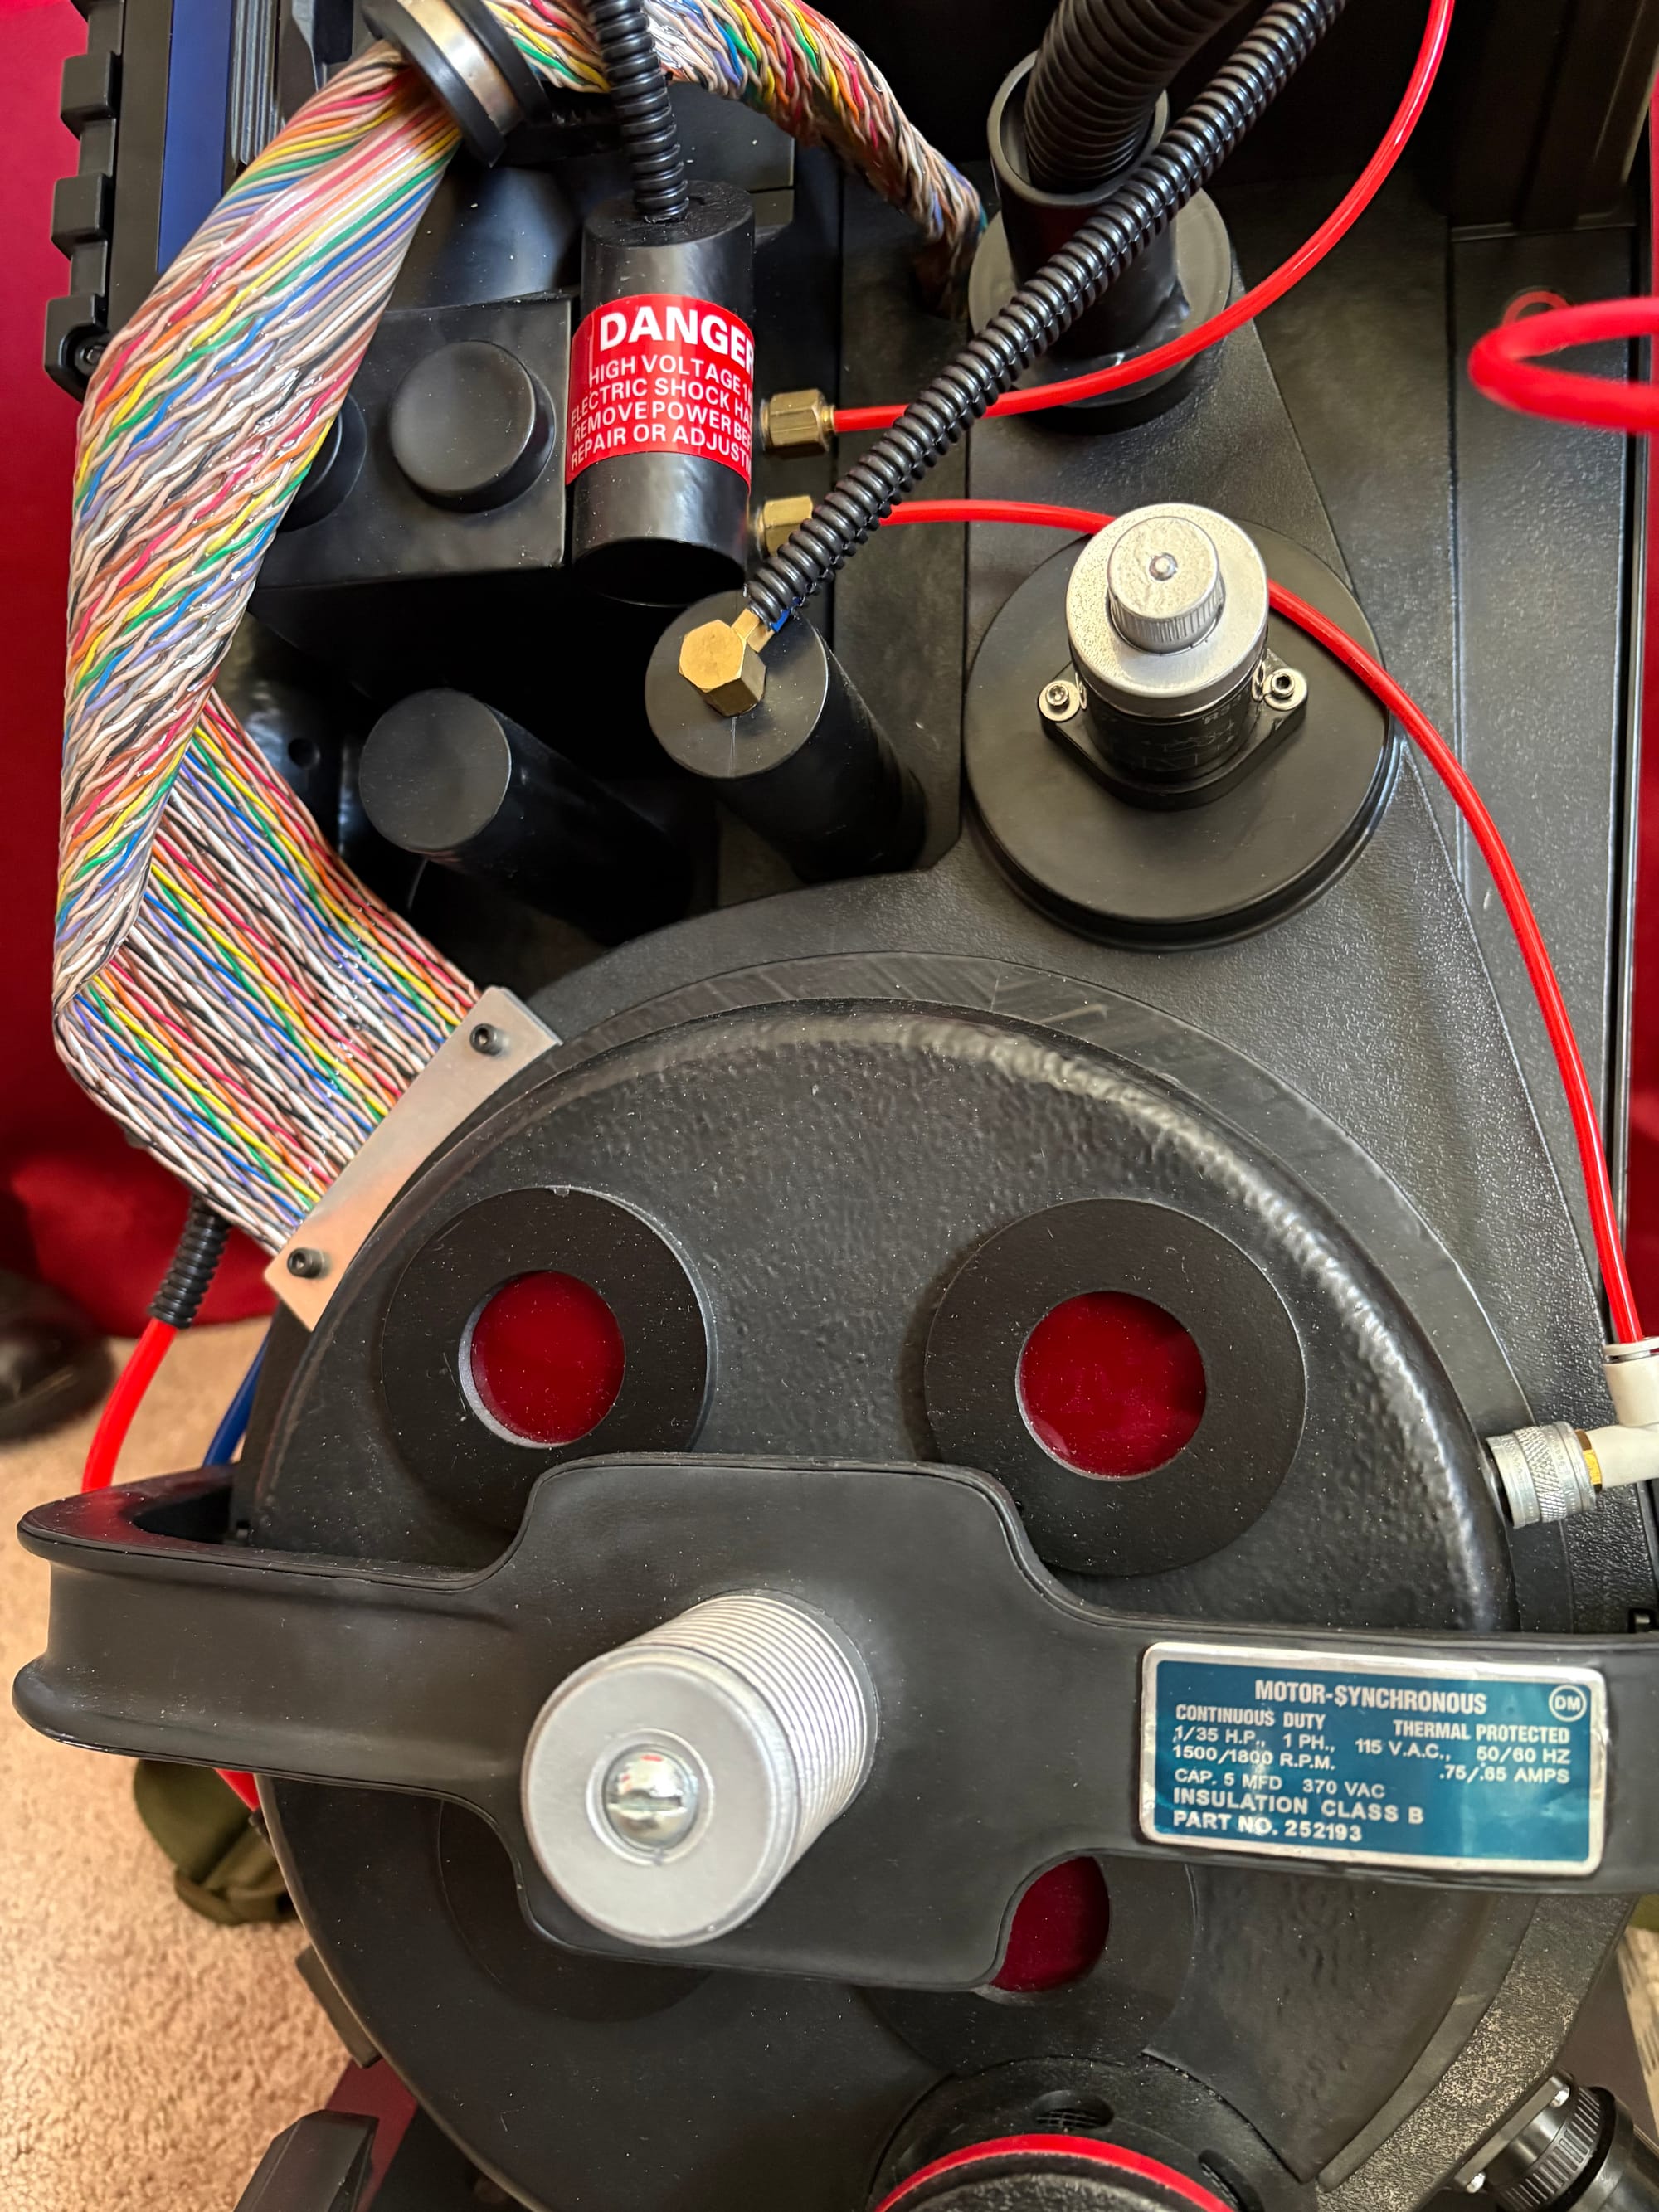
A beautiful GB2 ribbon cable and metal hold-down.
V-Hook
While I was inside the pack, I also changed out the V-Hook. The original functions but tends to stick and is basically impossible to reholster when wearing the pack. It is also surprisingly easy to knock off the pack. So I grabbed a new version from Tools & Talent Props, which works with the stock V-Hook on the Spangler thrower–so no need to change both. It also offers a deeper tilt (or cant), so it is easier to pull off and reholster. The GB2 packs also had a deeper tilt compared the near vertical Gb1 style; while this is even further than the GB2 packs it still serves as making the pack a little closer the Gb2 pack like I want. All you need to do is remove the original, drill the new hole if you want that deeper tilt, thread through the bolts, and tighten with washers and nuts. Super easy switch-out, and the pack is much better for it.
I will say re-holstering is still a challenge, don't change it out and expect to immediately be able to slot that thrower back in place like a pro. It does work better and I have done it way more times than the original V-hook. But to be fair I was never able to do it with the original setup.
Semi-Hero Refinements
I was a little unhappy with how the tube connections came out; they worked, but they could be refined. I also needed to fix the resistors; one was over-drilled and loose, and the other broke. My replacement for the small Sage resistor hasn't arrived, so I'll skip fixing that for now. But for the larger Dale resistor, I removed it and filled the over-drilled hole with Milliput. Once it cured, I gave it a quick coat of black paint, then redrilled and attached it.
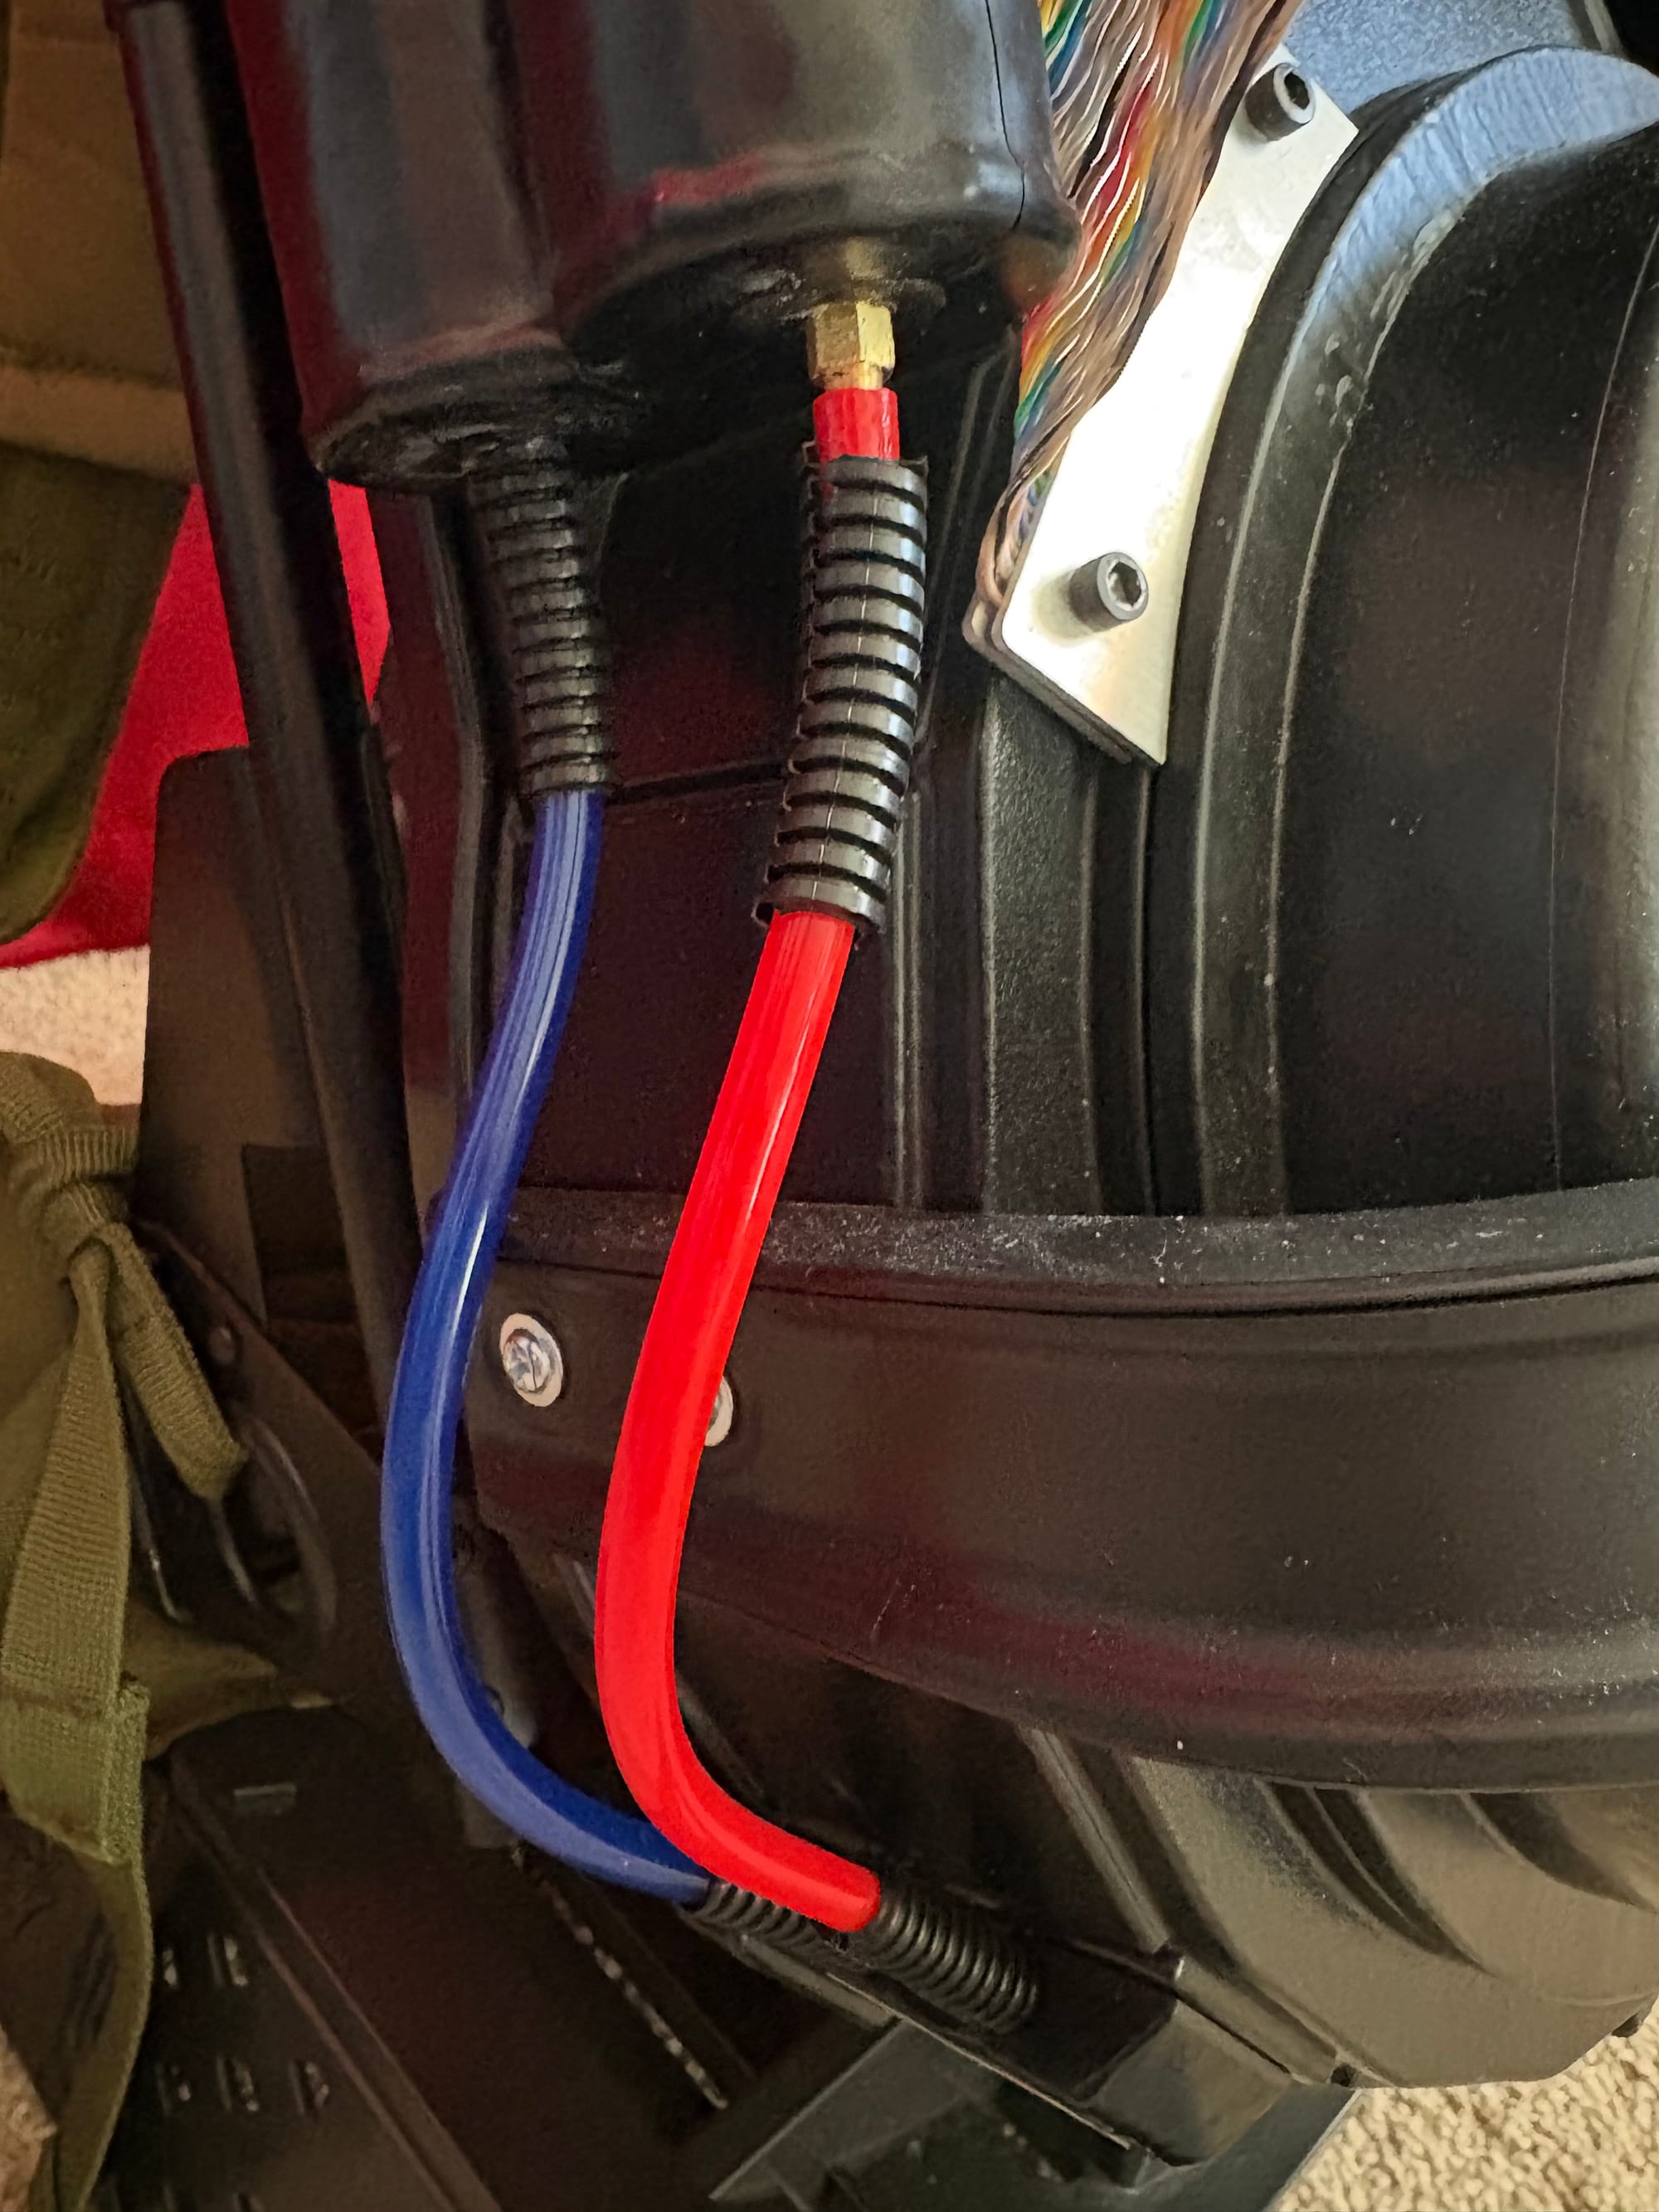
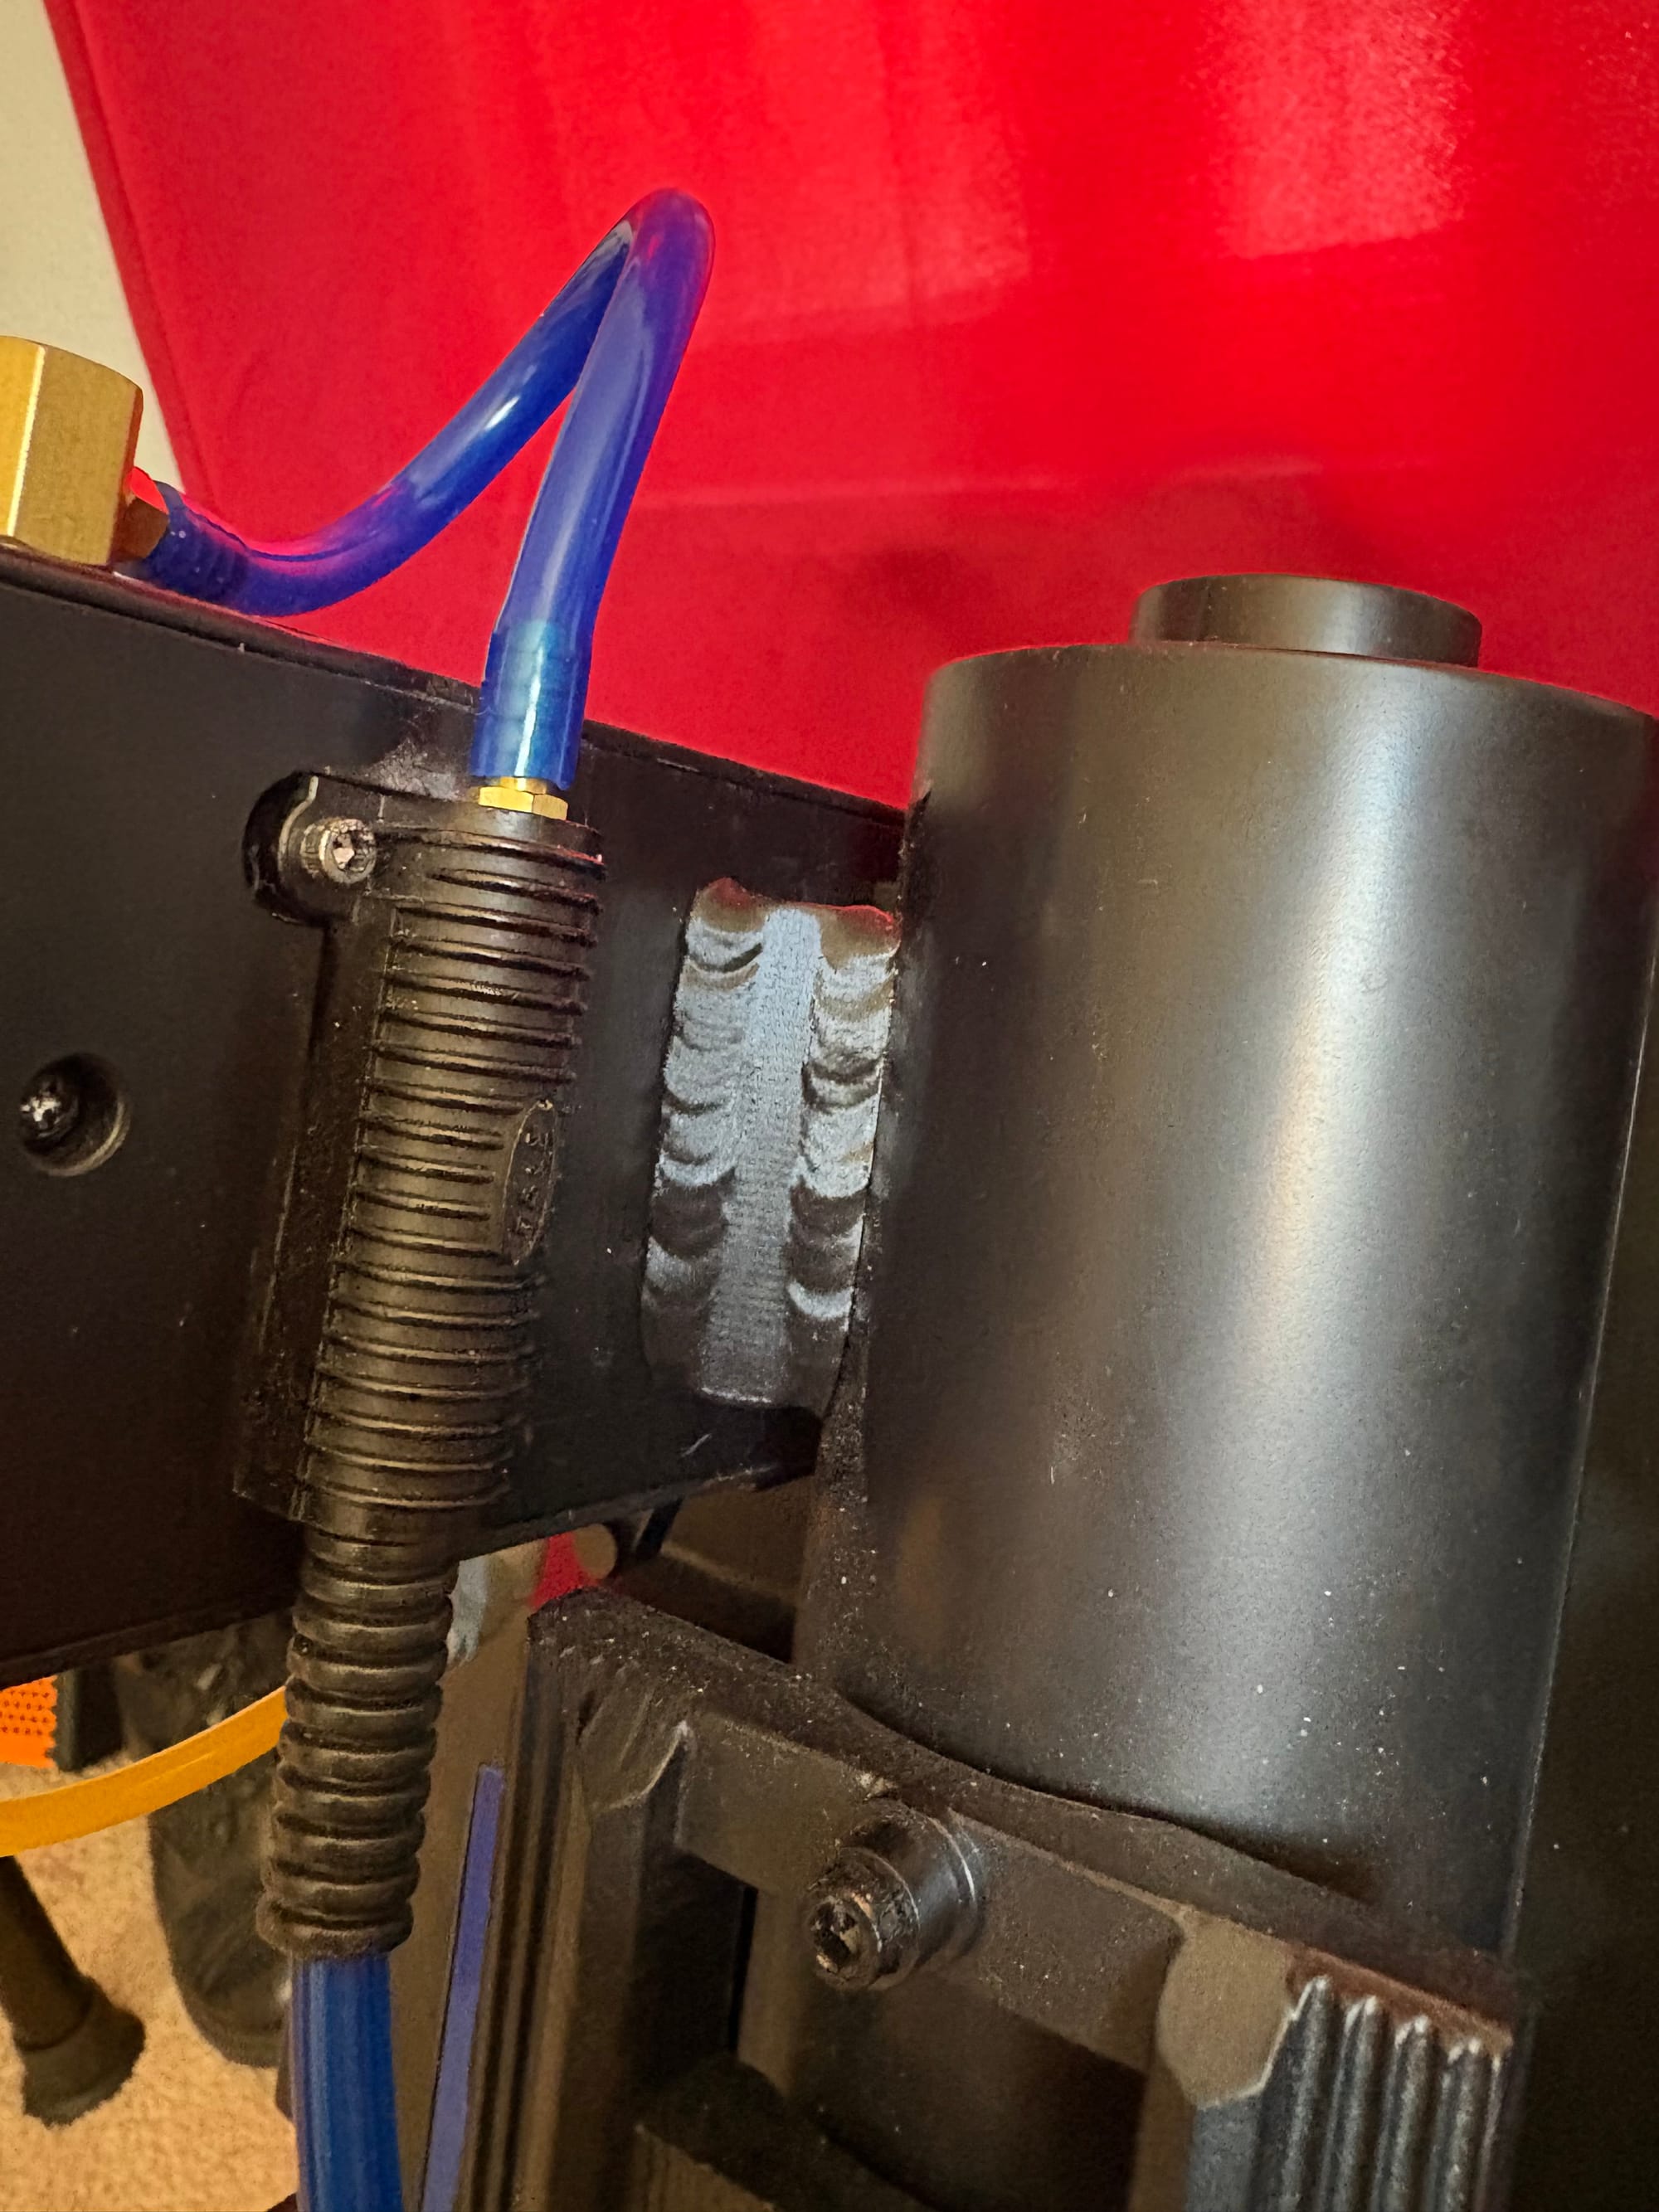
I also wanted to add a little touch from the Semi-Hero packs: the Clippard barbs holding the tube in place from that Dale resistor. I wanted to run that idea to other spots, too. So I drilled out the top of my Dale resistor a bit more, and pressure-fit the barb with a touch of glue. I originally used the stock hole on the PPD, as the split loom kept it in place well enough. But I wanted to clean that up, so I applied Milliput and let it cure before painting it black. Was I going to drill a hole and use a barb? I had intended to, but I ordered one too few barbs, so I drilled out the new spot to the exact size it needed and got a tight fit for the tubing this time. I also angled it a bit and ran it along the outside of the ribbon cable, again close to the Semi-Hero packs.
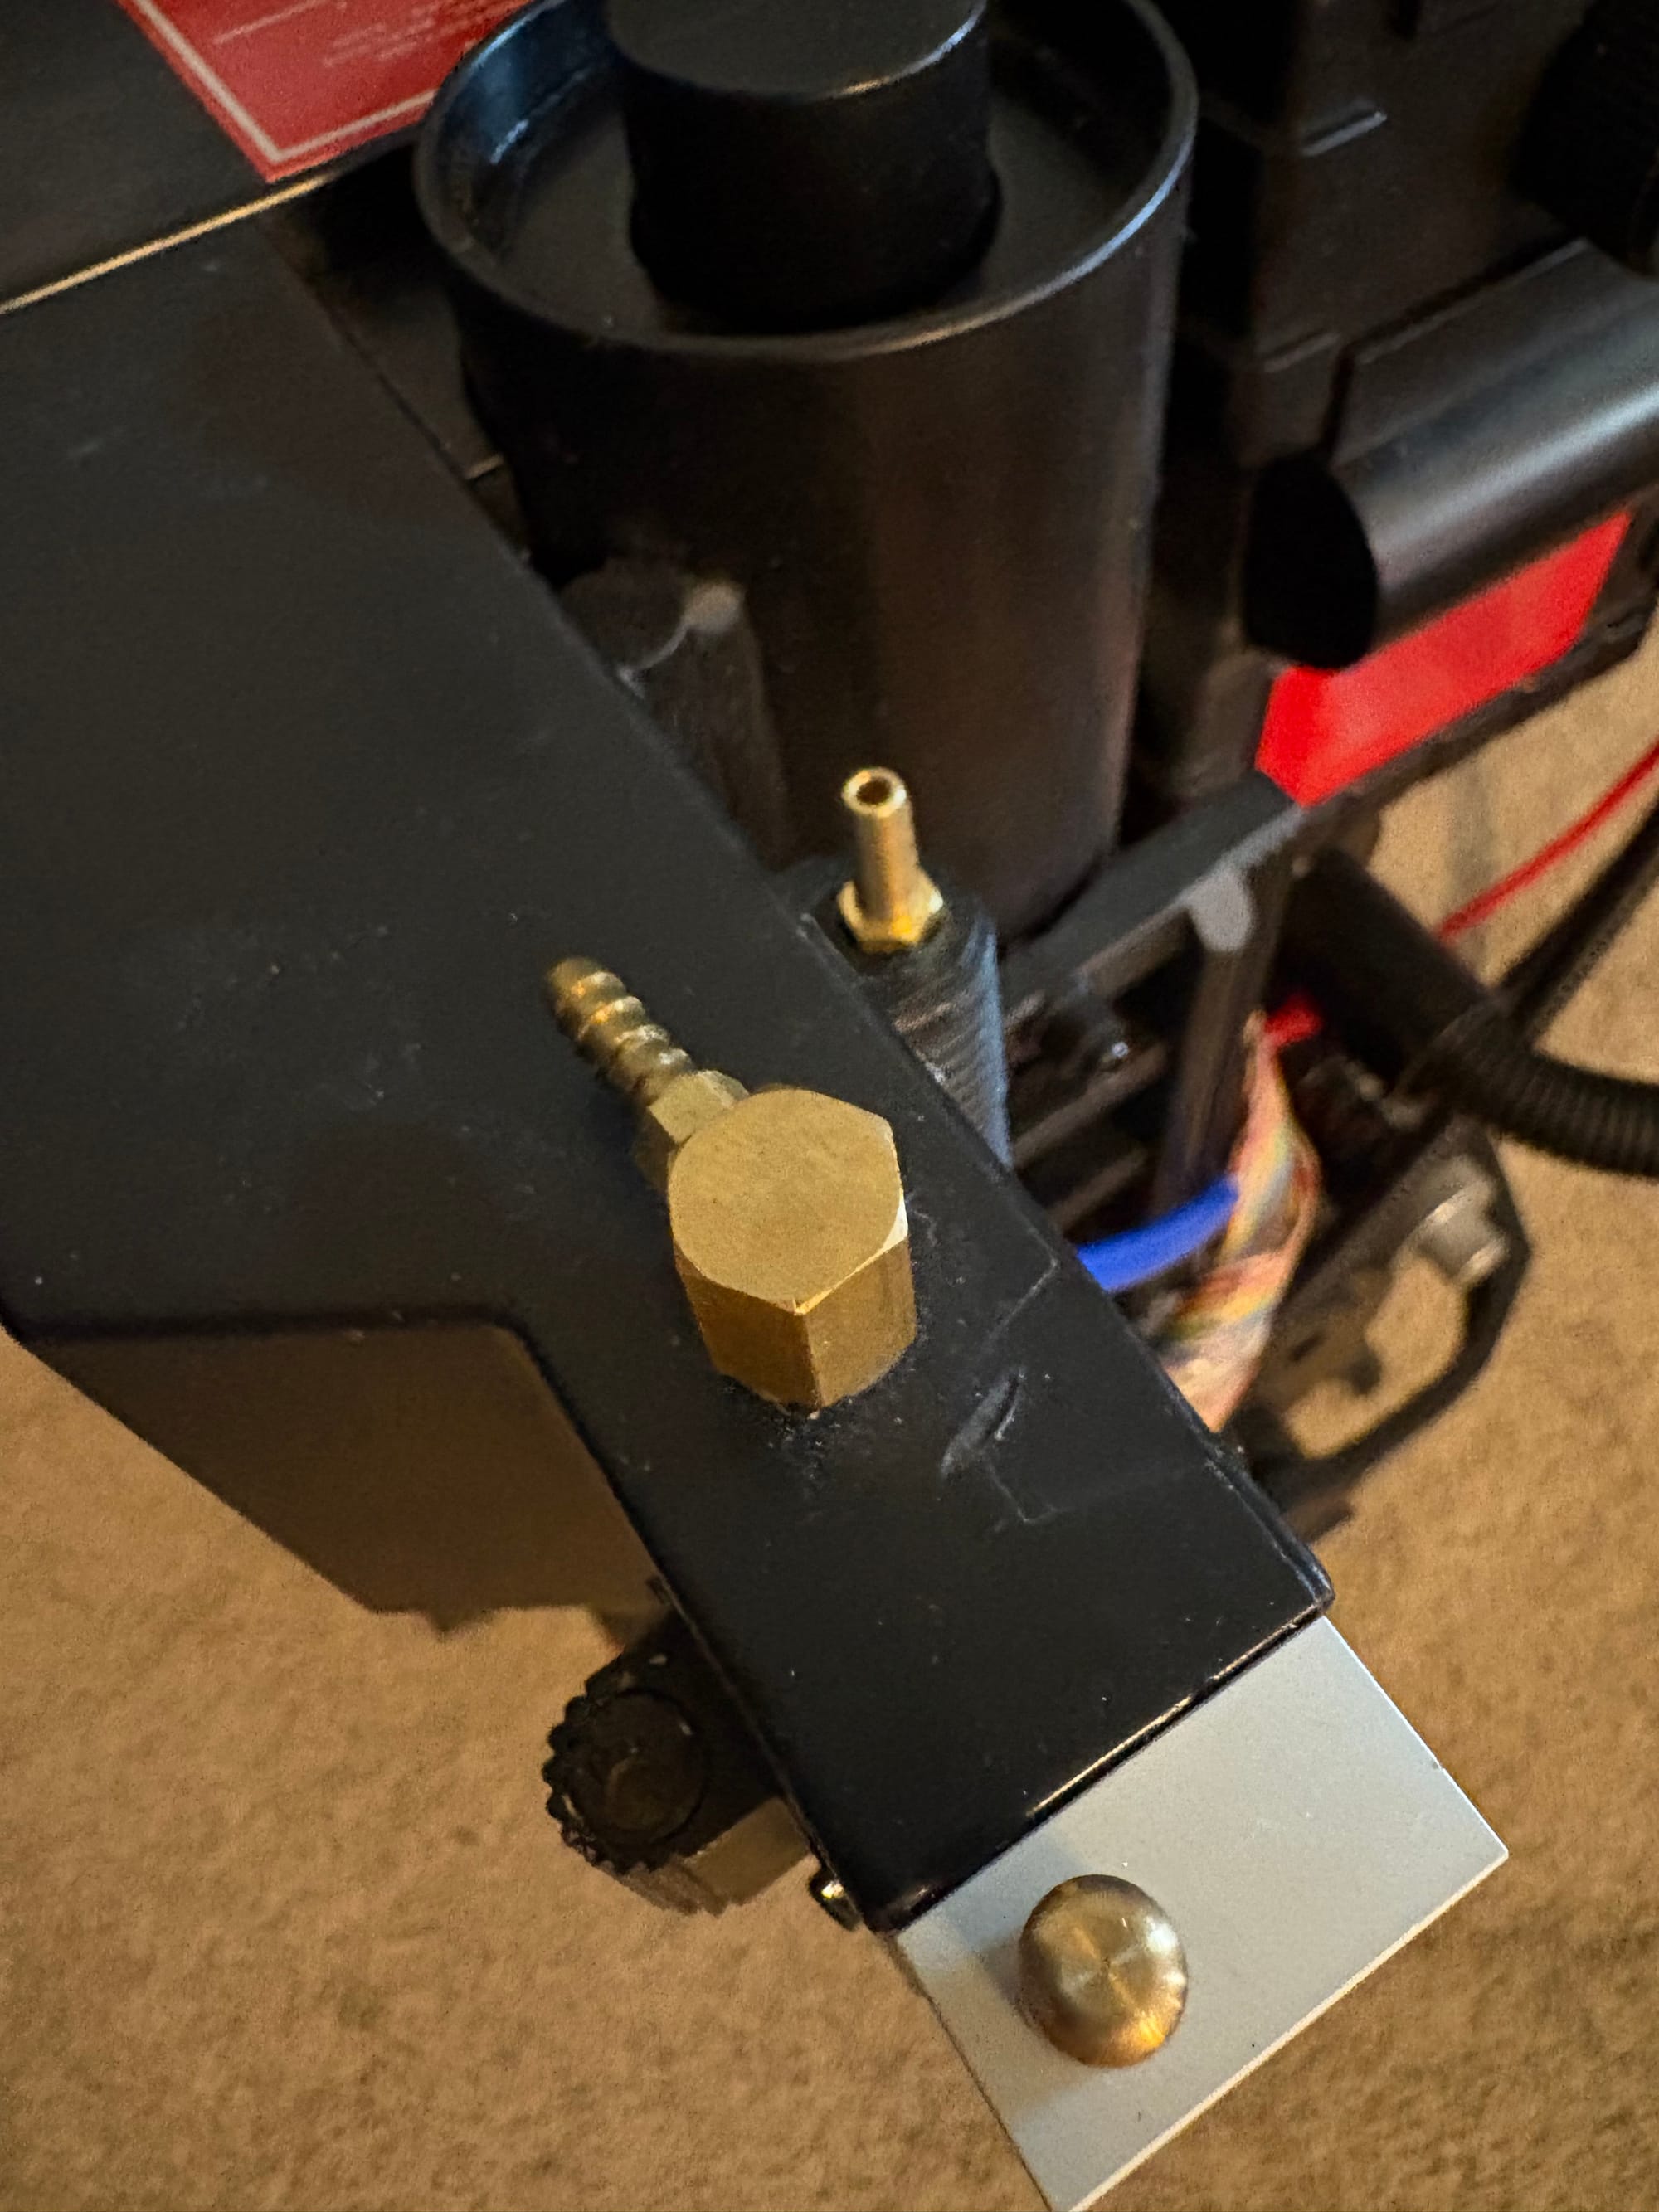
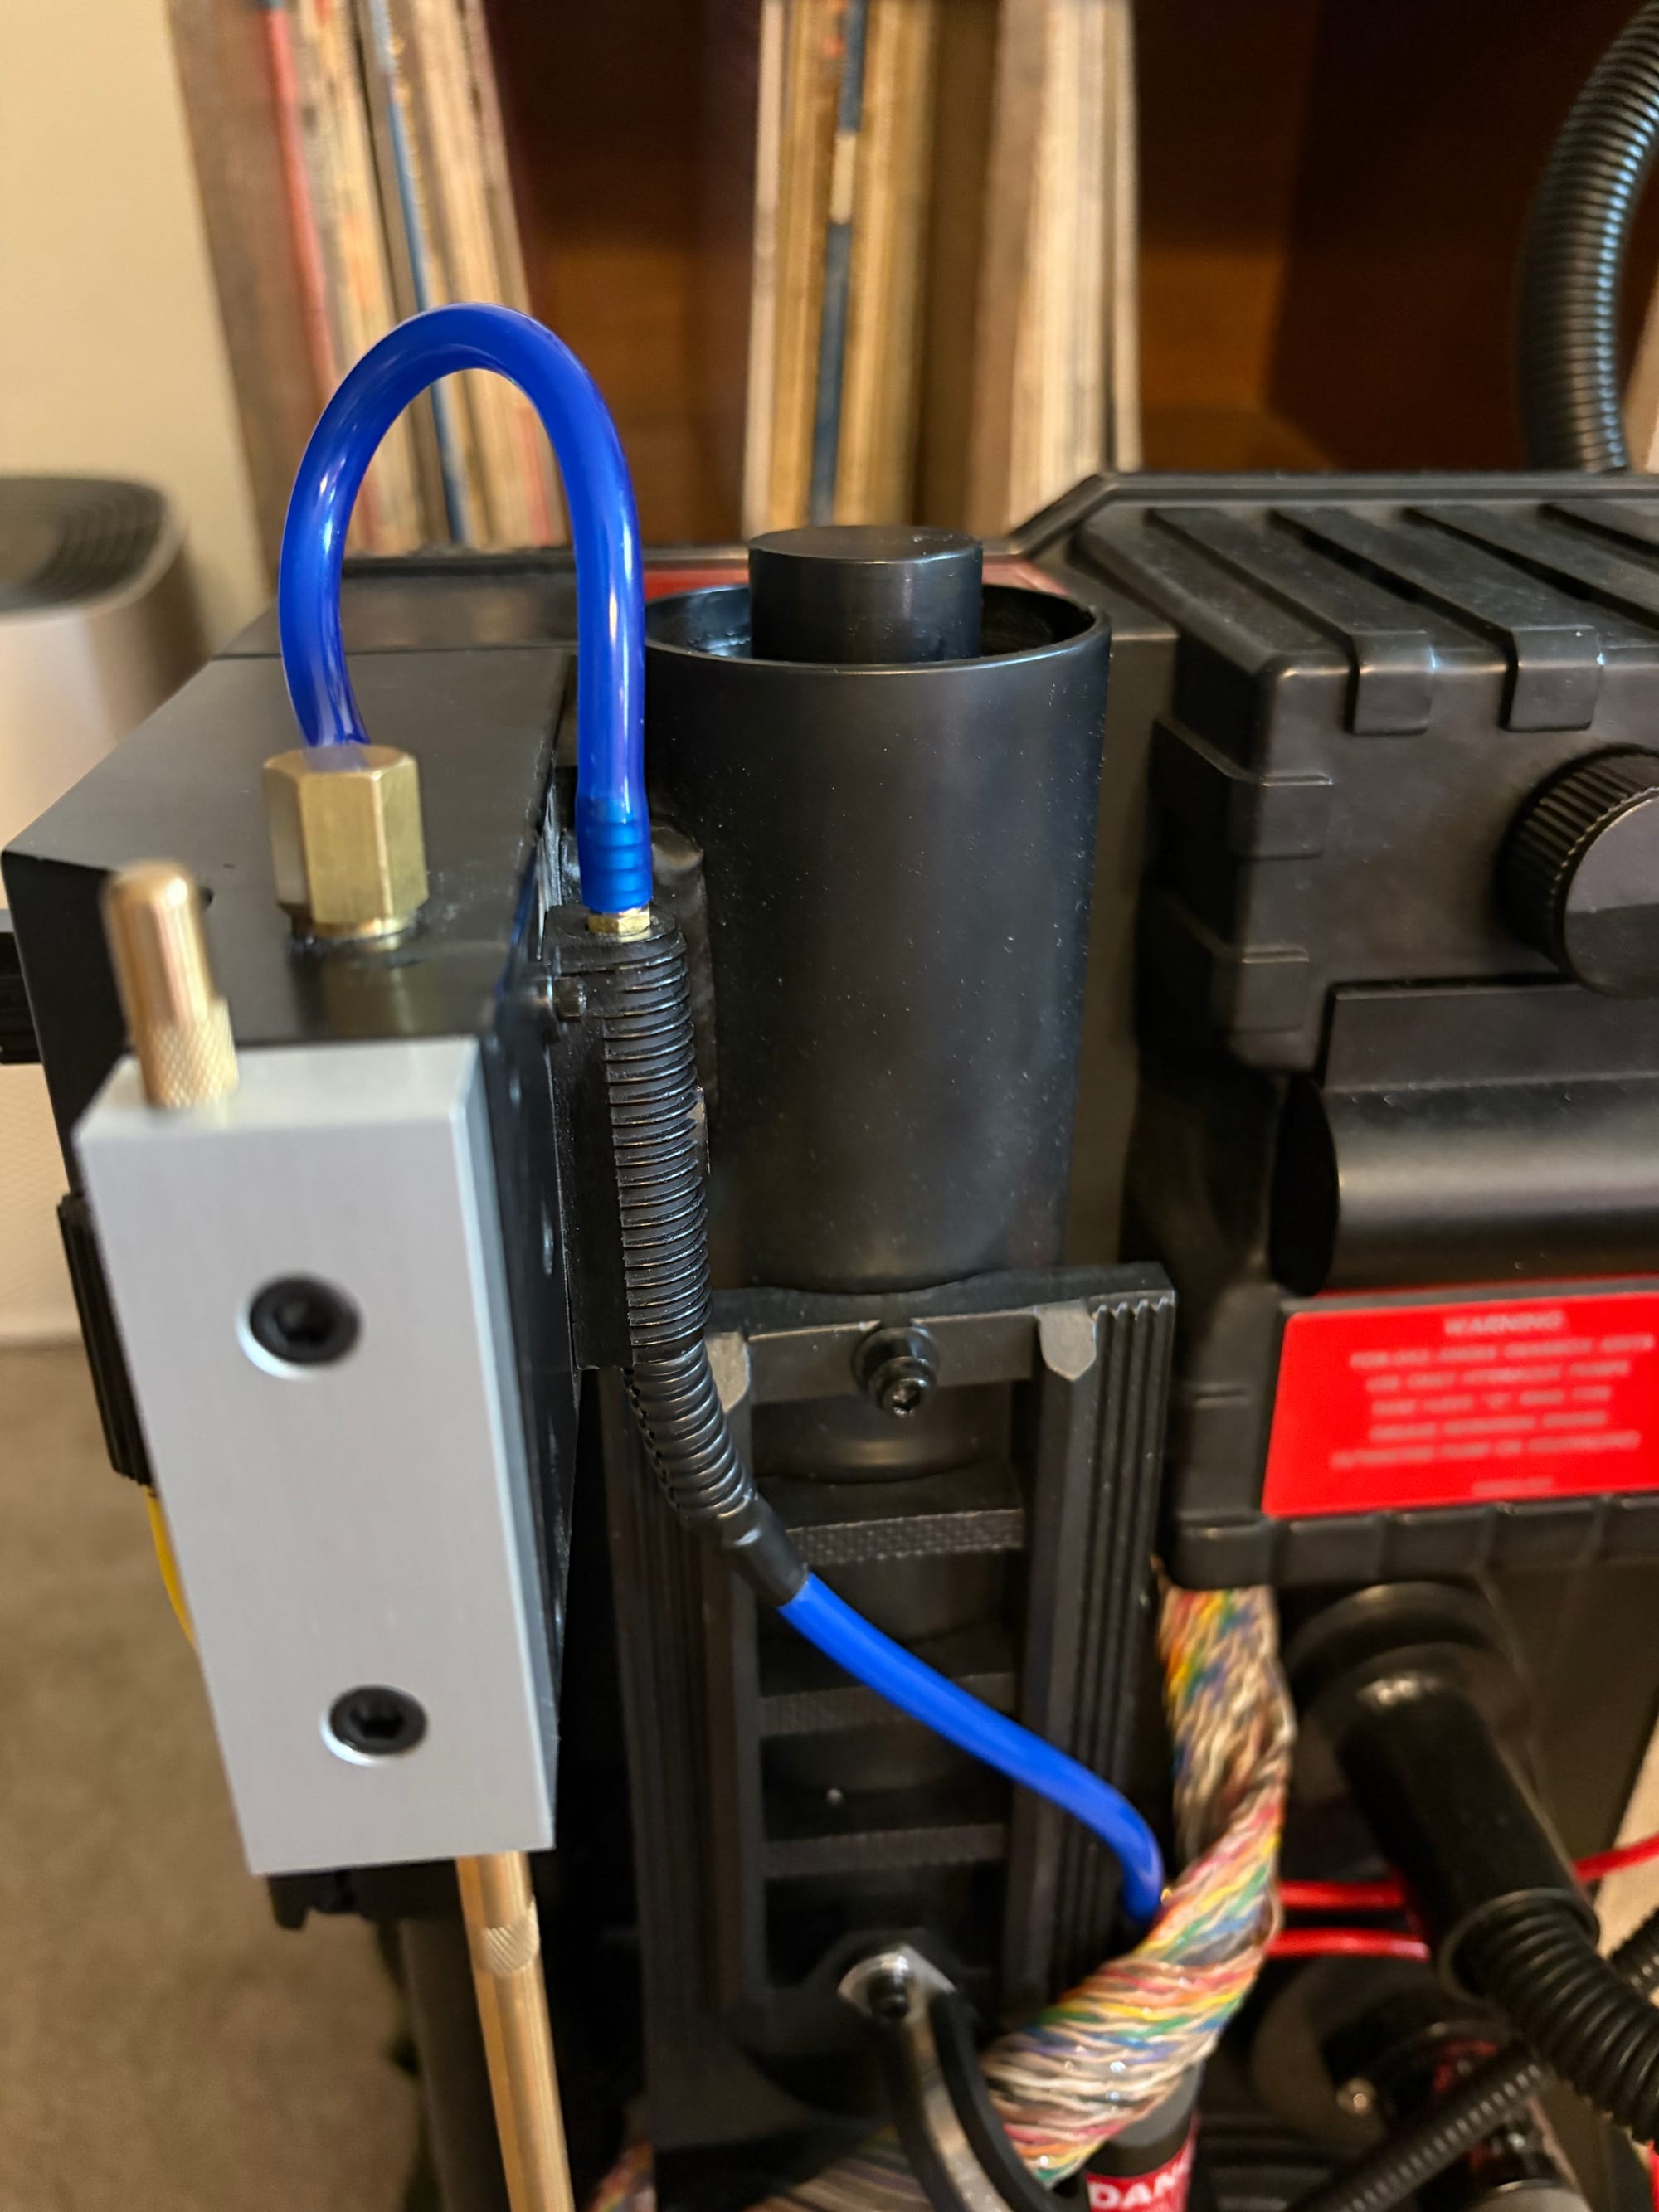
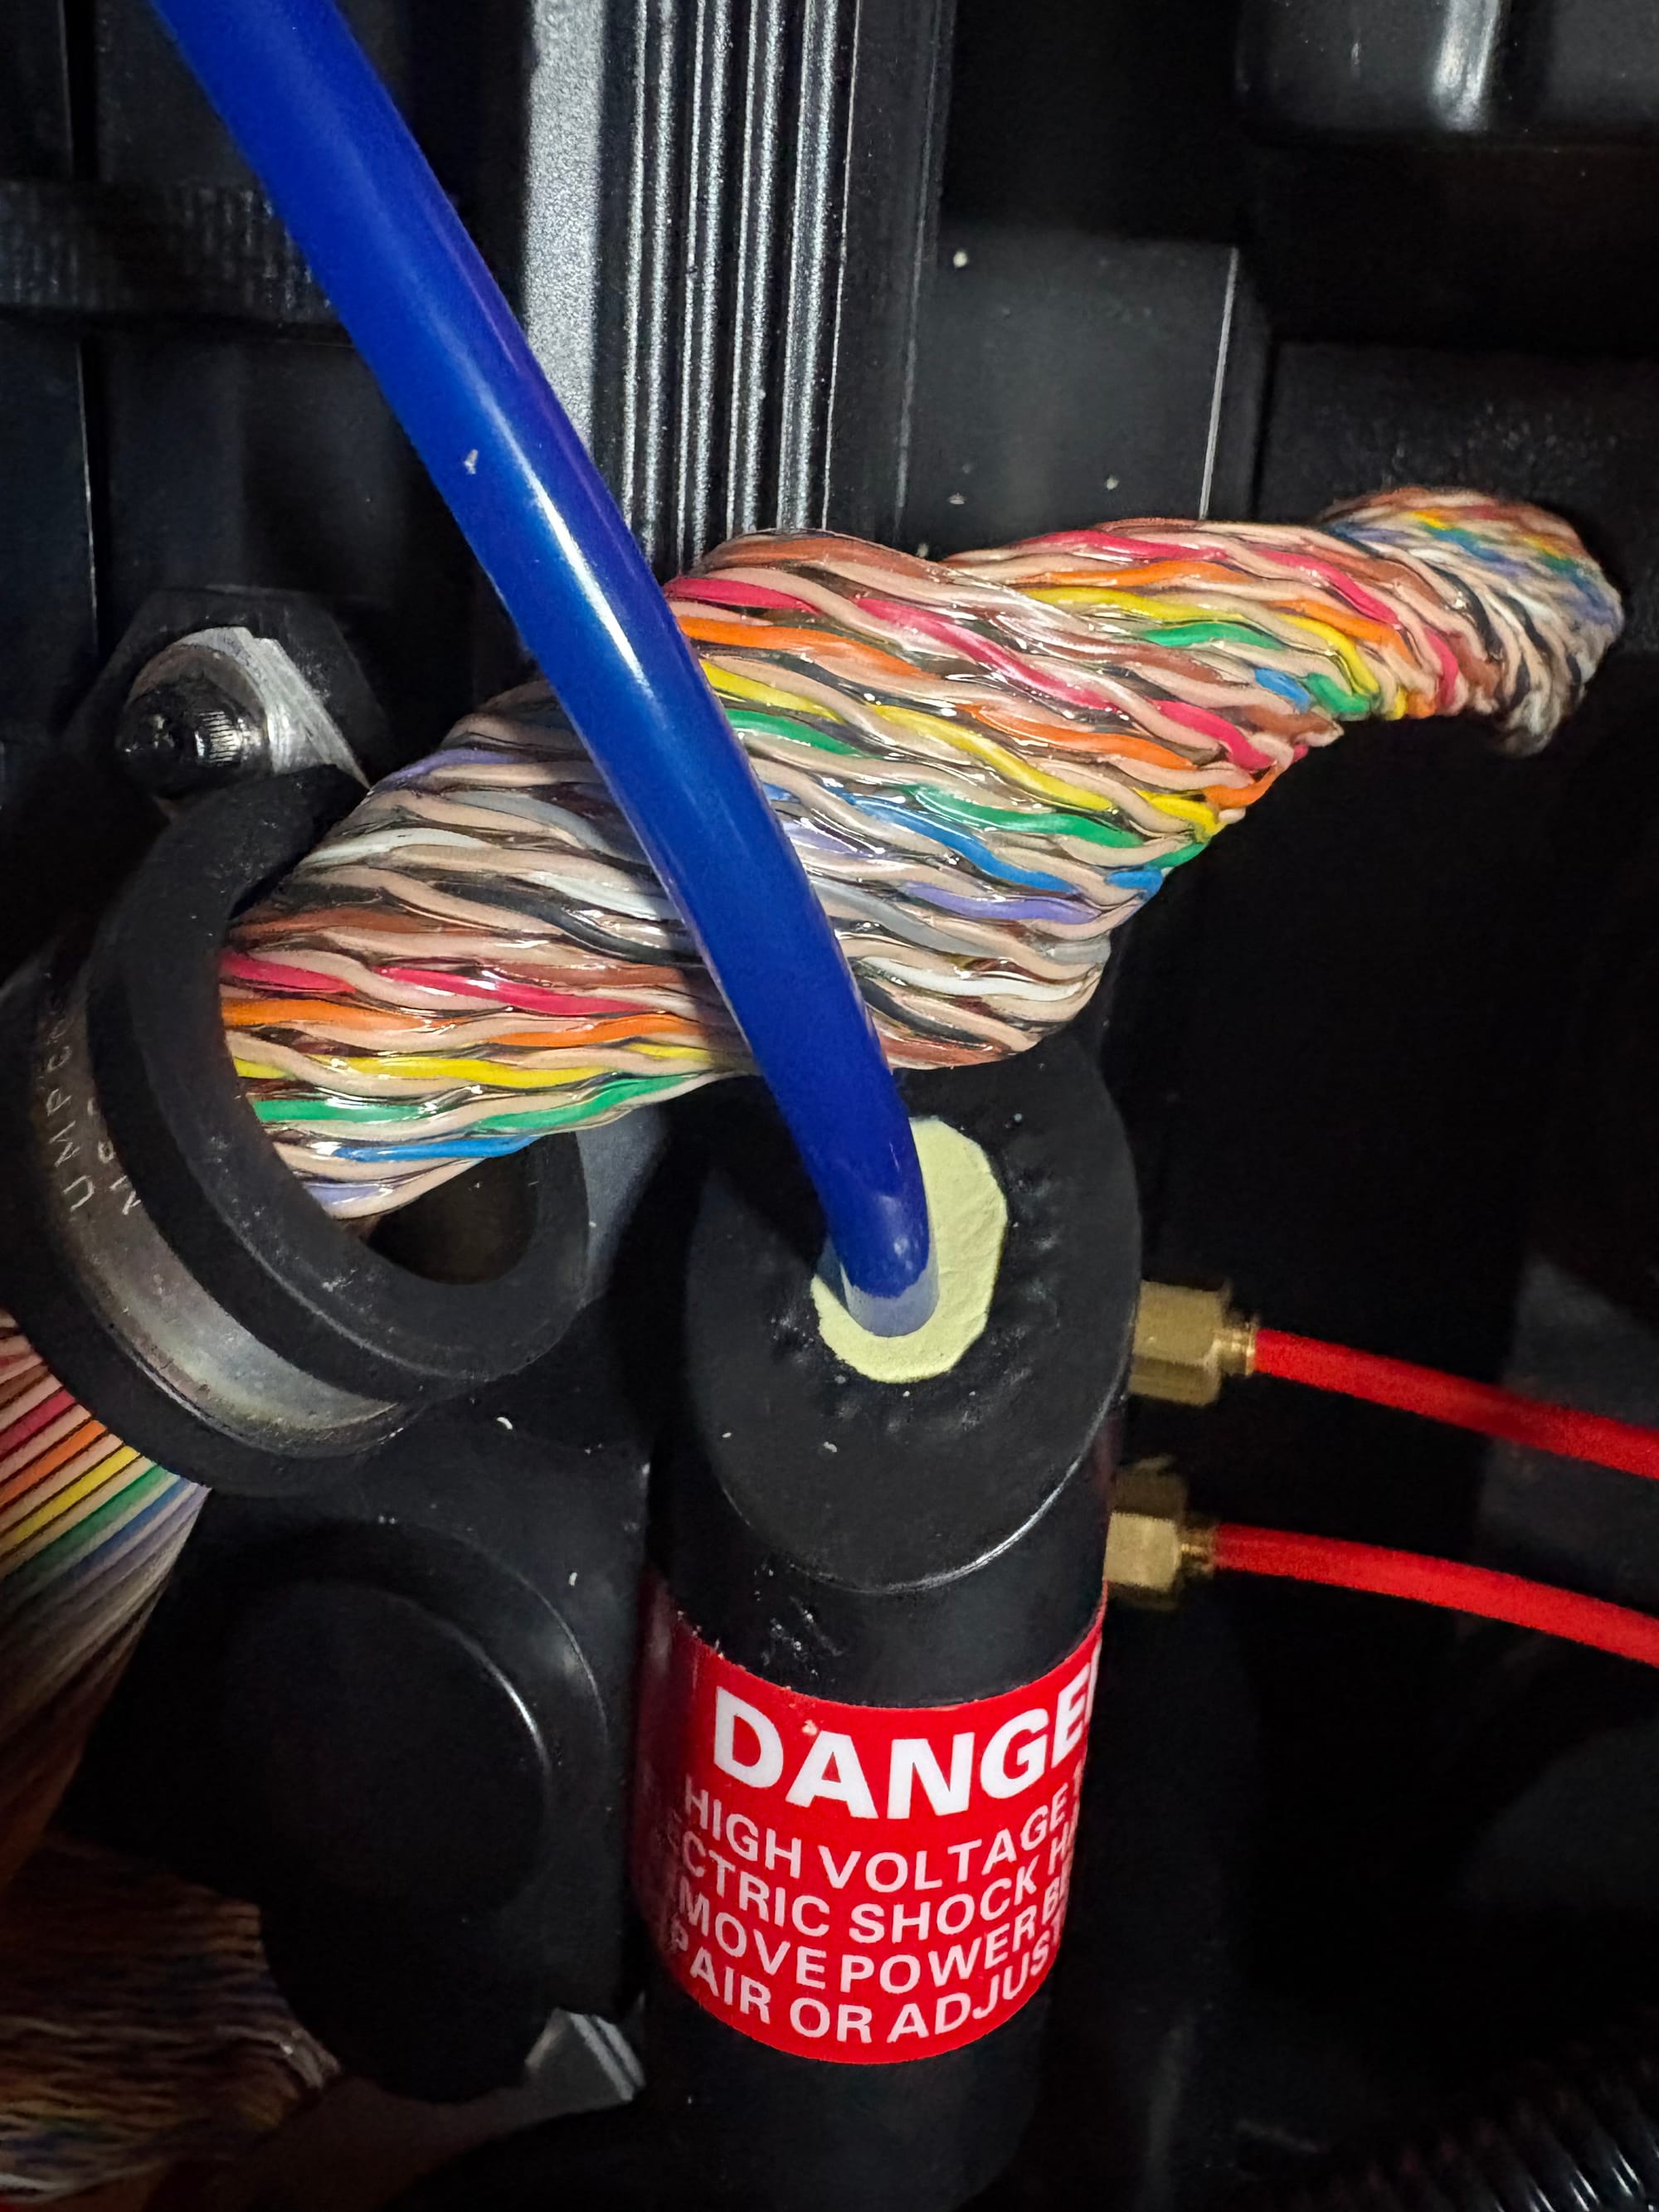
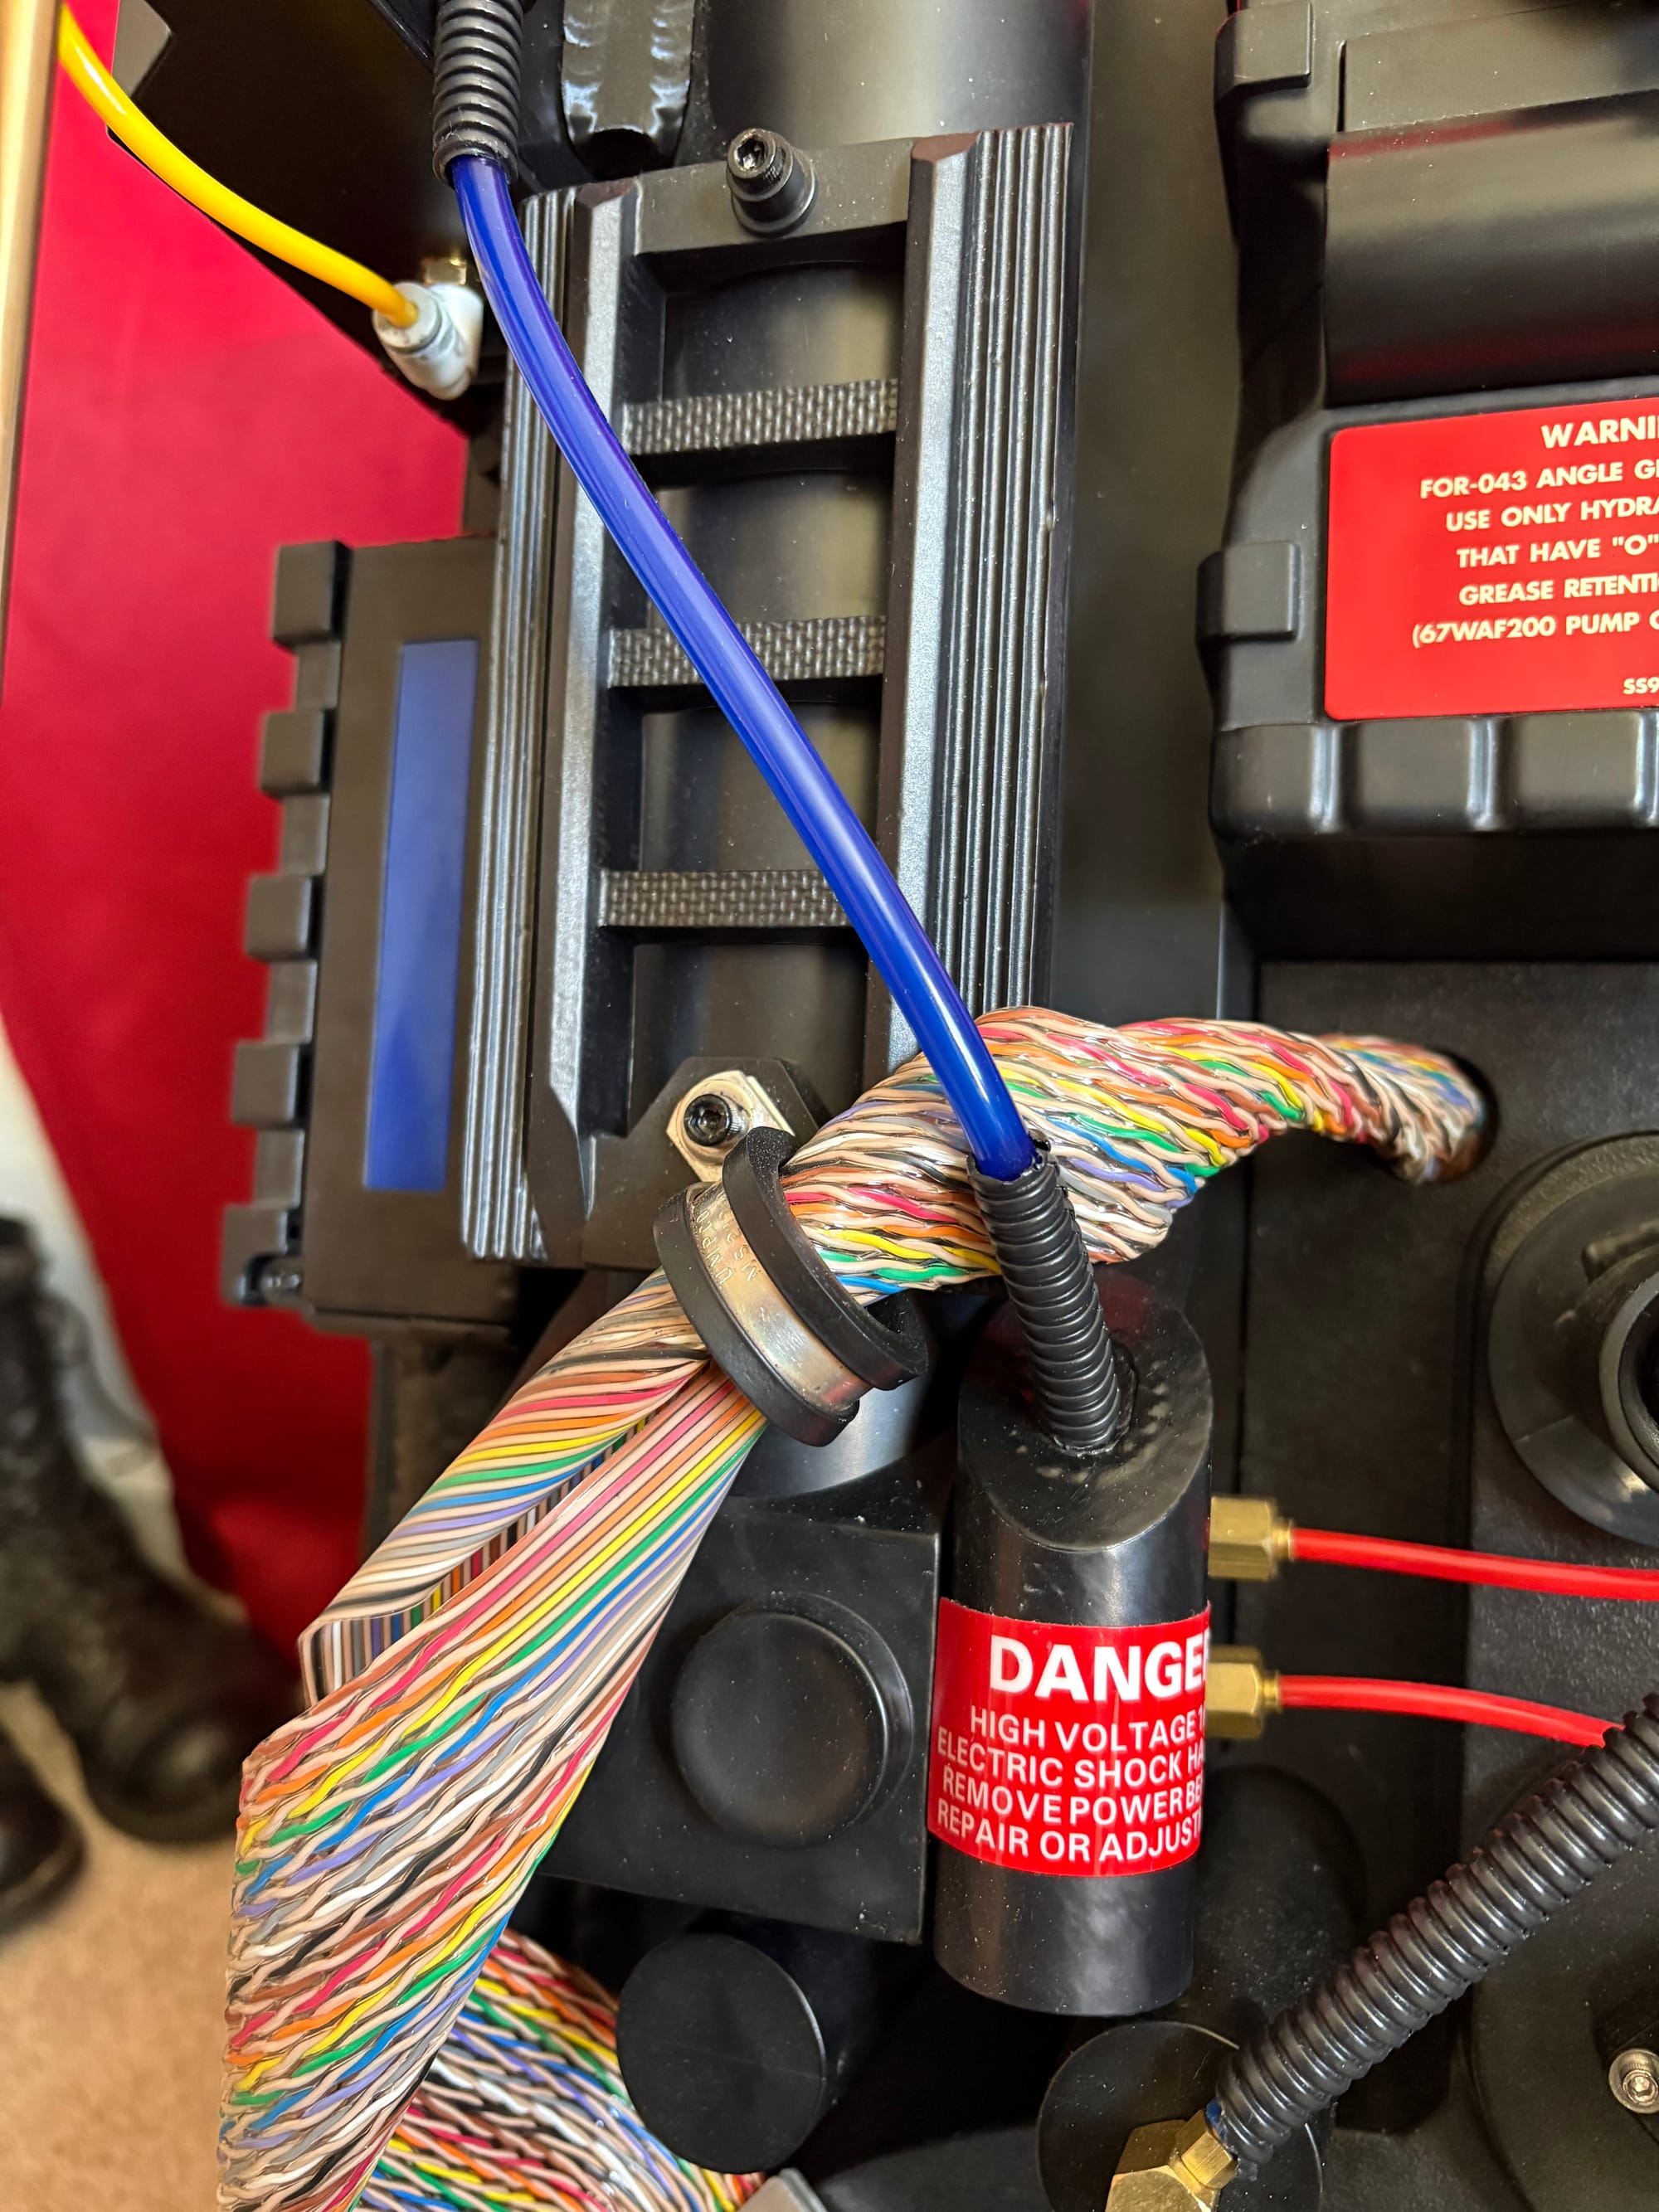
Switching out the tubes and adding barbs. The PPD before paint and split loom.
I then applied Milliput to the injector tubes and the bump-out in the synchronous generator. I originally just stuck the tubes into the holes that were part of the pack, and left enough there to make sure they wouldn't pop out. Once cured, I drilled them out, painted them, and screwed in my barbs. One spot on the cyclotron was loose, so I needed help with some glue; I don't think the Milliput was thick enough to get a good grip.
After that, I trimmed any tubing that needed it, cleaned up the split loom to make it more consistent in size, and attached everything. The barbs hold the split loom, which looks much cleaner than electrical tape or glue, and overall everything looks nicer and is more stable. I really like this approach and will do it again if I ever tackle a GB2- or GB1-style pack.
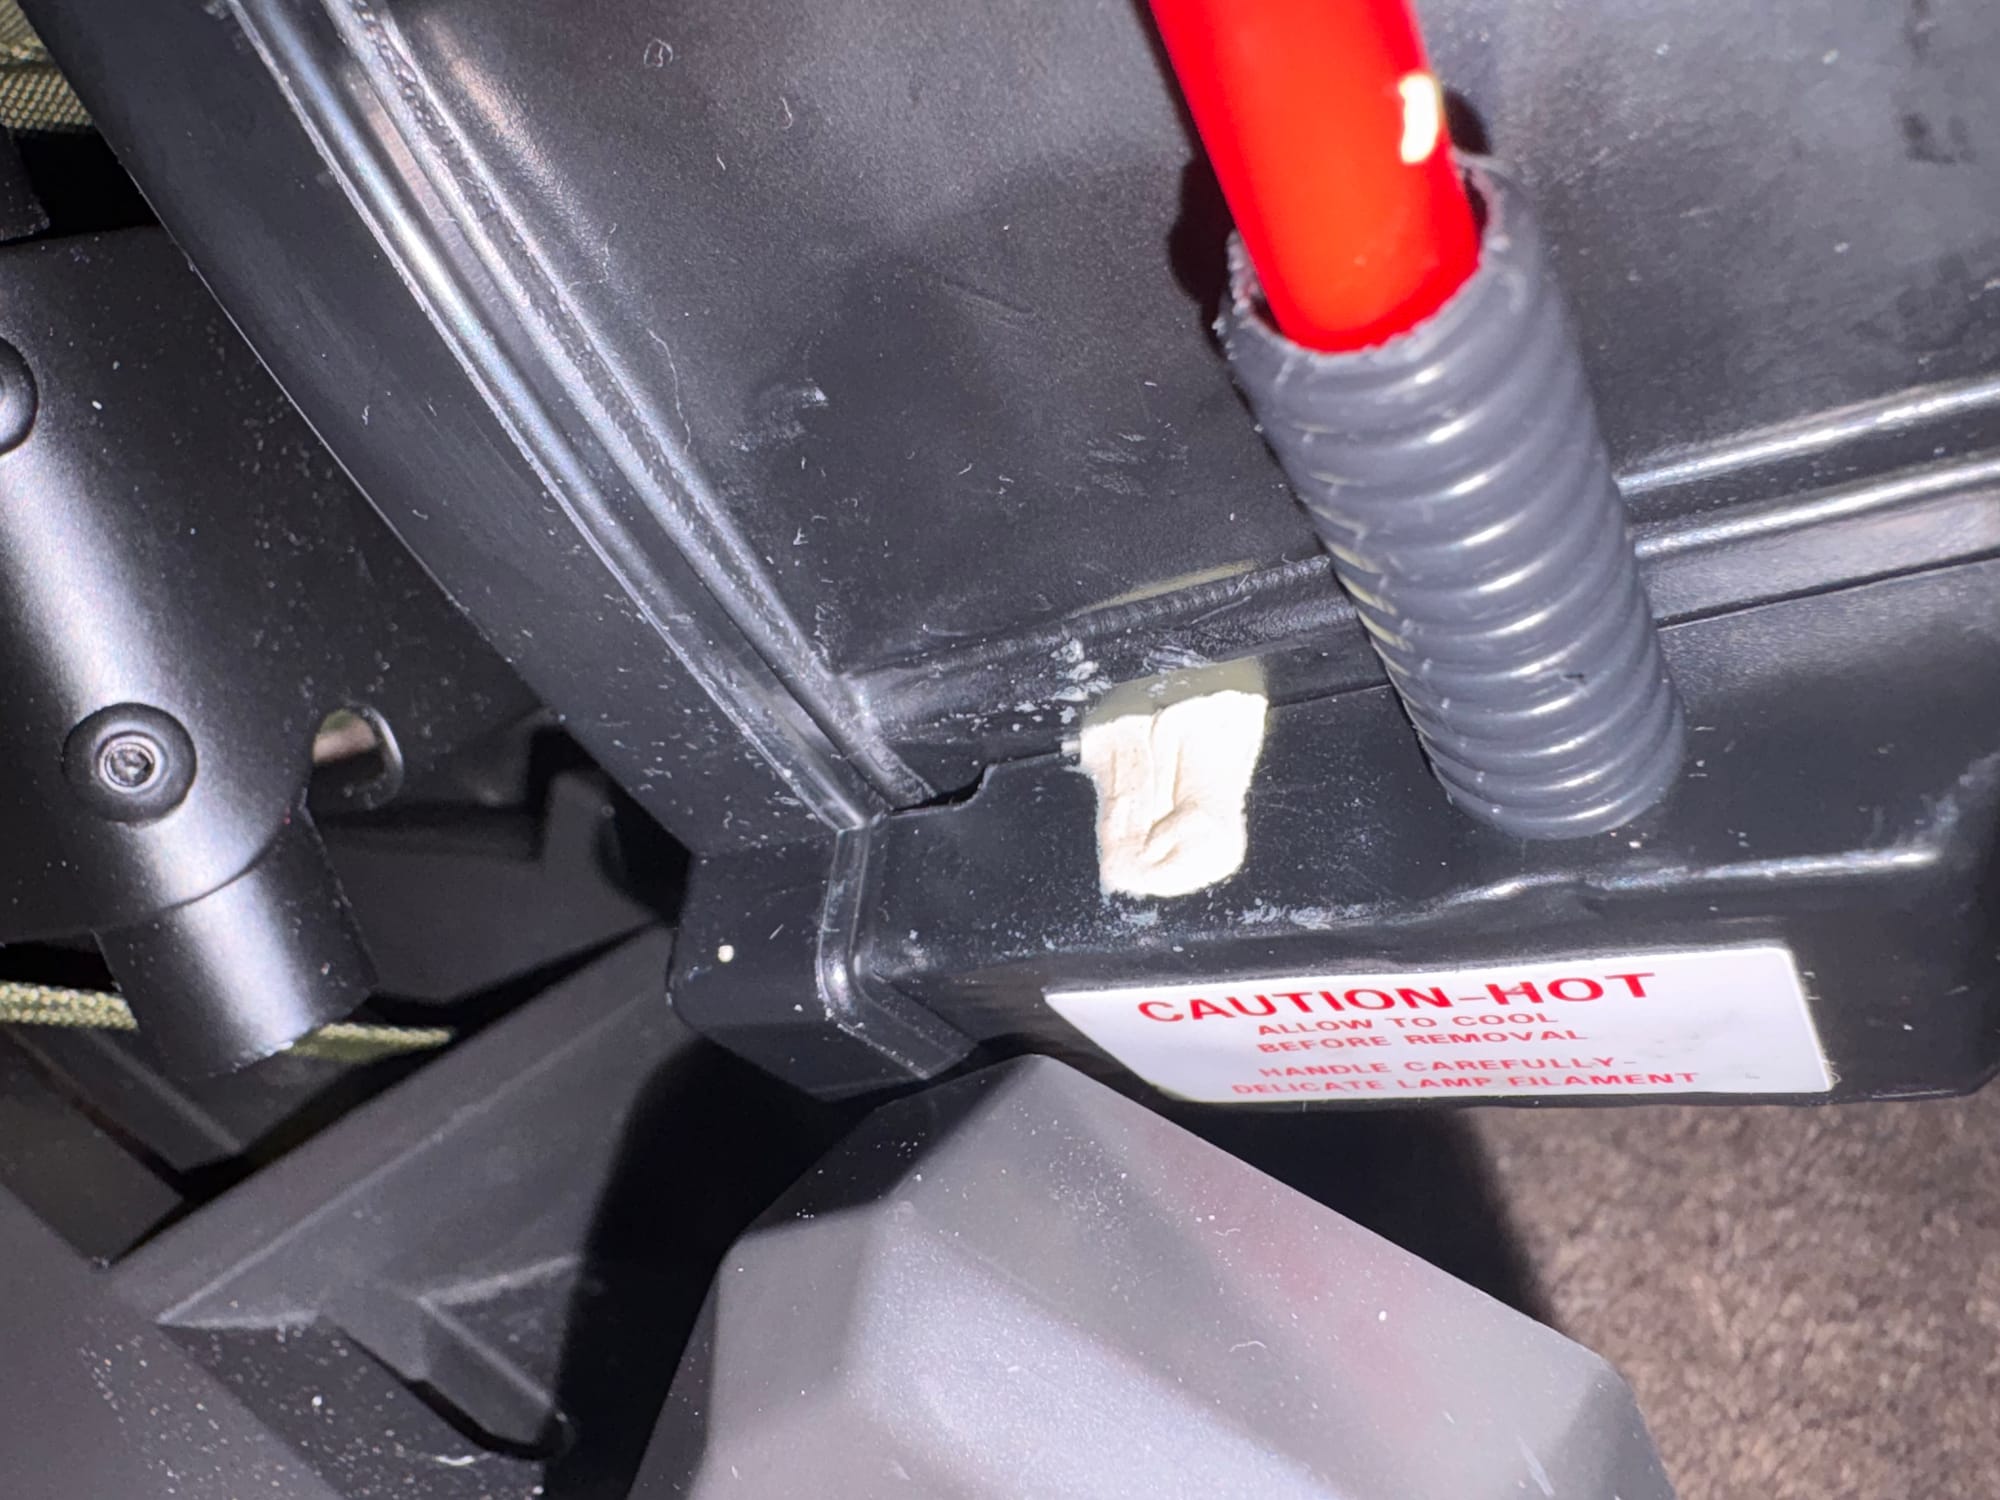
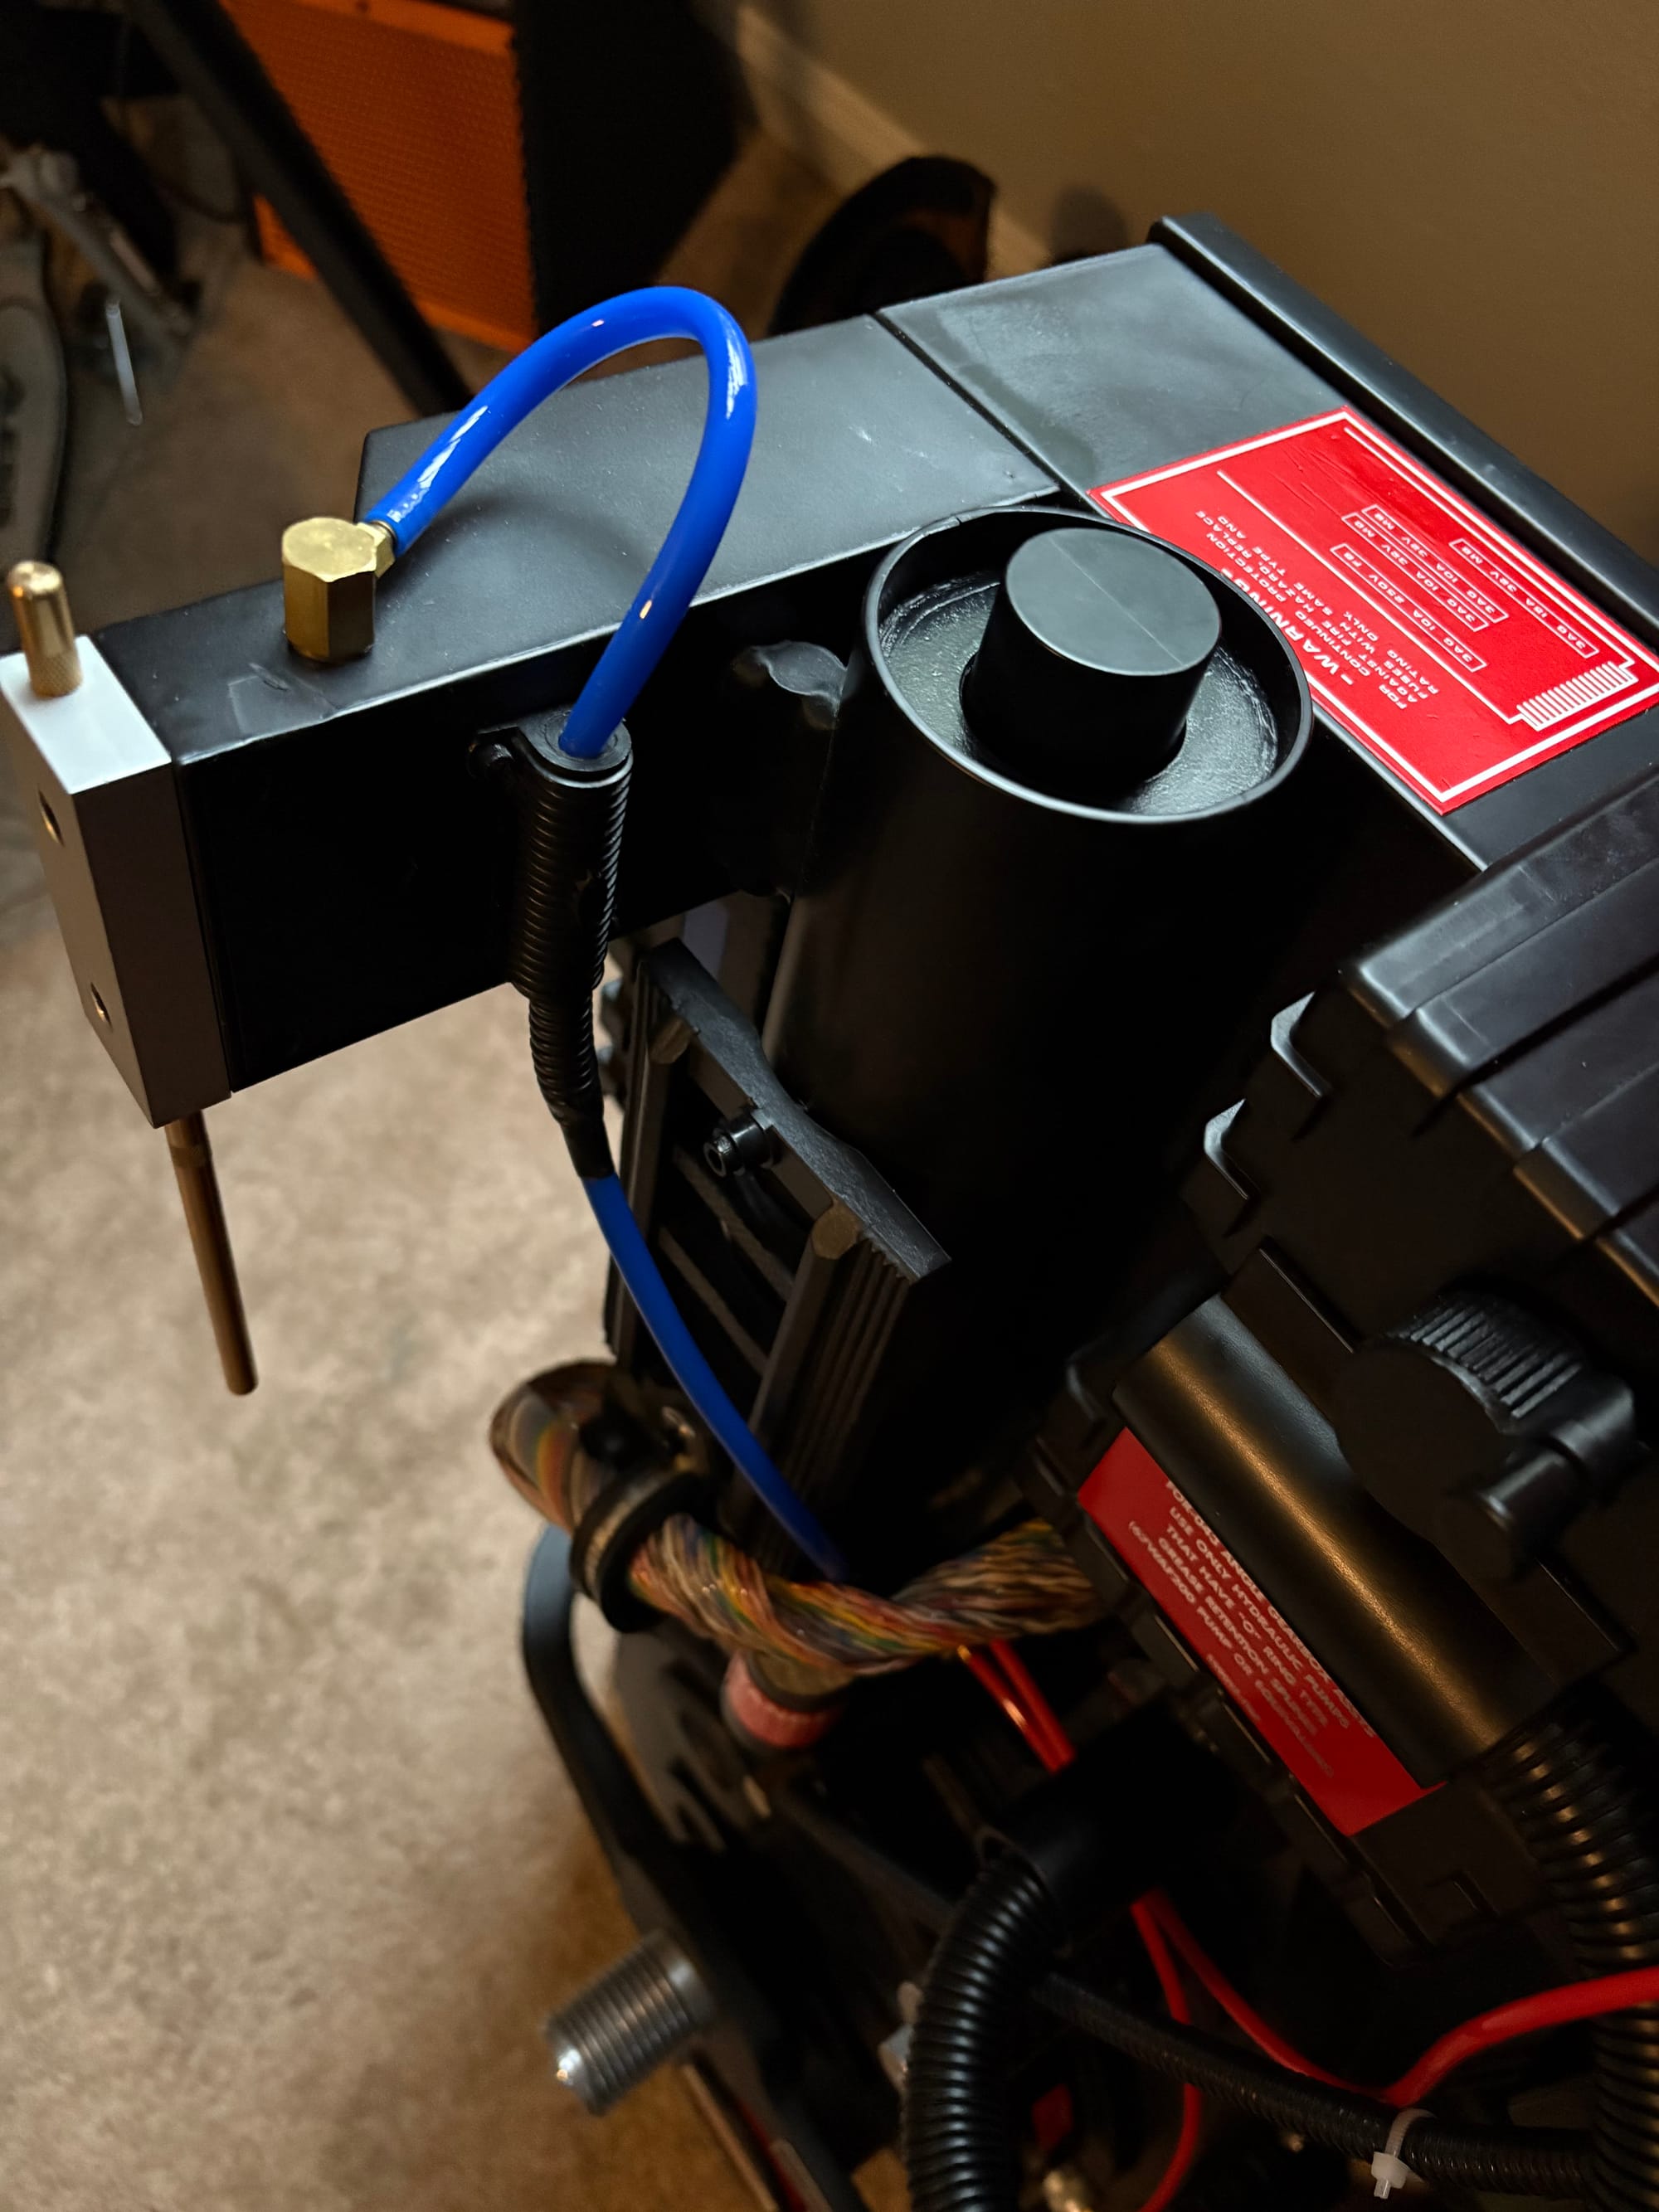
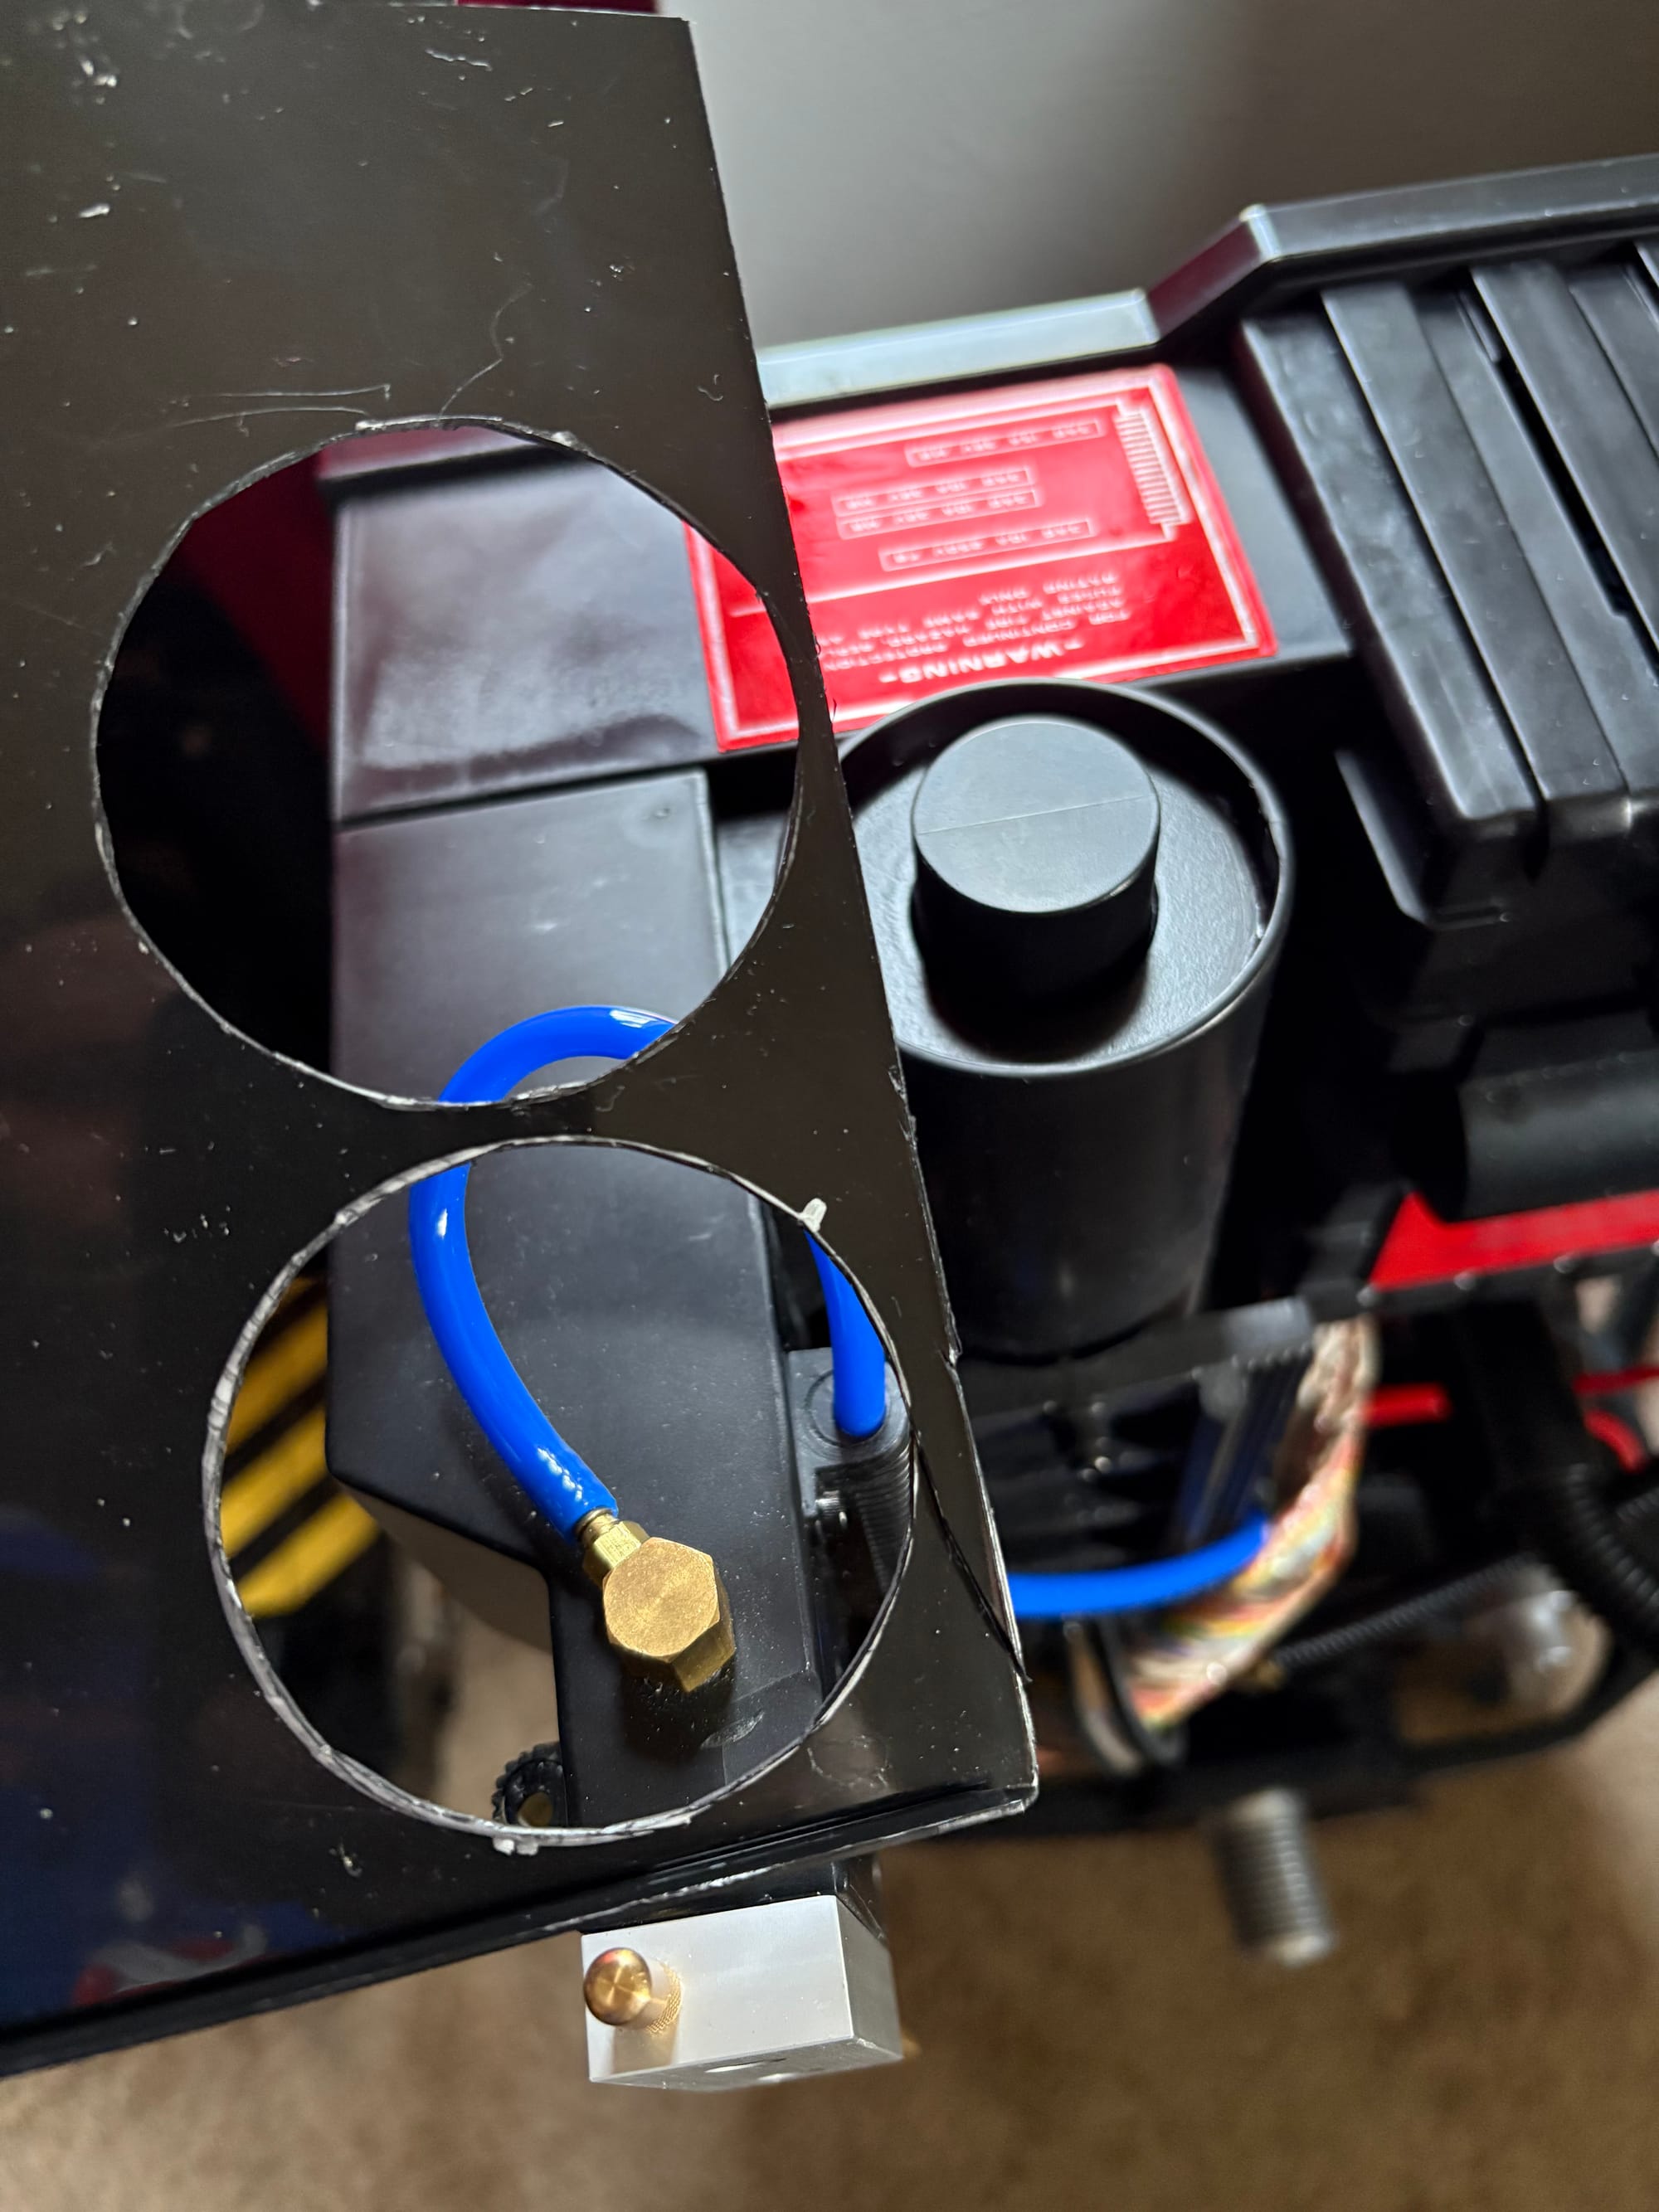
I also wanted to replicate the closed booster tube on the Semi-Hero packs. I think they are there because the Semi-Hero packs are casts of the original builds. The original "84" packs were not technically open, but they appear hollow, as there is nothing down the tube for over half of it; the GB2 packs are closed right at the top. There are several ways I could have done this: 3D-print a perfect-size disc, find a giant washer, cut a circle from thin wood, or build it up with putty. I opted to take an old DVD case, cut out the circle I needed, paint it so it wasn't so shiny, put a strip of double-sided tape inside the booster tube to keep it from slipping, and then glue it in place. It is a bit silly, but I think it looks good.
The last addition on the pack was a simple touch; I also bought a fake 3D-printed weld joint from Chris Bosh. I gave it a coat of black paint, applied some glue, and stuck it in place. It's unnecessary, but it adds that little detail Hasbro's shell is missing.
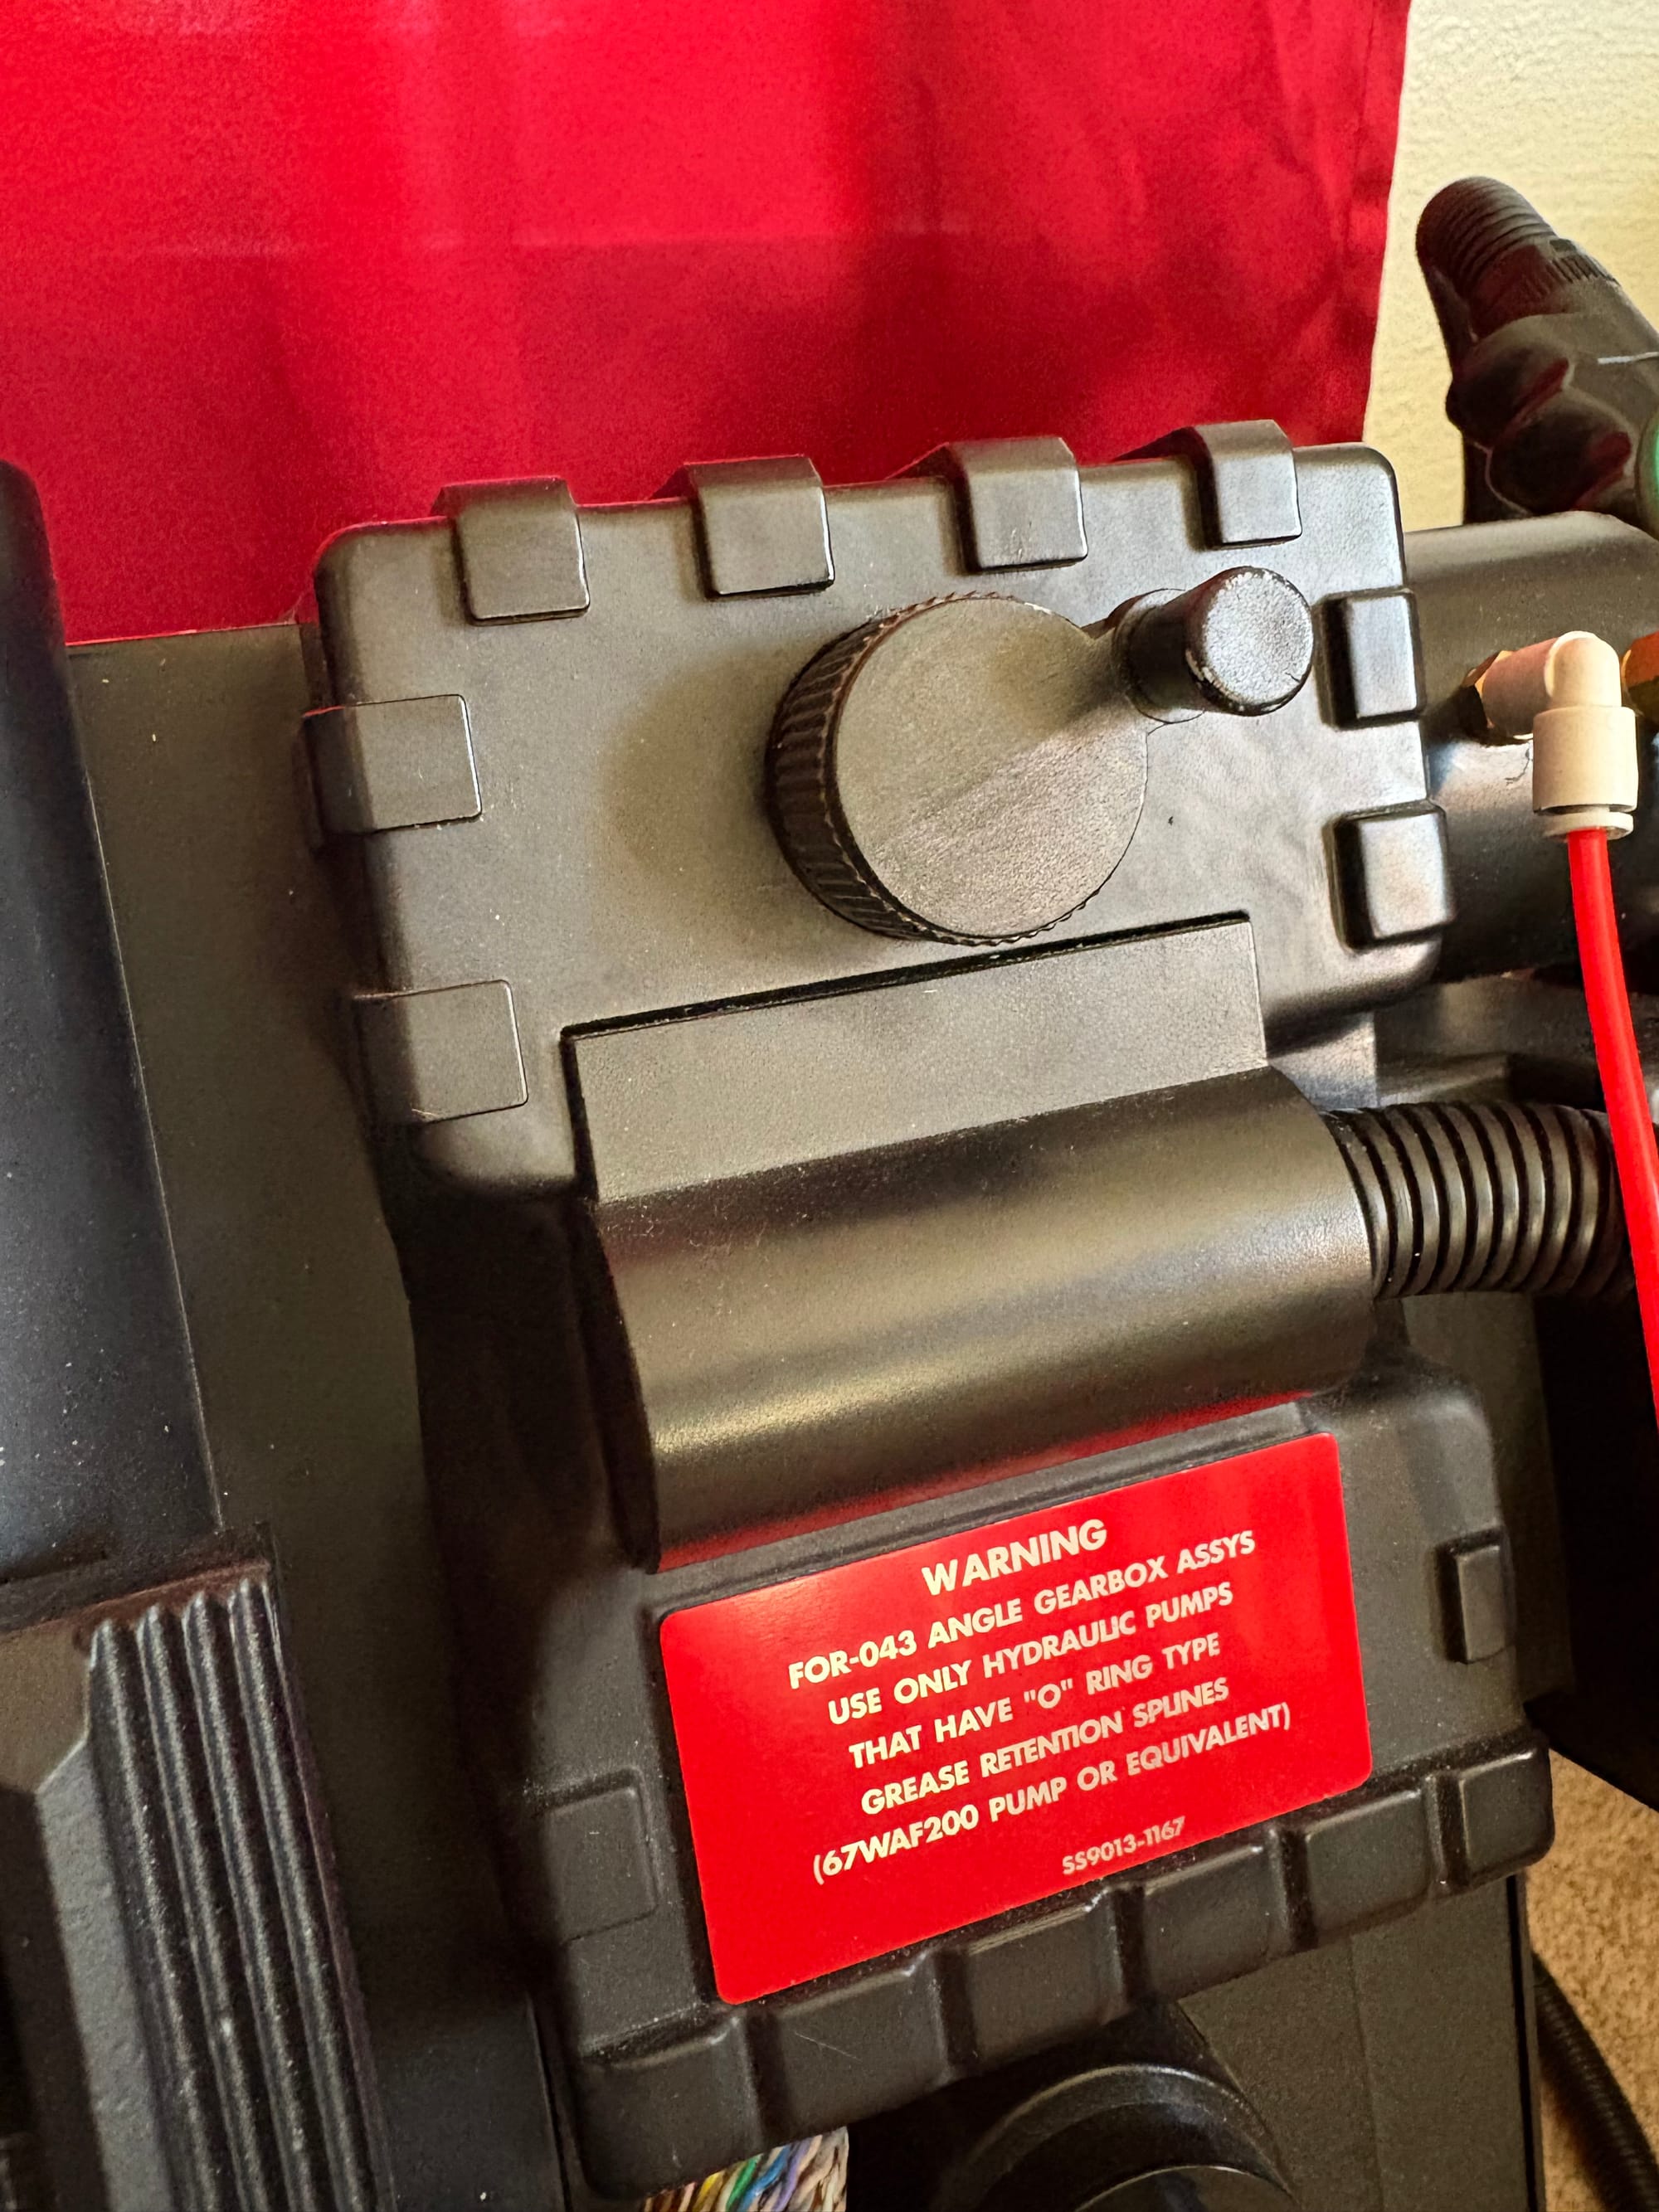
Of course, it isn't a GB2 pack without the shiny black crank knob either. The Hasbro pack uses the knob for volume, and it isn't a normal connection; you can't just pop it off like a stereo volume knob. So I just grabbed some glossy outdoor acrylic paint and brushed it on. Turned out surprisingly well.
Now for the Thrower
I've been avoiding doing too much to the proton thrower; unlike the pack, everything is pretty locked down. Screws are hidden, things are glued down, and there's not much space because of all the wires. But some stuff keeps bothering me, which is the problem with starting something like this for me; I keep seeing more that I don't want to let go.
I had already trimmed off the orange cap, but it wasn't enough. It was rough and still didn't have the right look with the round nub. So I picked up an acrylic tube; I wanted to extend the barrel to match how it looks in the first two films.
The Acrylic Emitter Tube
So first I pried off the rounded end cap, slowly working around the edge to break the glue. Once it popped off, I trimmed the end of the LED strip so it wouldn't protrude as much. I then pulled out the foam and plastic sleeve that holds the LED strip in place and diffuses the light. The acrylic tubes in the movies are clear with a few frosted strips; the LED strip isn't the best-looking, but I think the clear emitter tube looks better than the white one. To achieve the frosted sections, I taped off the parts I wanted to keep clear and then, using 320-grit sandpaper, sanded up and down until I got a consistent frosted section.
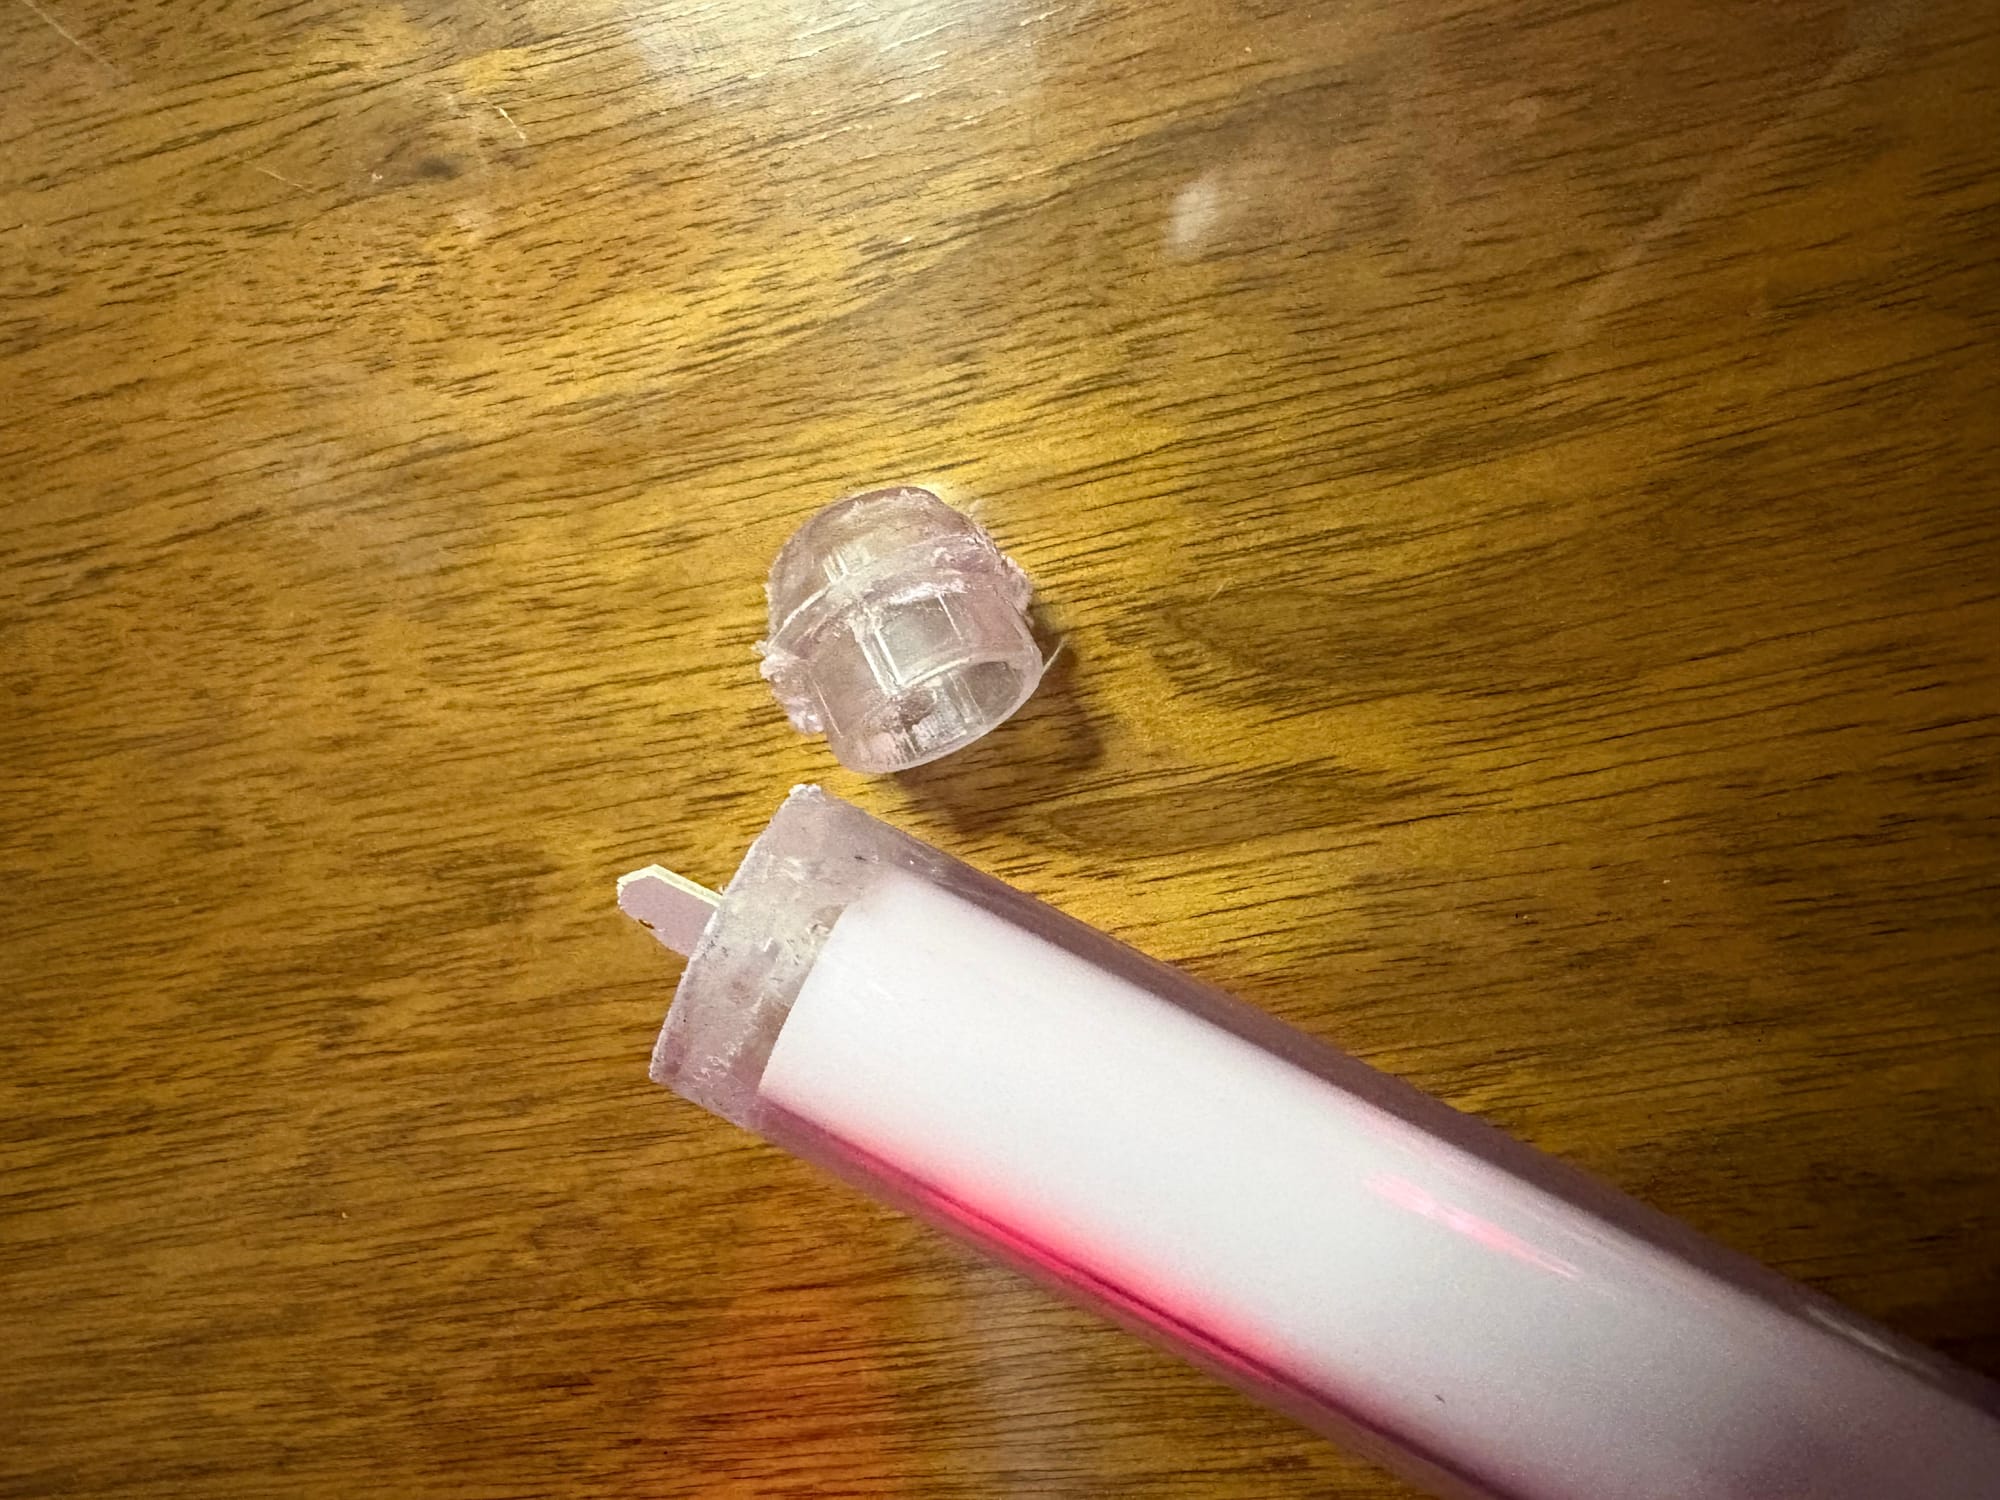
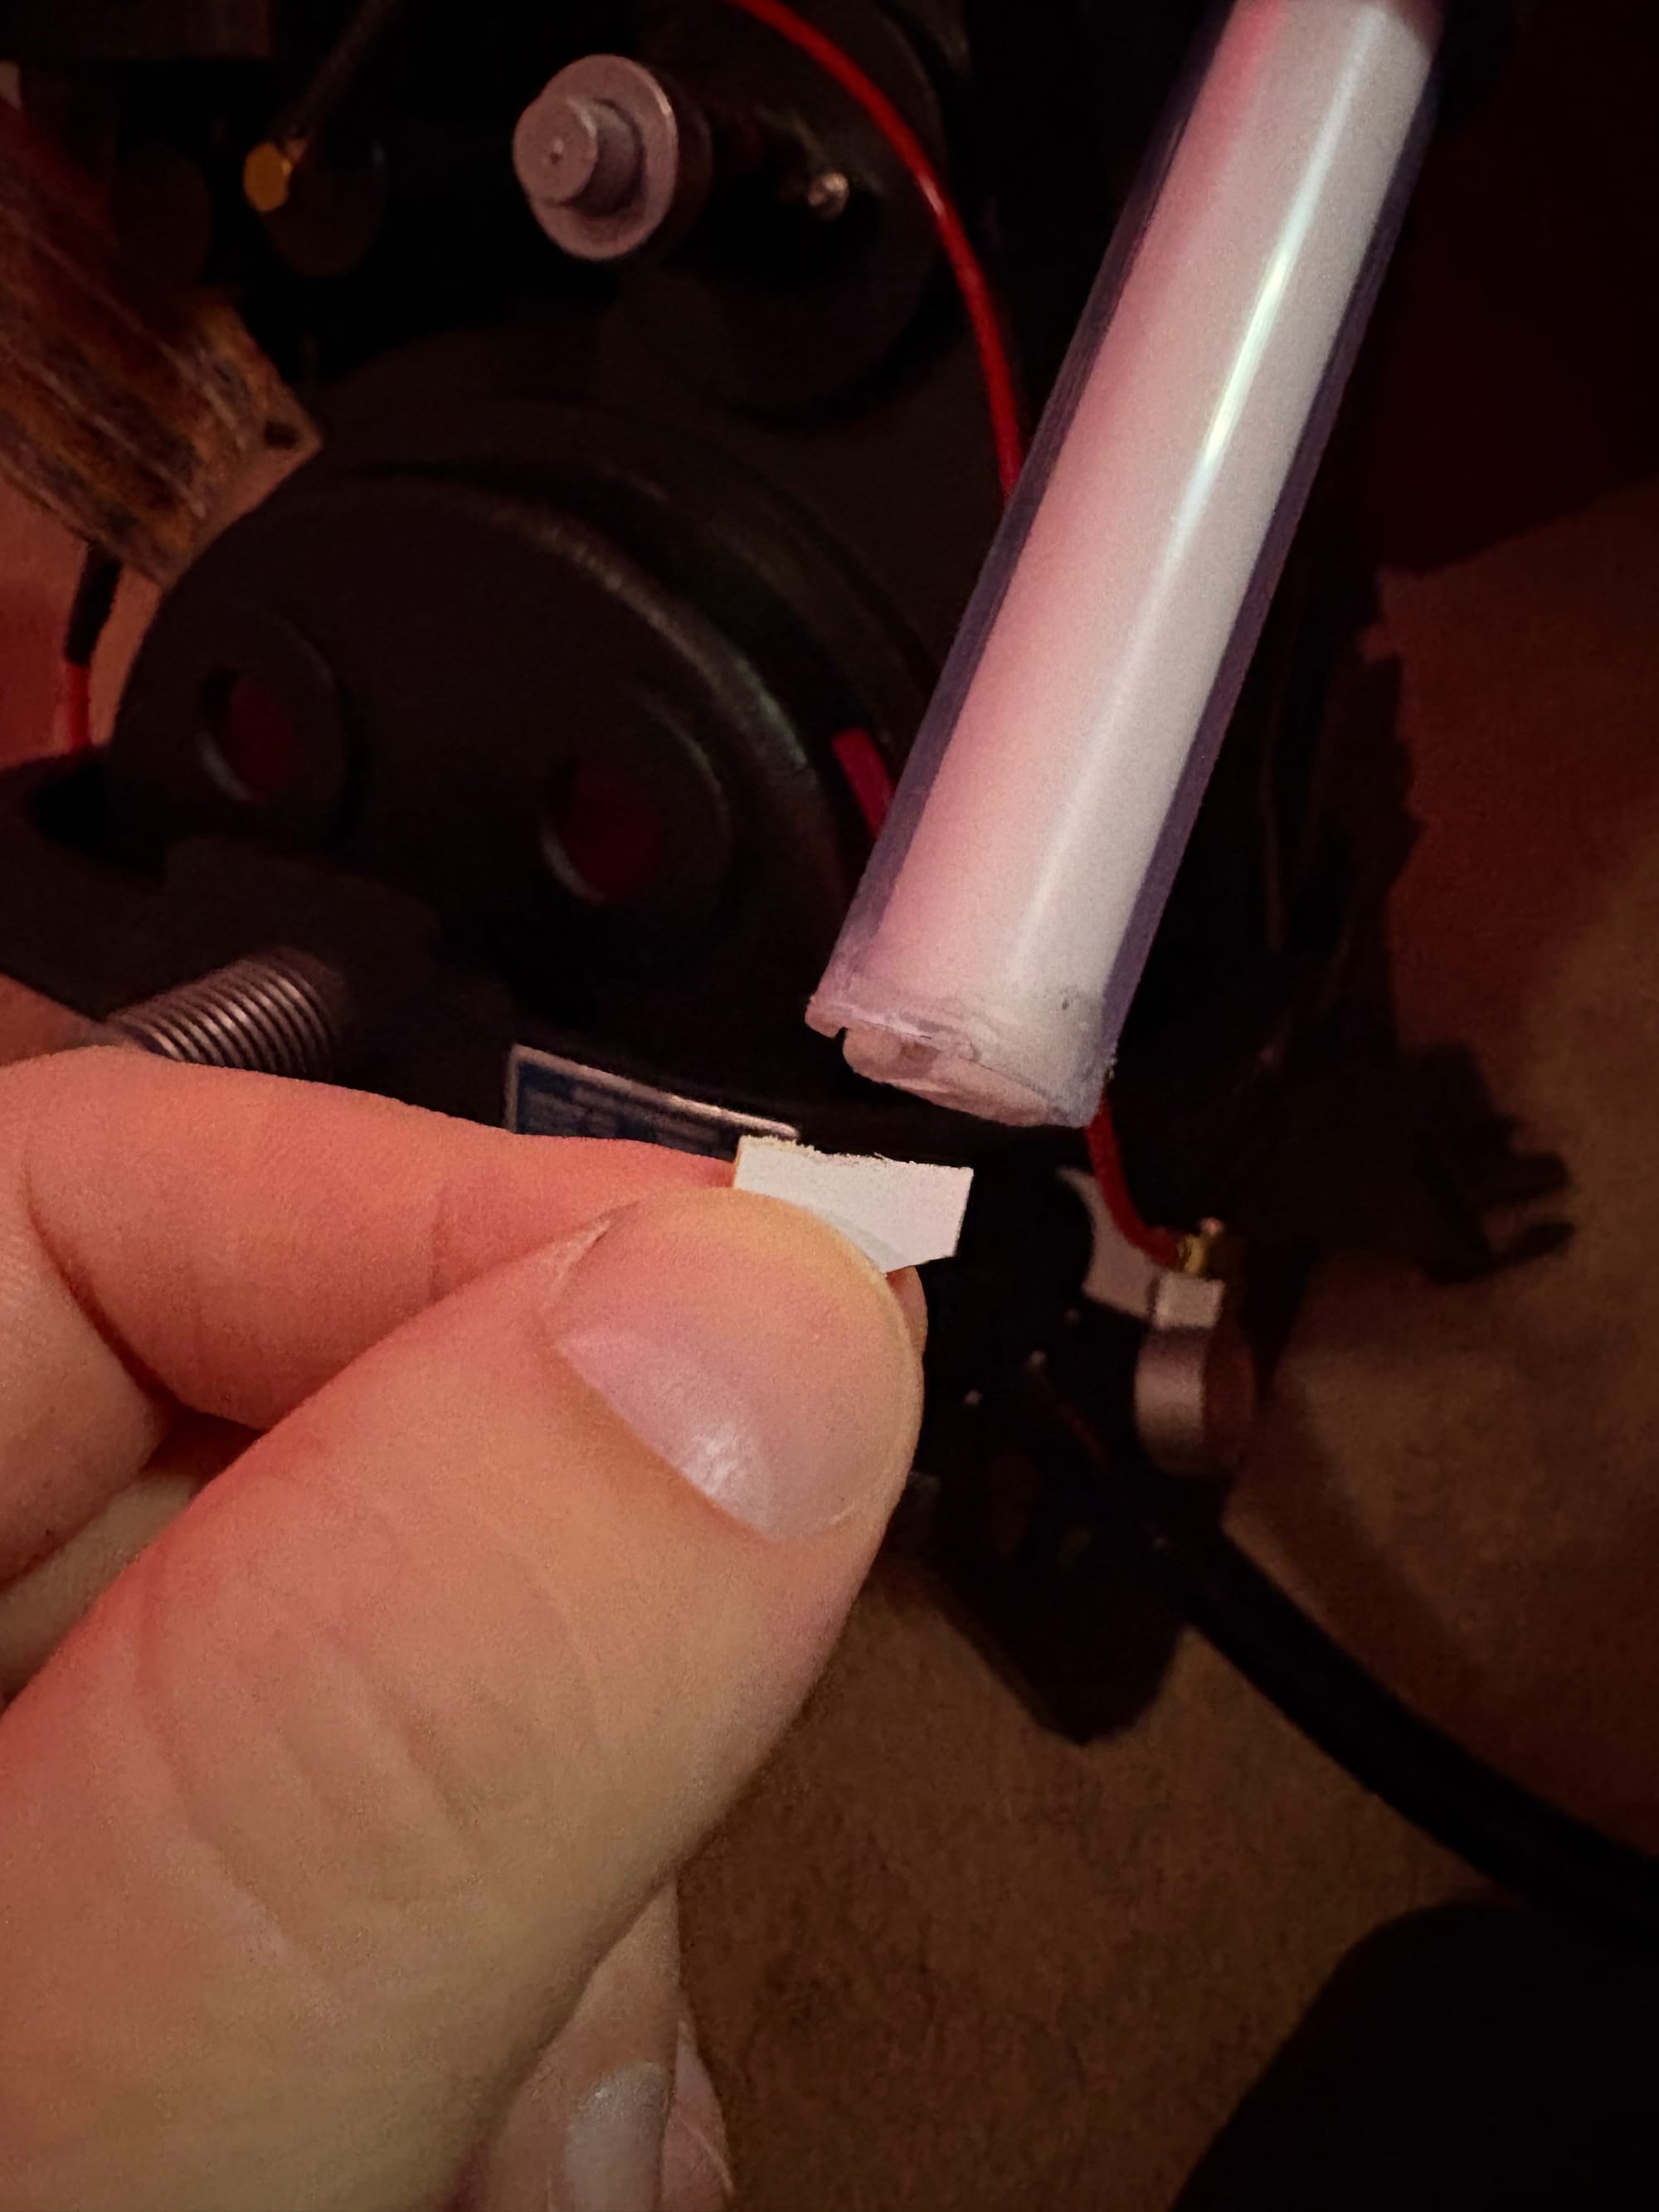
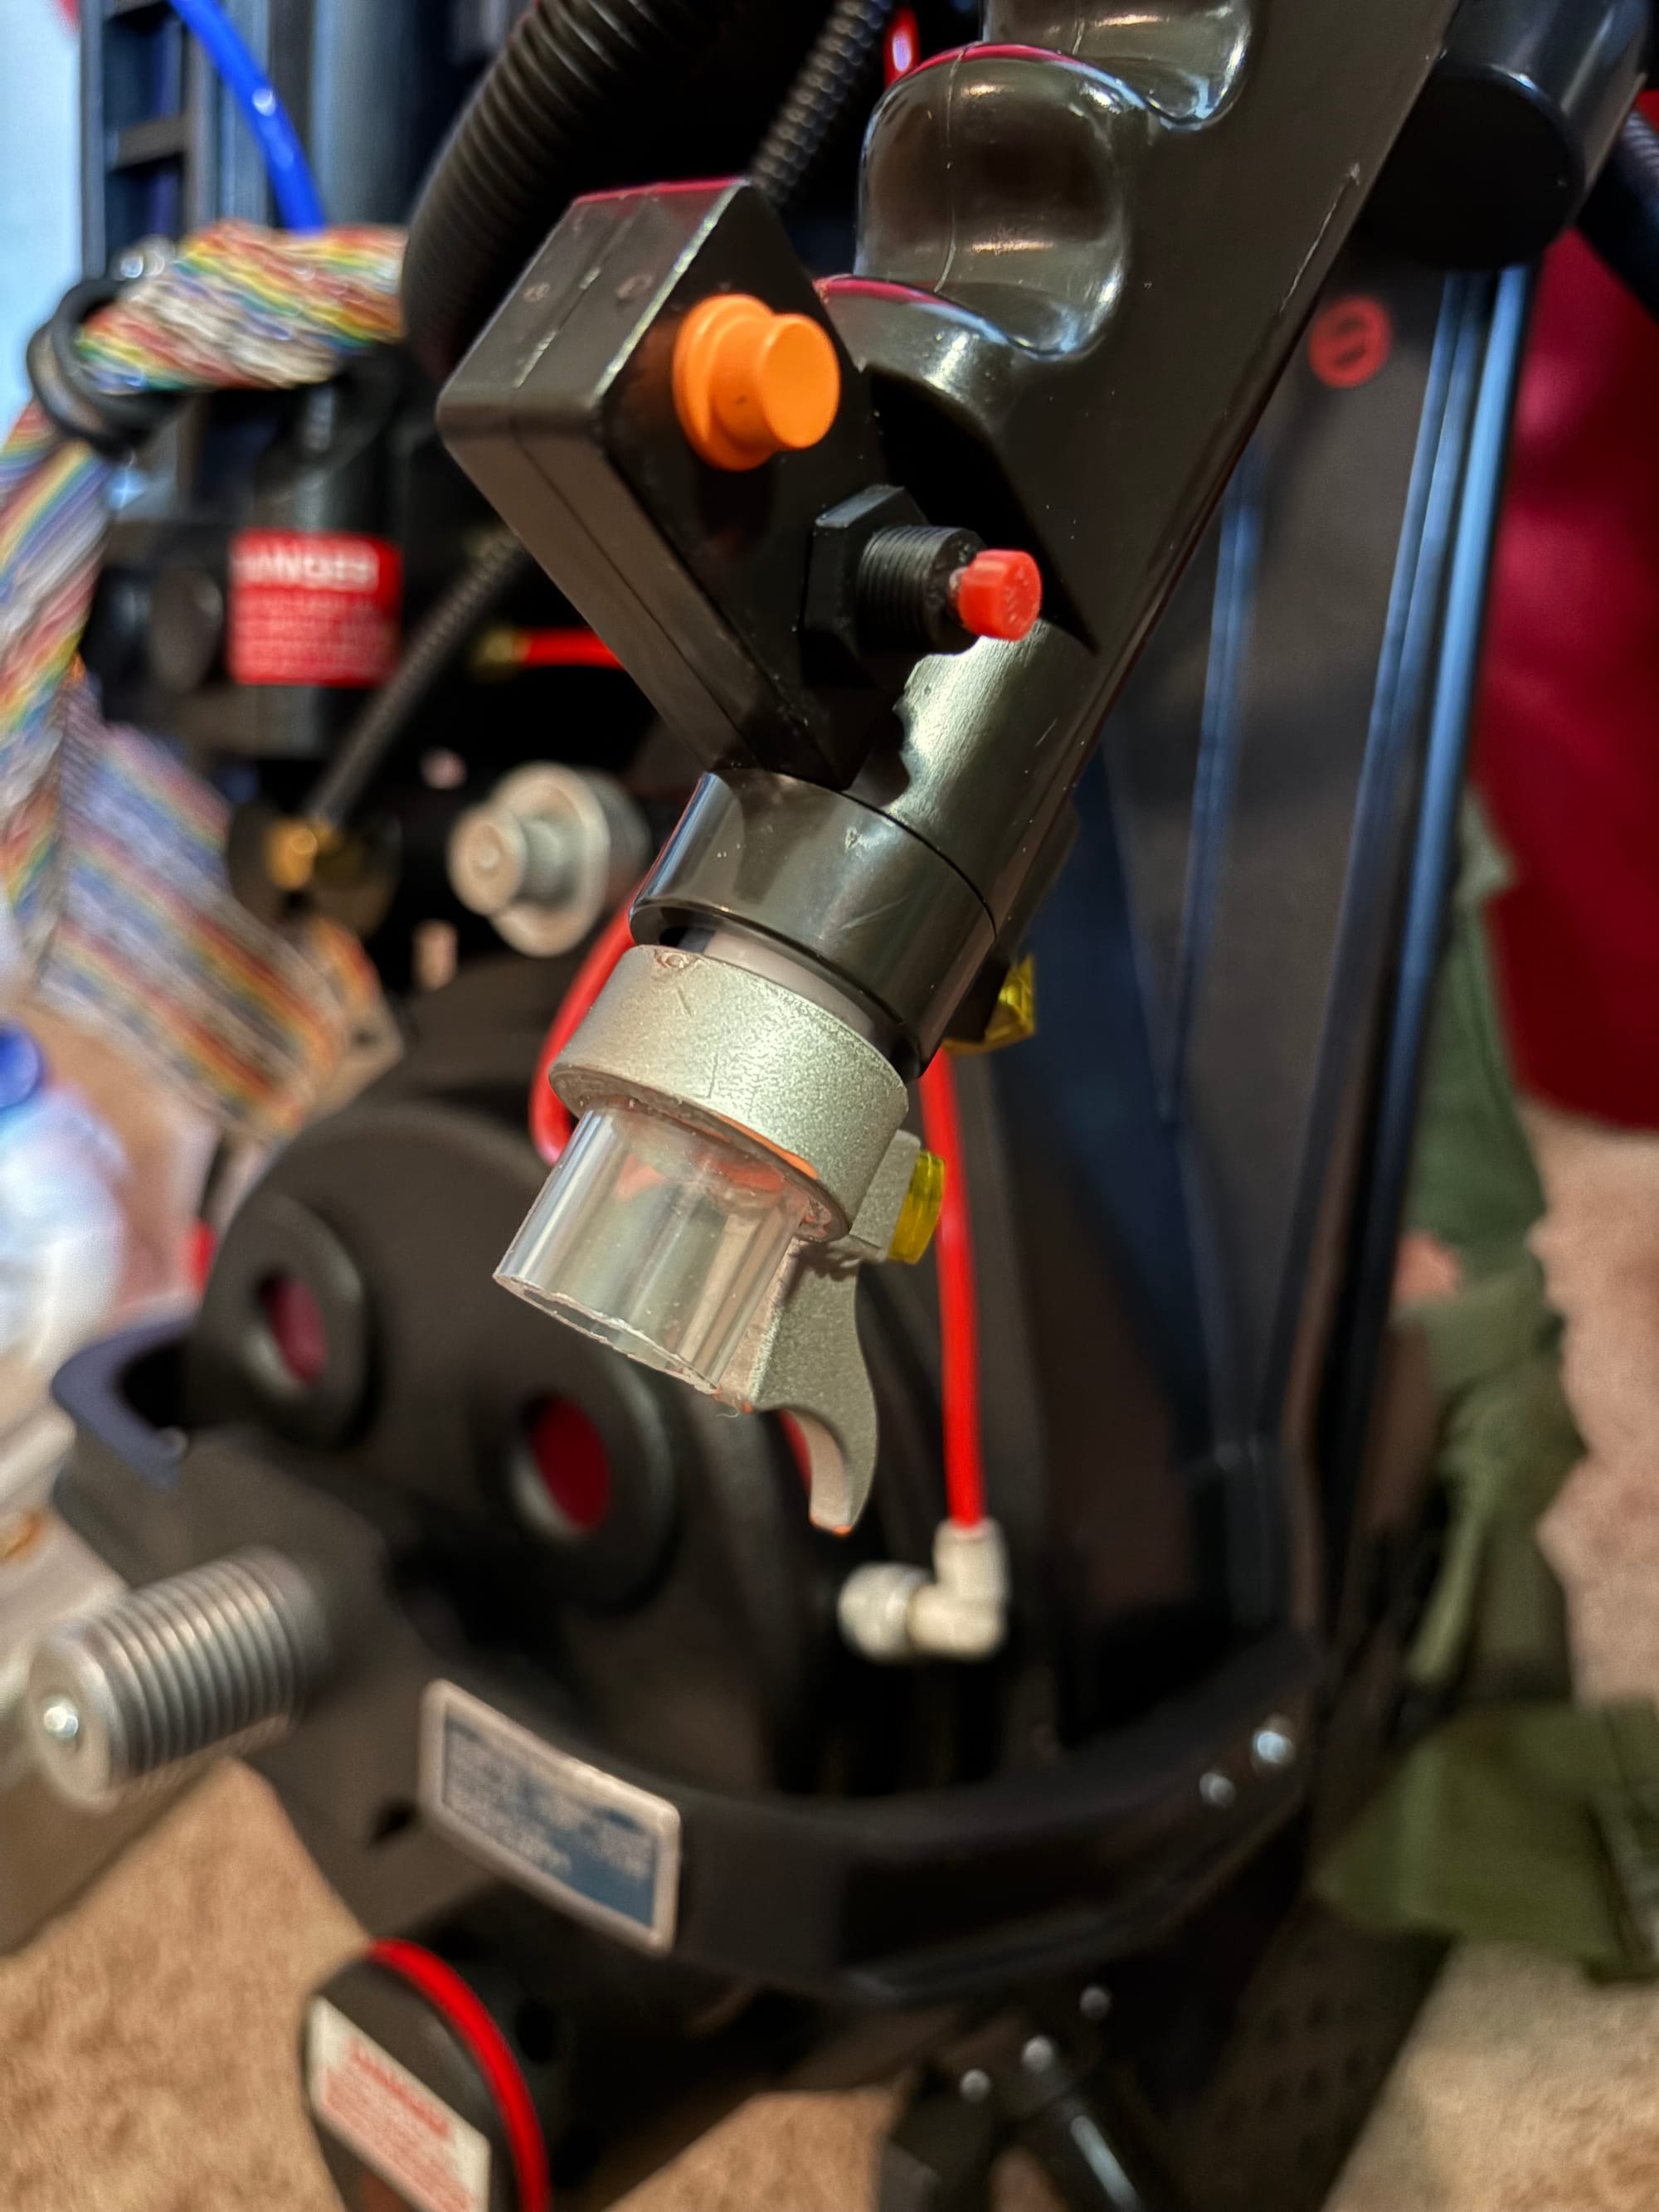
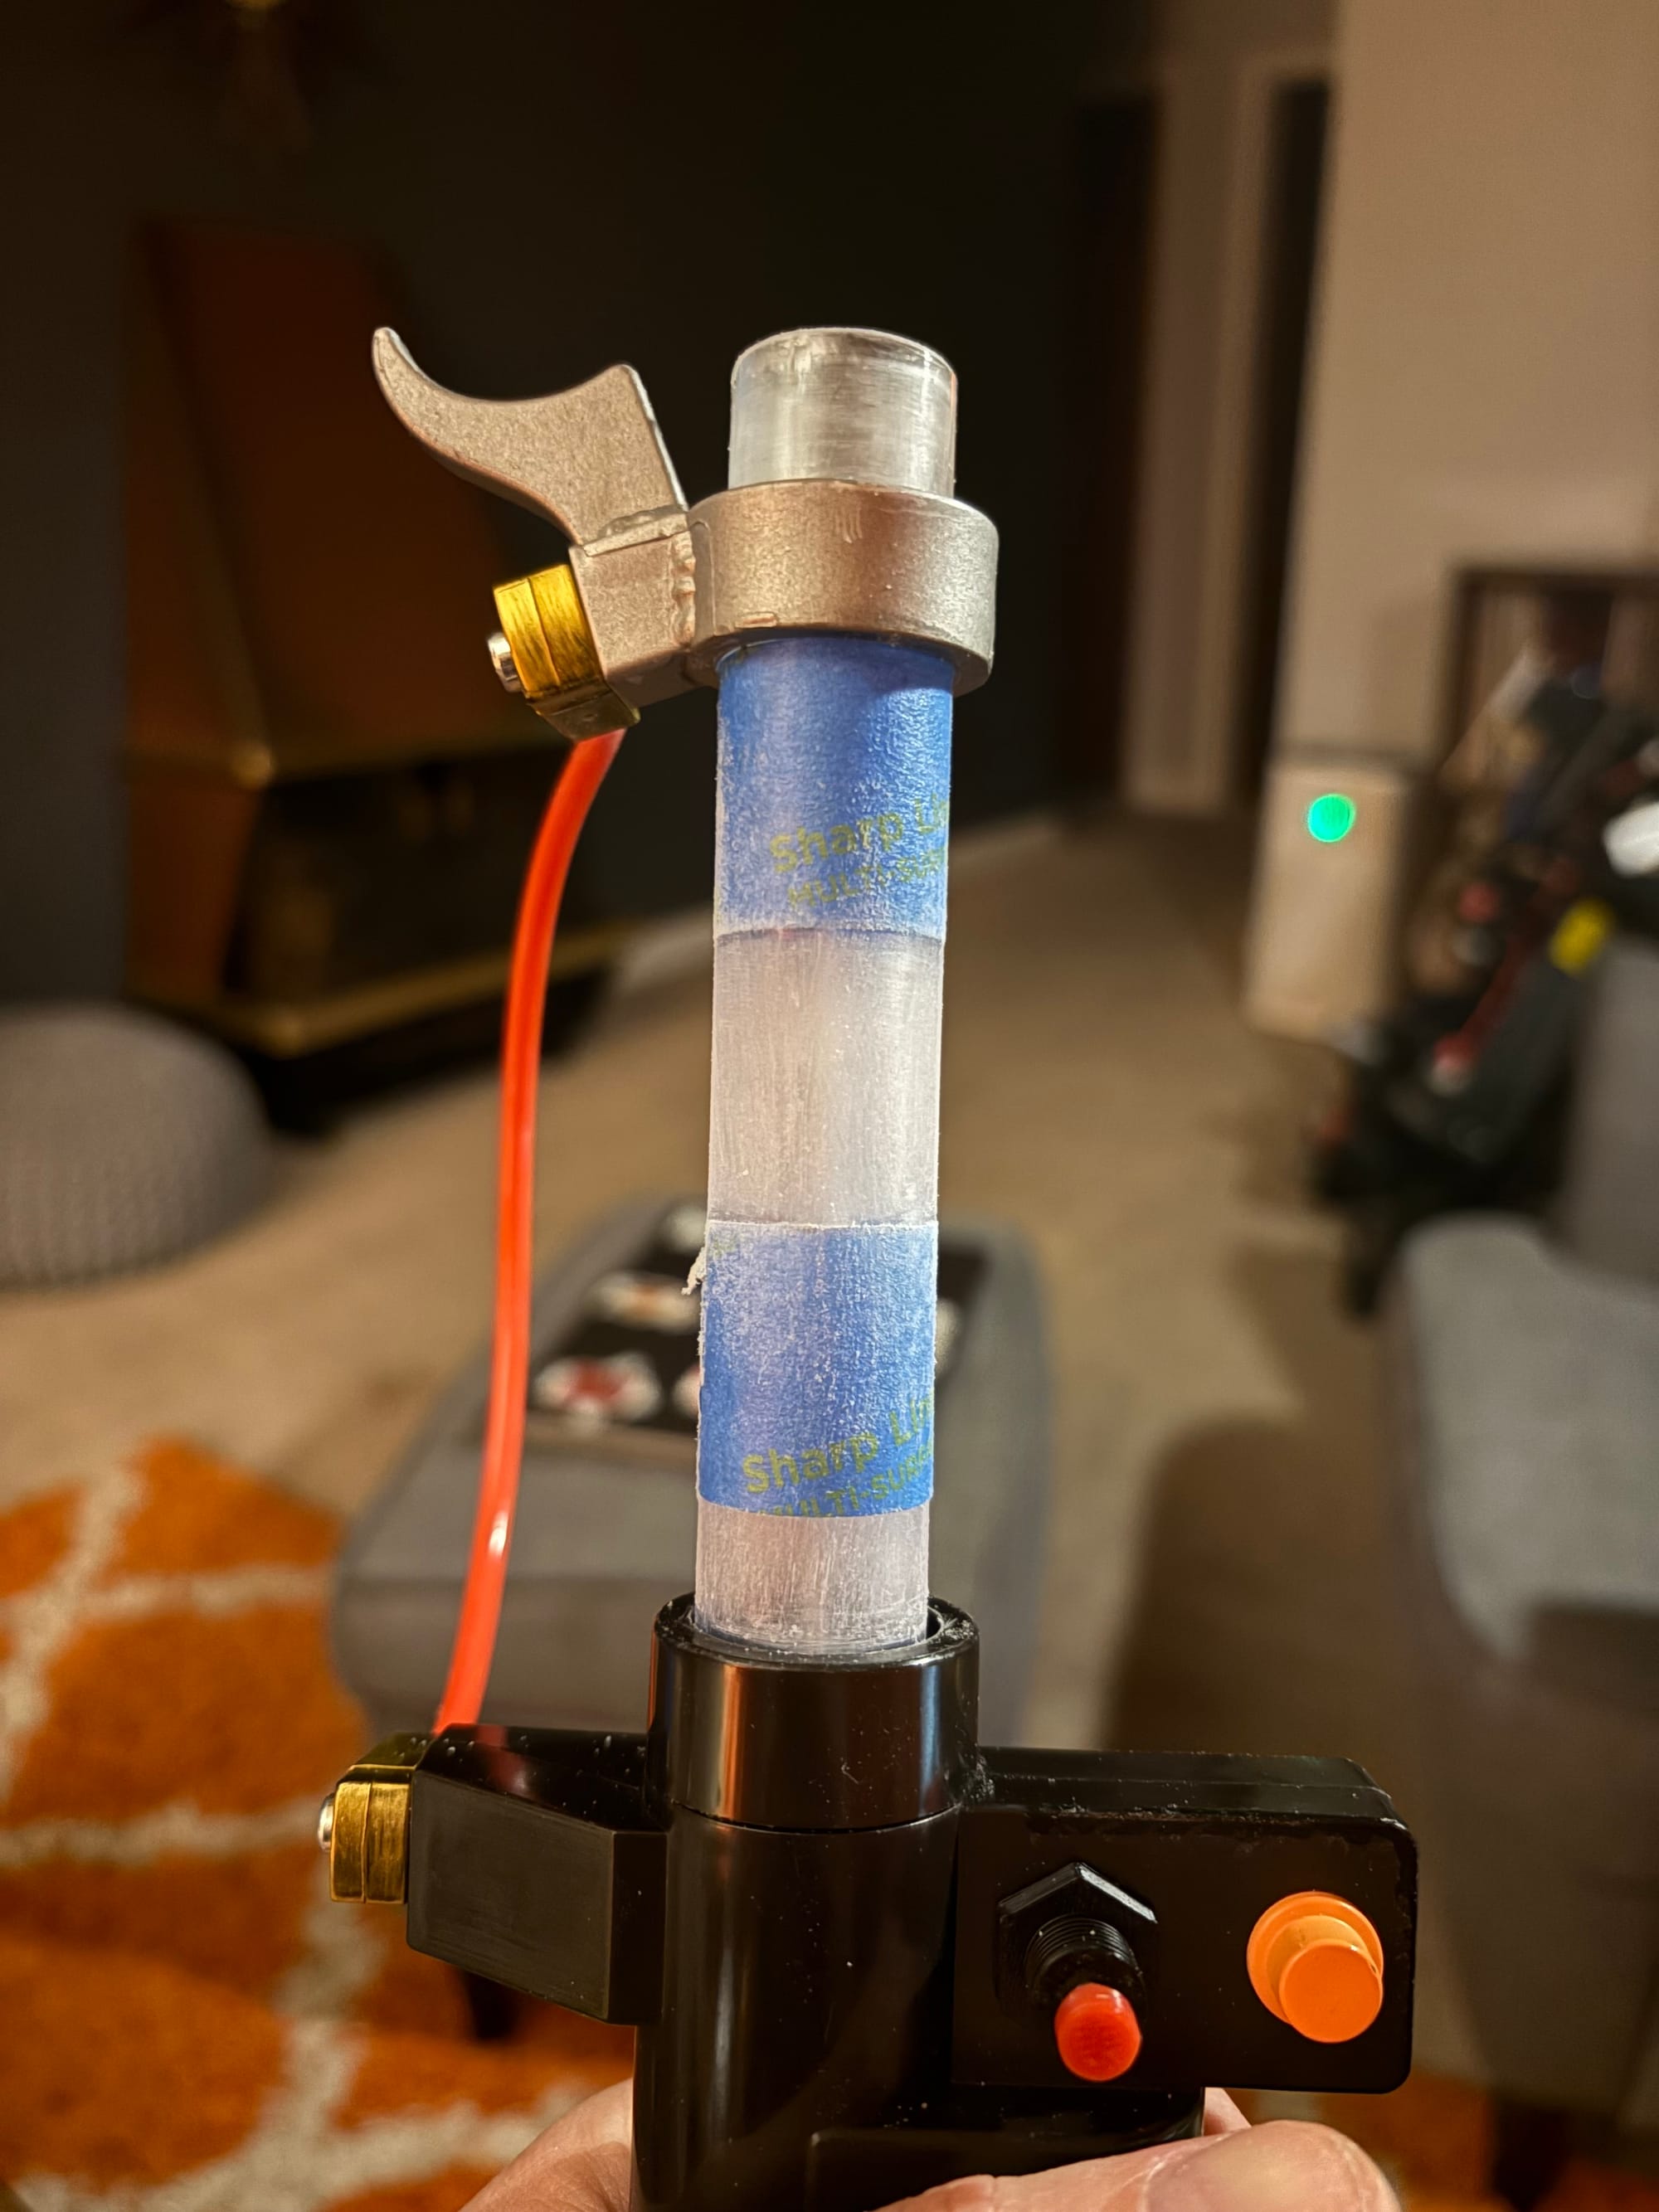
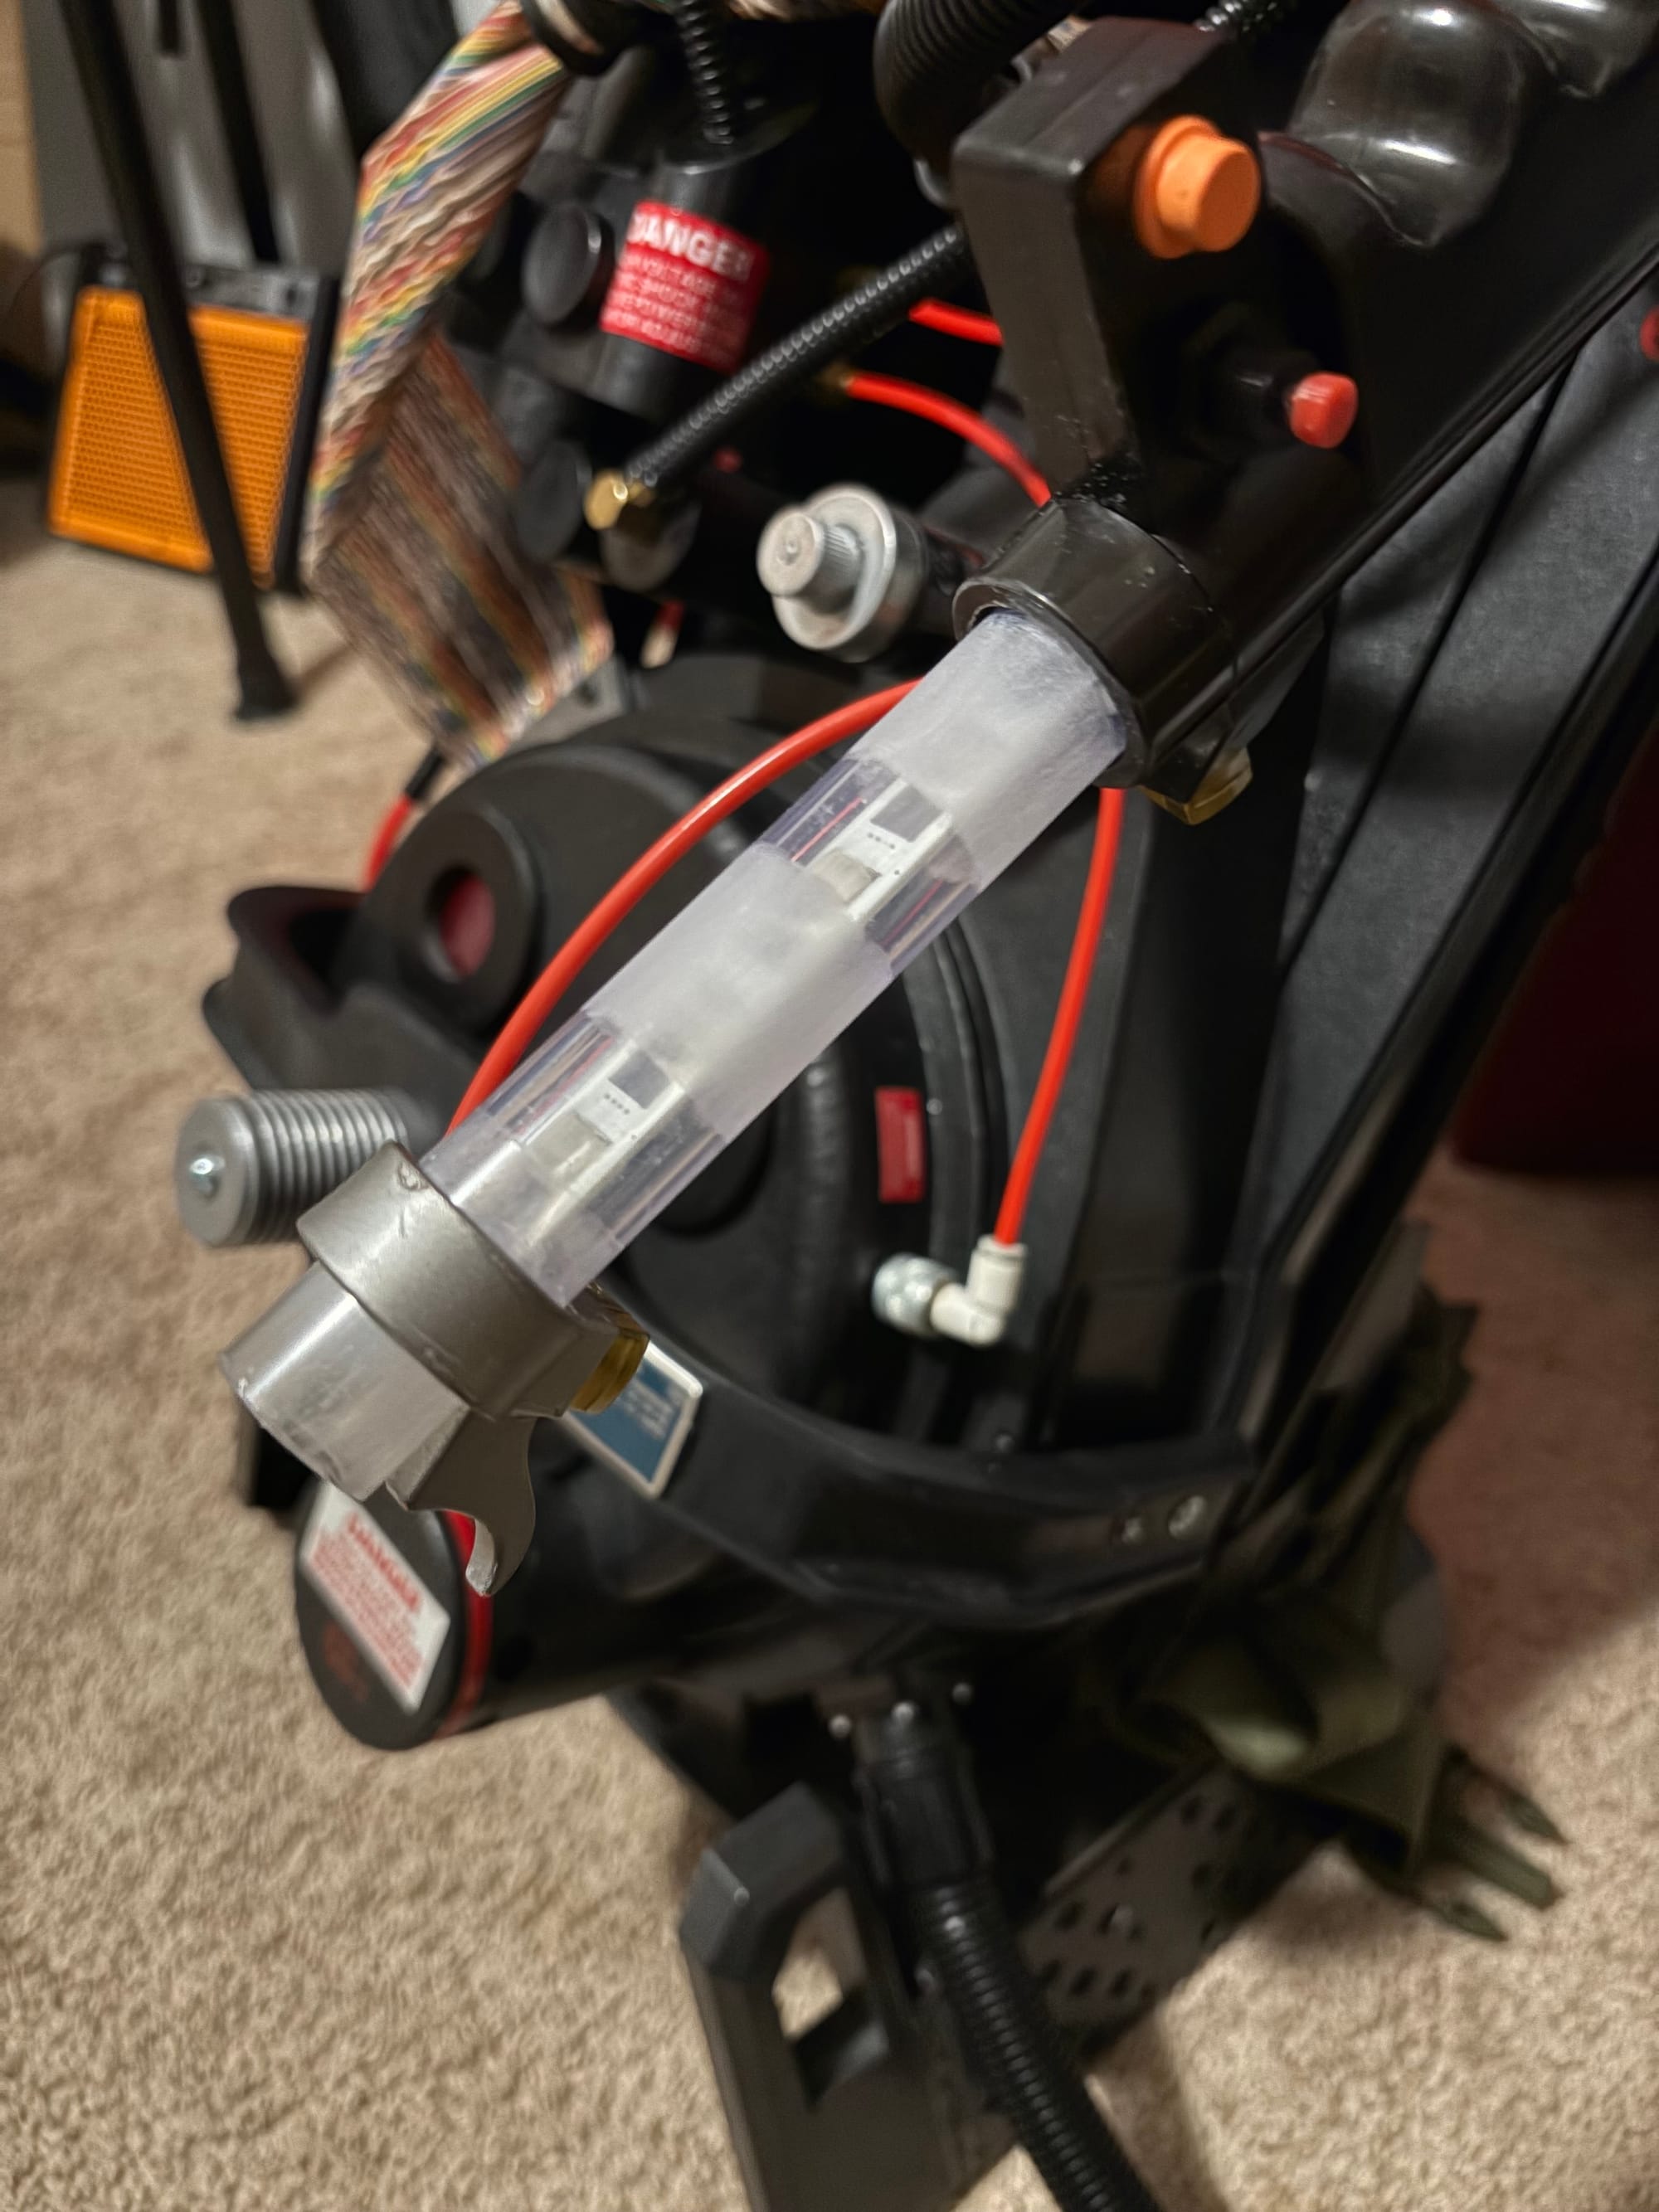
For the extended tip, I bought another acrylic tube and cut off a small nub. I sanded the cut edge a bit to get it as level as possible, then glued it to the tube in the thrower. I put clear tape around the seam to help it cure and stay tight. It's a little too long and not tapered, but it will do for now and looks much better than the stock barrel and tip.
Emitter Tip & Nycoil Banjos
Now I wasn't going to do all this work and not replace the Emitter tip or the Nycoil banjos with real aluminum and brass parts. So, I grabbed one of each from Mack's Factory. The aluminum ring is easy to replace; pop the original off and put the new one on. It has a small set screw that holds it to the acrylic tube.
The fake banjos are a different story. The one on the barrel is not easy to remove, and like many parts on the thrower, part of it is held on with glue. You'll probably be unlucky: the glued plastic nut will spin endlessly, and the screw on the bottom of the barrel that you have to drill a plug out to reach won't help.
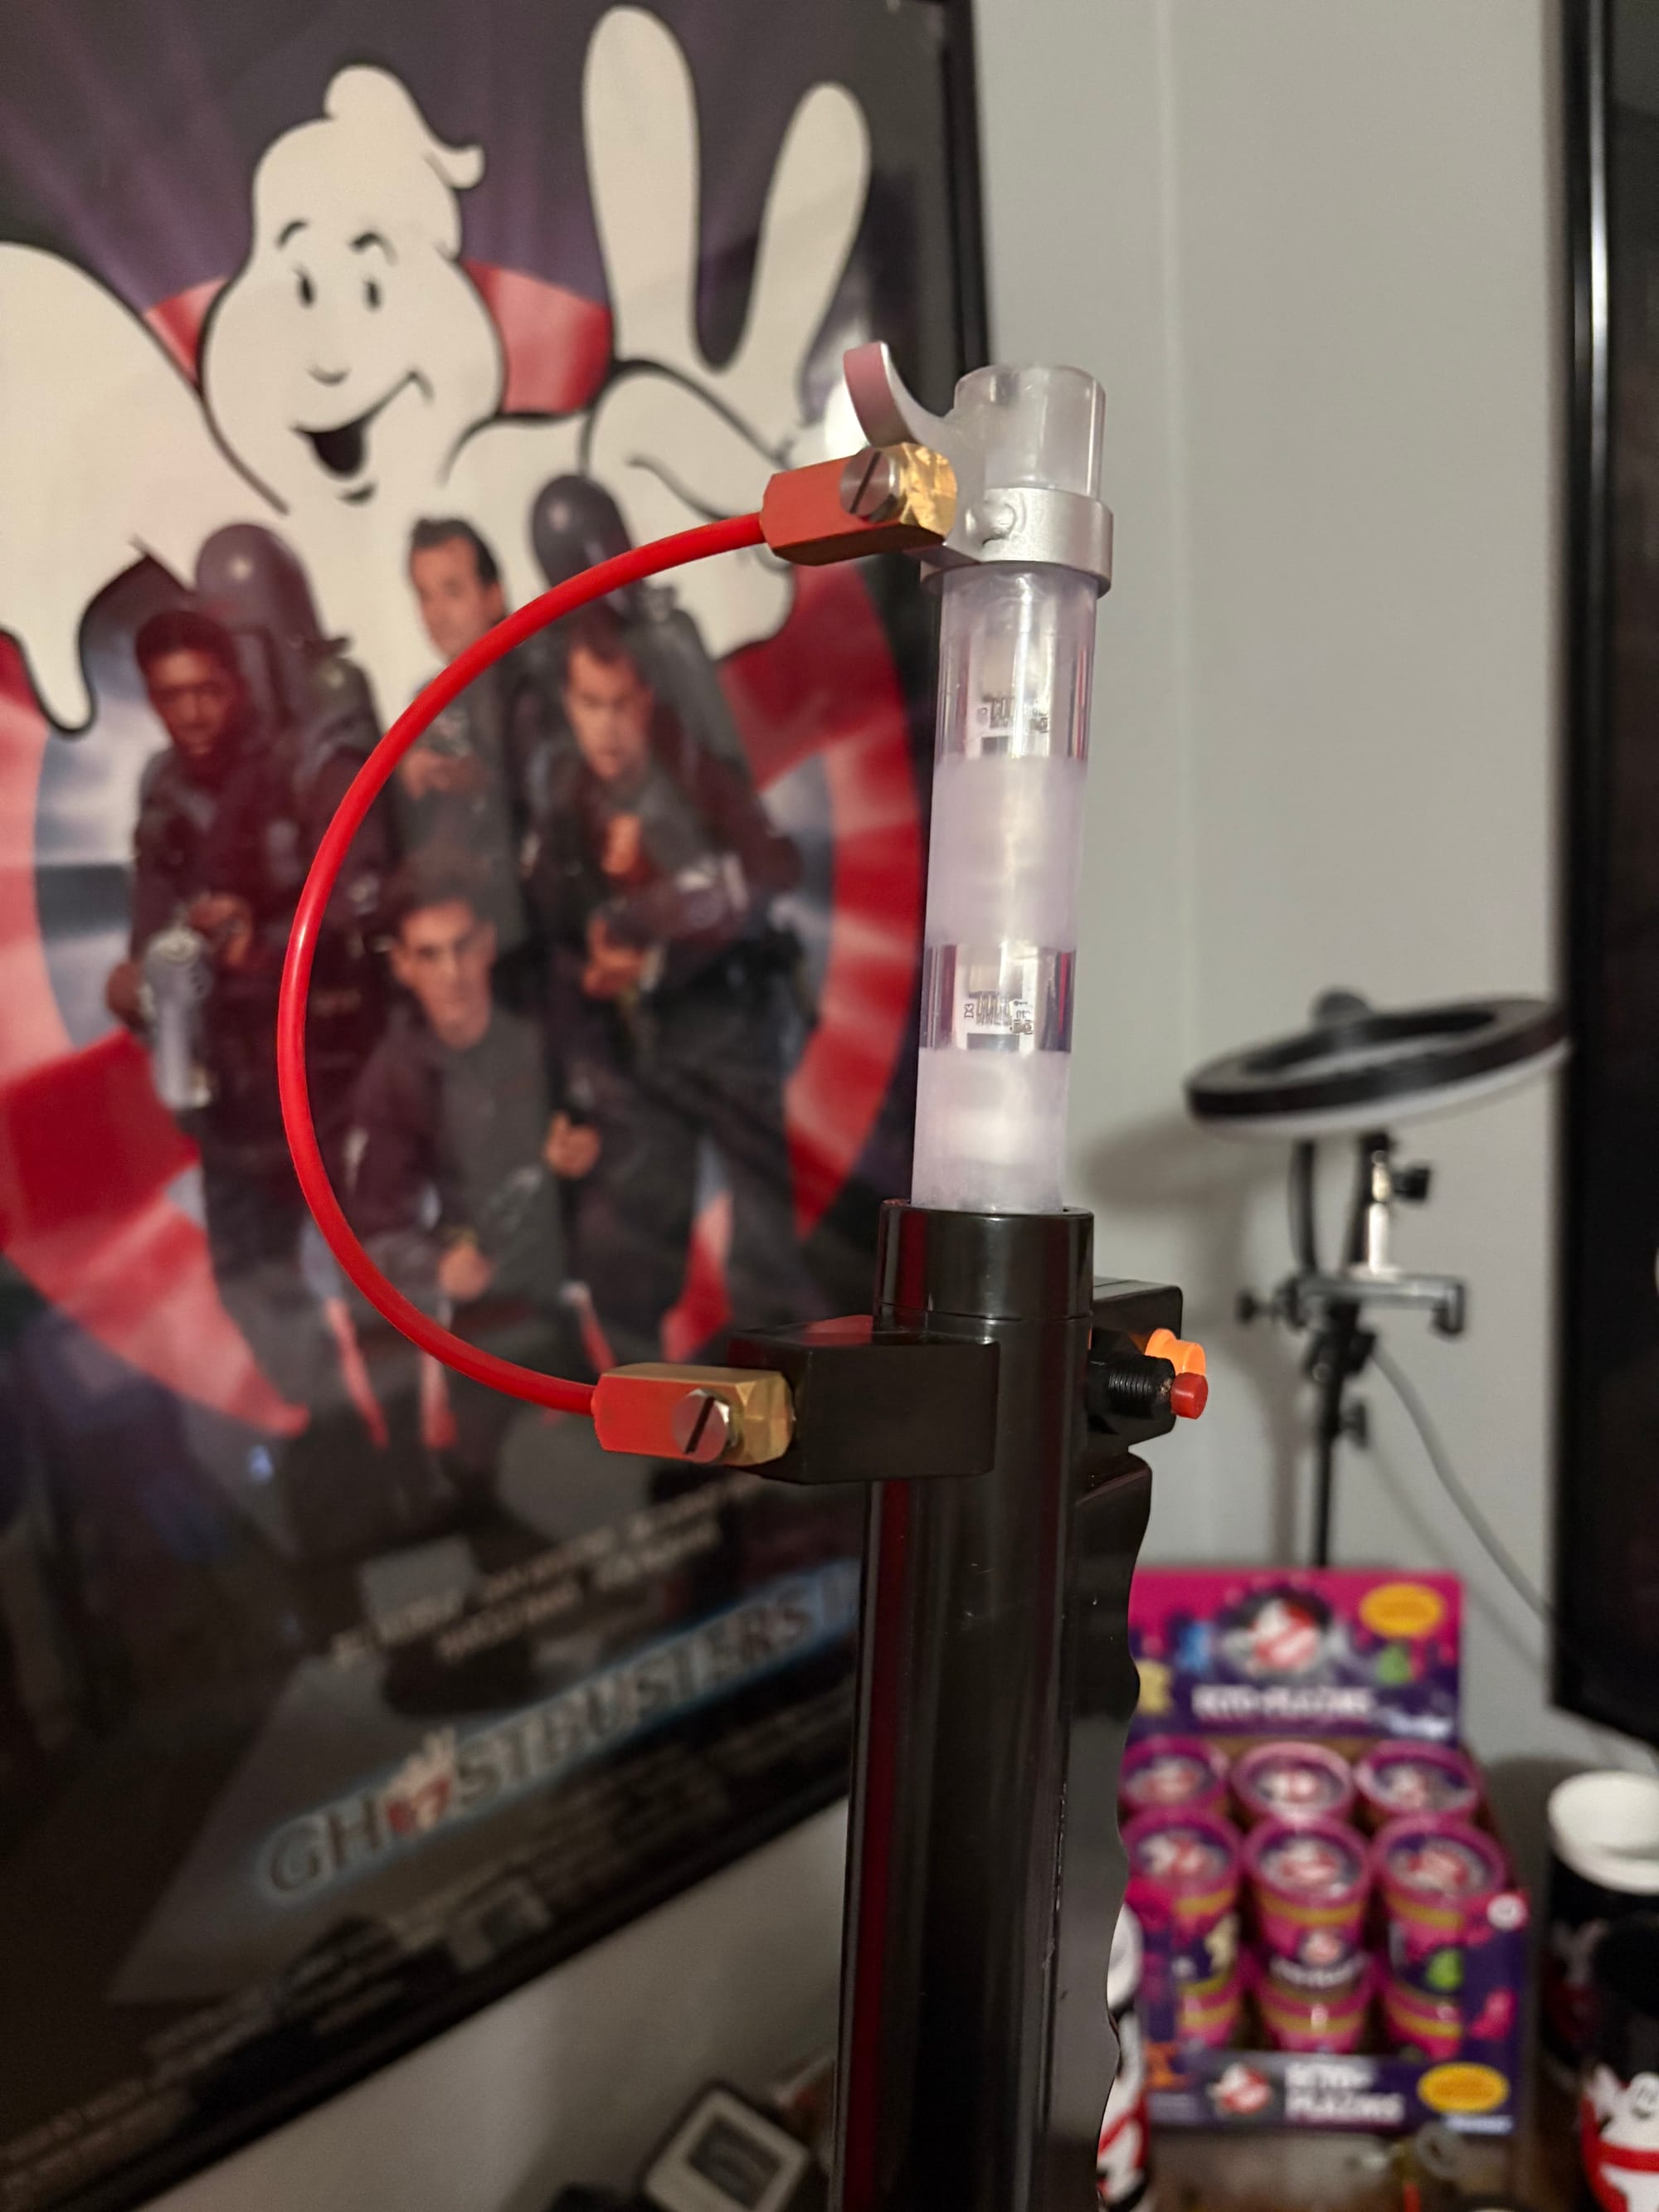
After trying both, I grabbed the screw behind the fake banjo with some needle-nose pliers and yanked hard. The screw and nut just popped through the plastic, leaving a hole to clean up. I drilled it out so the new screw would fit, and it thankfully worked. Now the other one screws into the ring, and the red tube connects them.
Clippard Barbs and Valve
Next is the green tube on the back of the thrower. This isn't fully necessary; the barbs are small, and so is the tube, but it's fine unless you're picky, and for some reason I decided to be. Once again, the barbs are in there with a glued plastic washer. I wasn't lucky again, so I cut them off. The screw on top of the fuse box stayed in place instead of falling into the thrower body, so I painted over it and drilled the hole for the new barb right next to it. The one going into the end just broke off and fell into the thrower body. I was able to get some out through the new hole, but the rest will either stay in there or wait until I decide to open it up entirely. But that does look better, so it is worth the little bit of rattling.
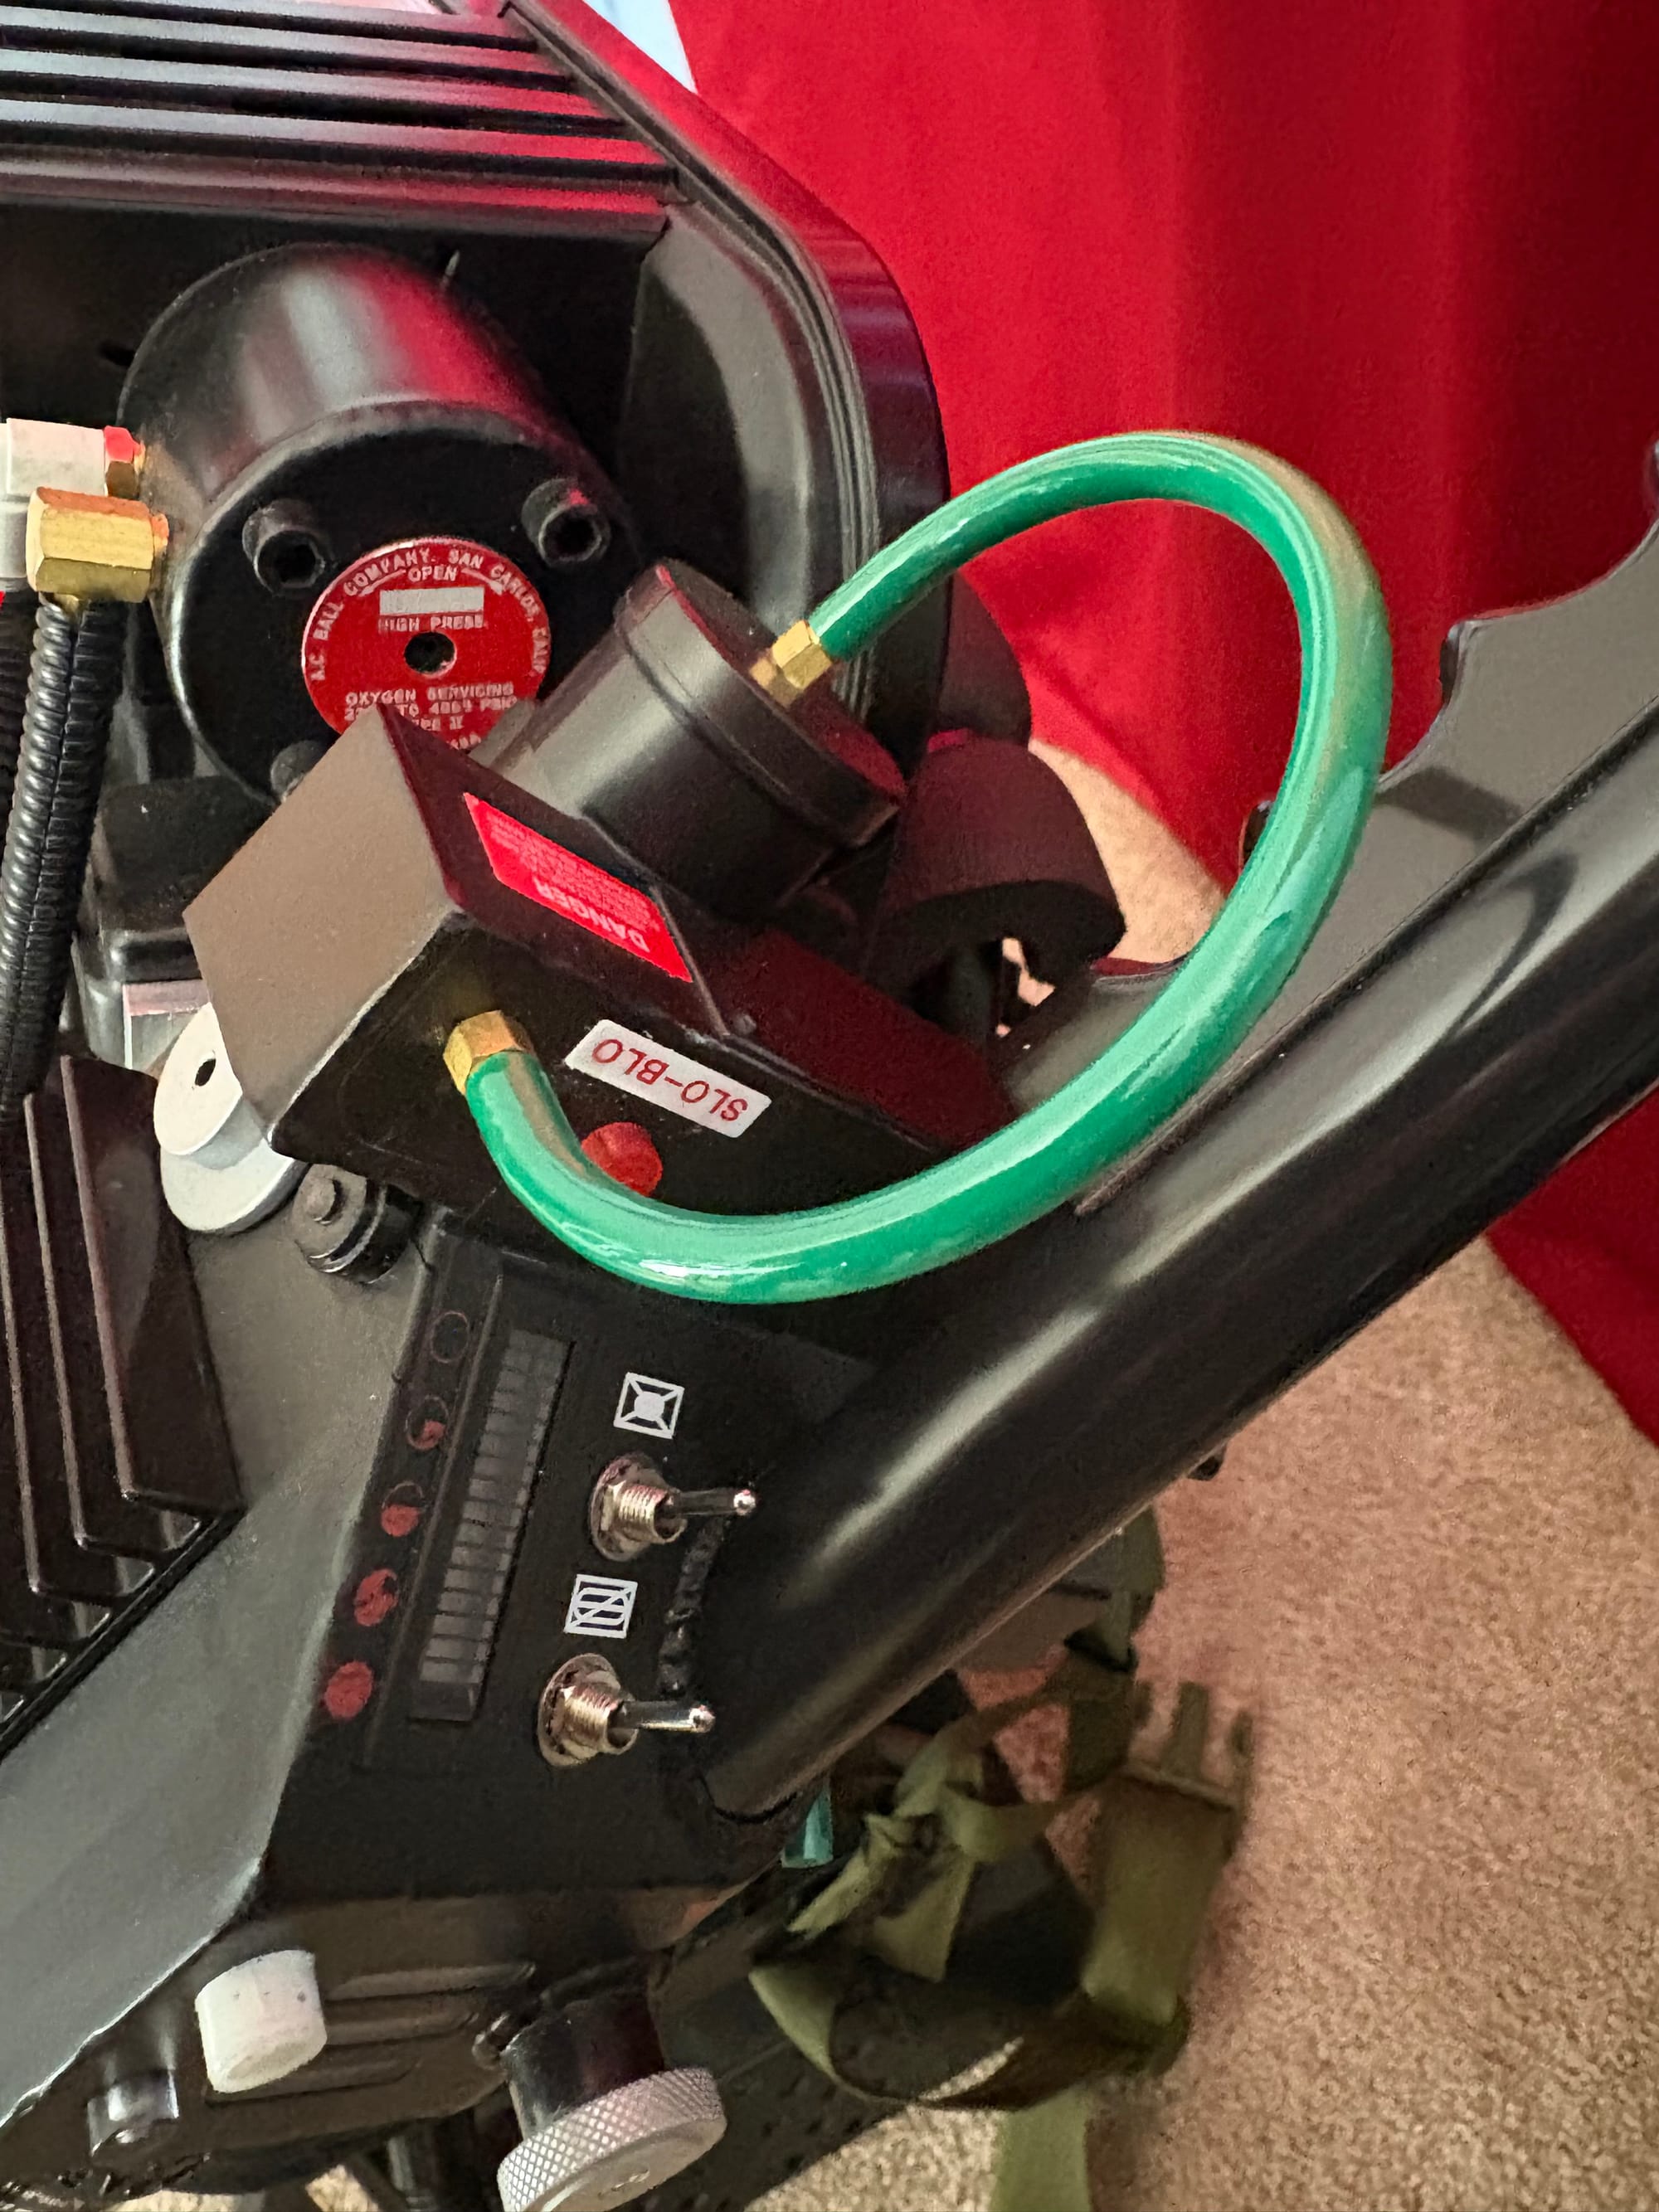
Last is the Clippard on the front of the thrower body. Like the pack, the fake one here is wrong in so many ways. Unlike the one on the pack, it is also held on by two nuts glued to the inside. I got one screw loose, but it eventually started spinning, and the other wouldn't come out. So I cut the one screw I could get to, which added another little rattle, and I tried to pry out the other one again. Surprisingly, the prying worked again, and it worked the best. It pulled the whole screw out with the nut attached, and the hole it left wasn't that bad since I already needed to widen it a bit for the new size of screw. I should have just done that for both!
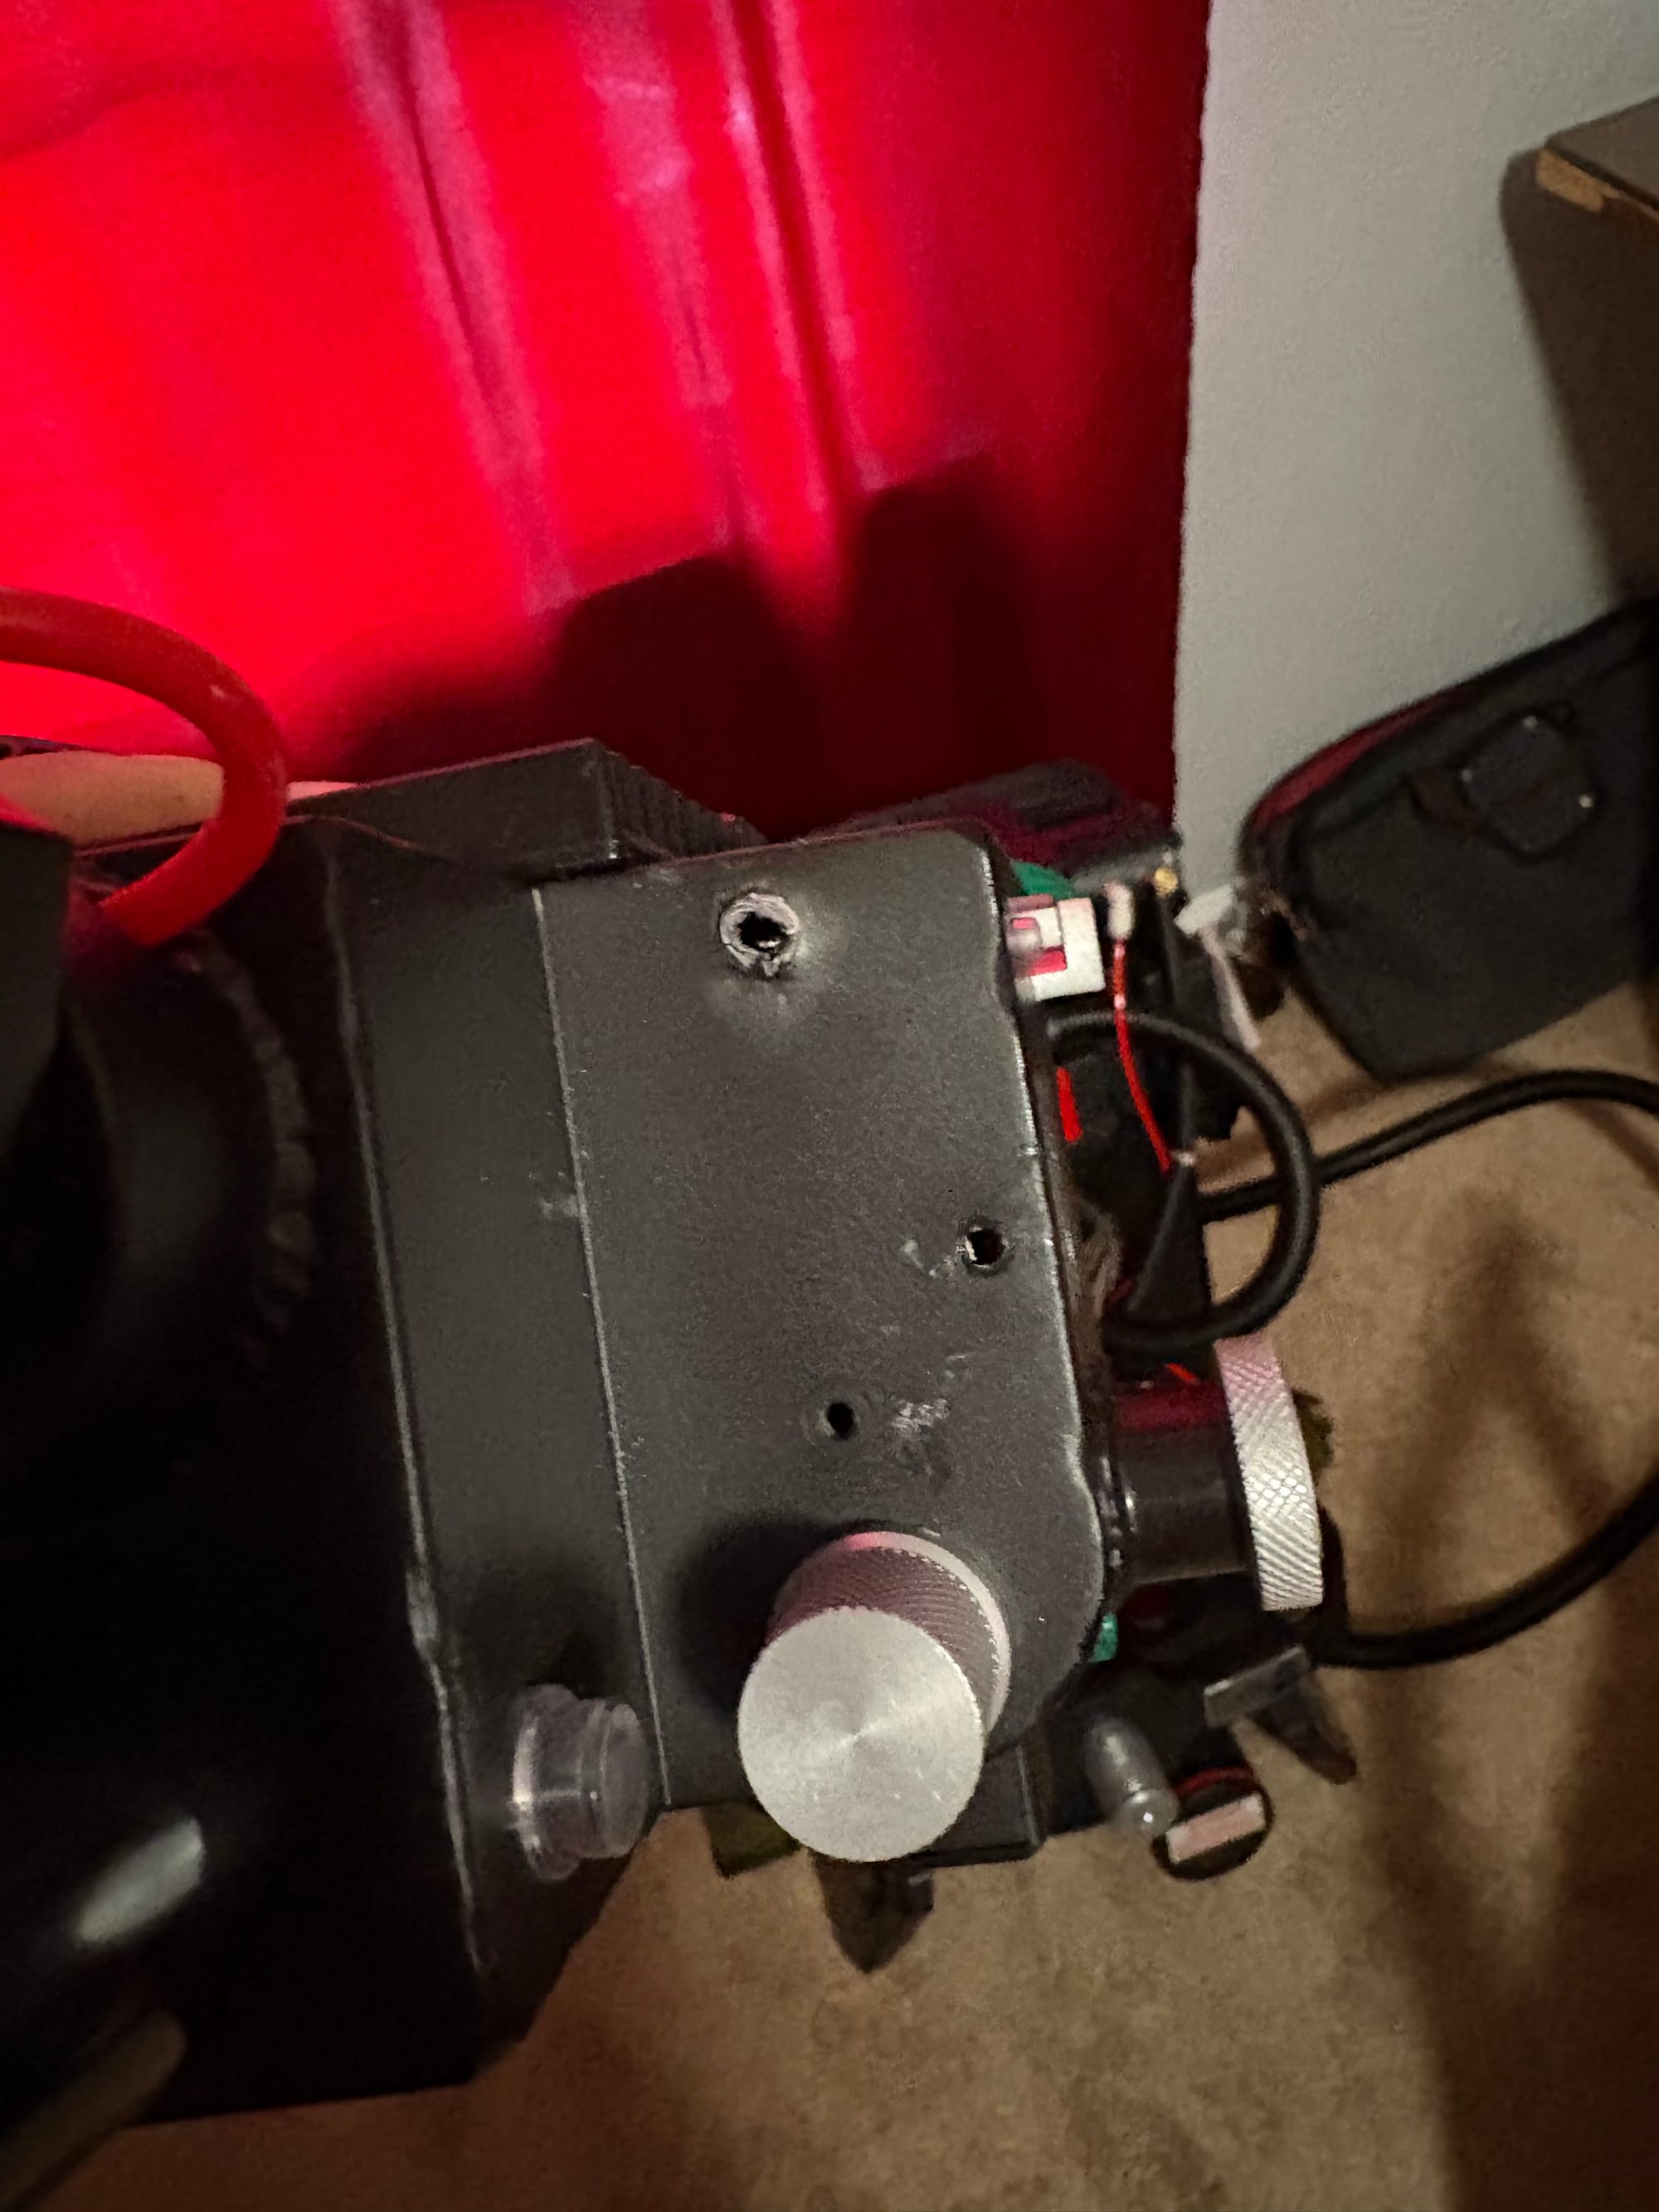
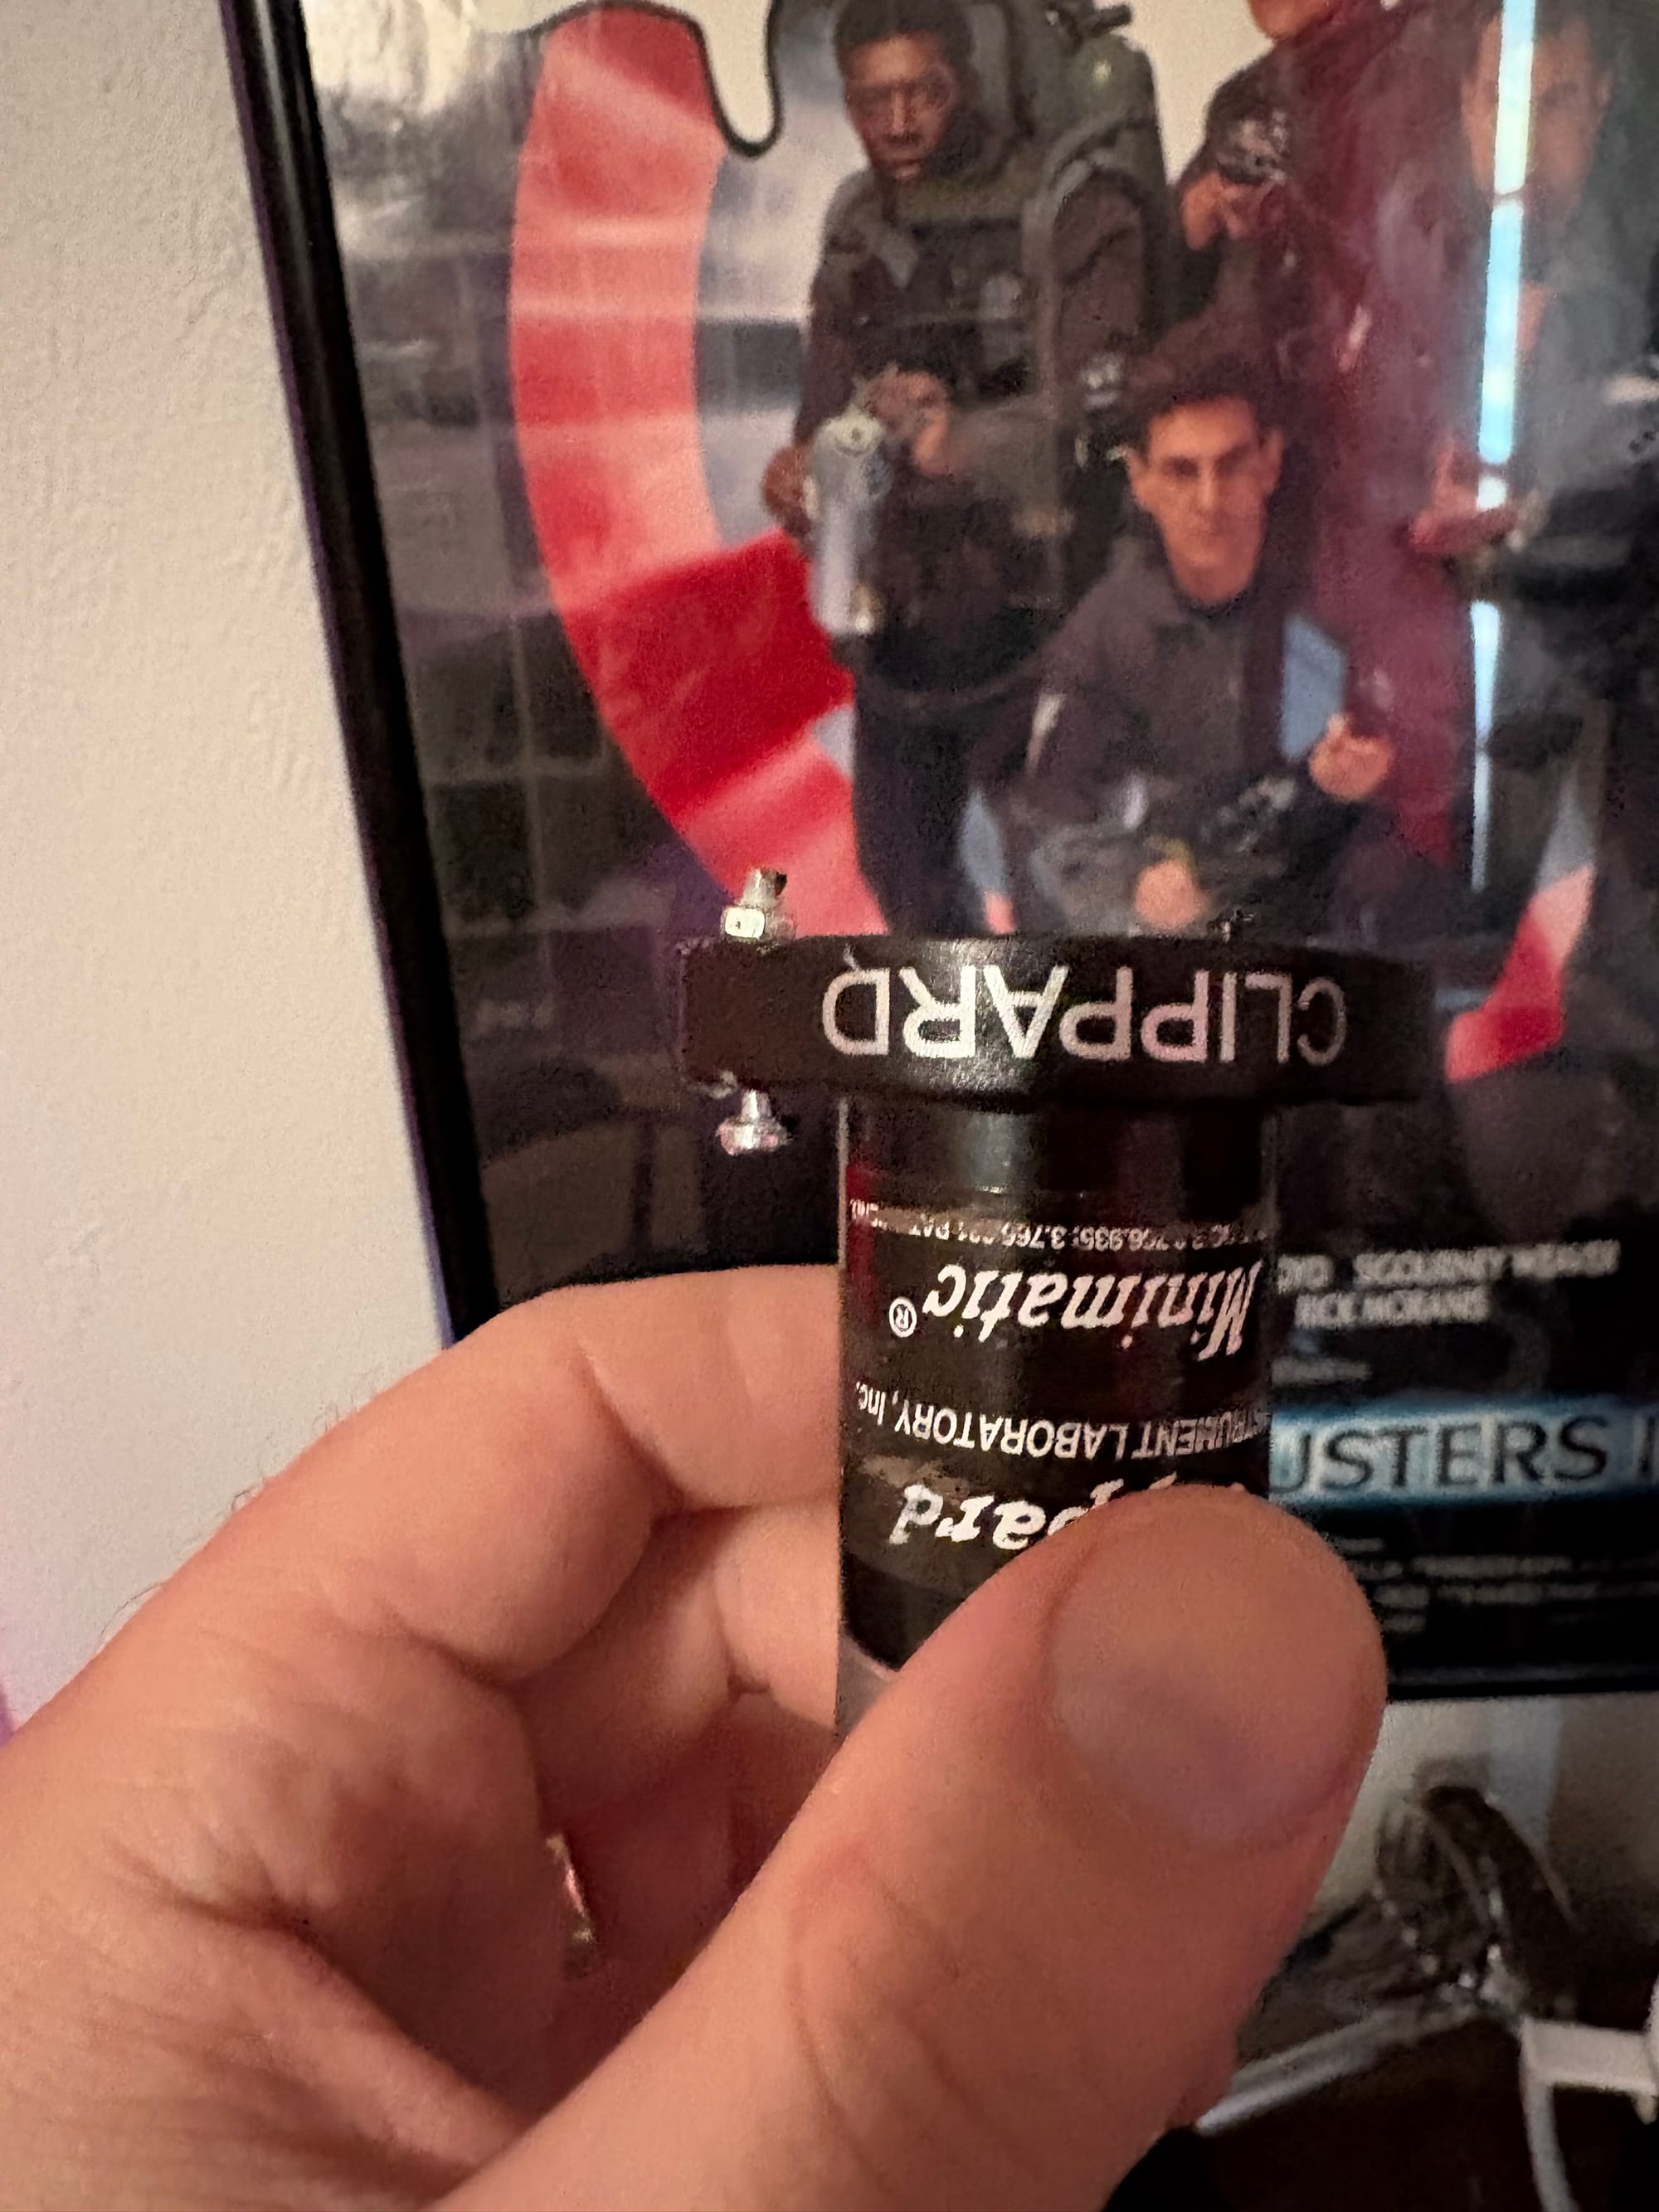
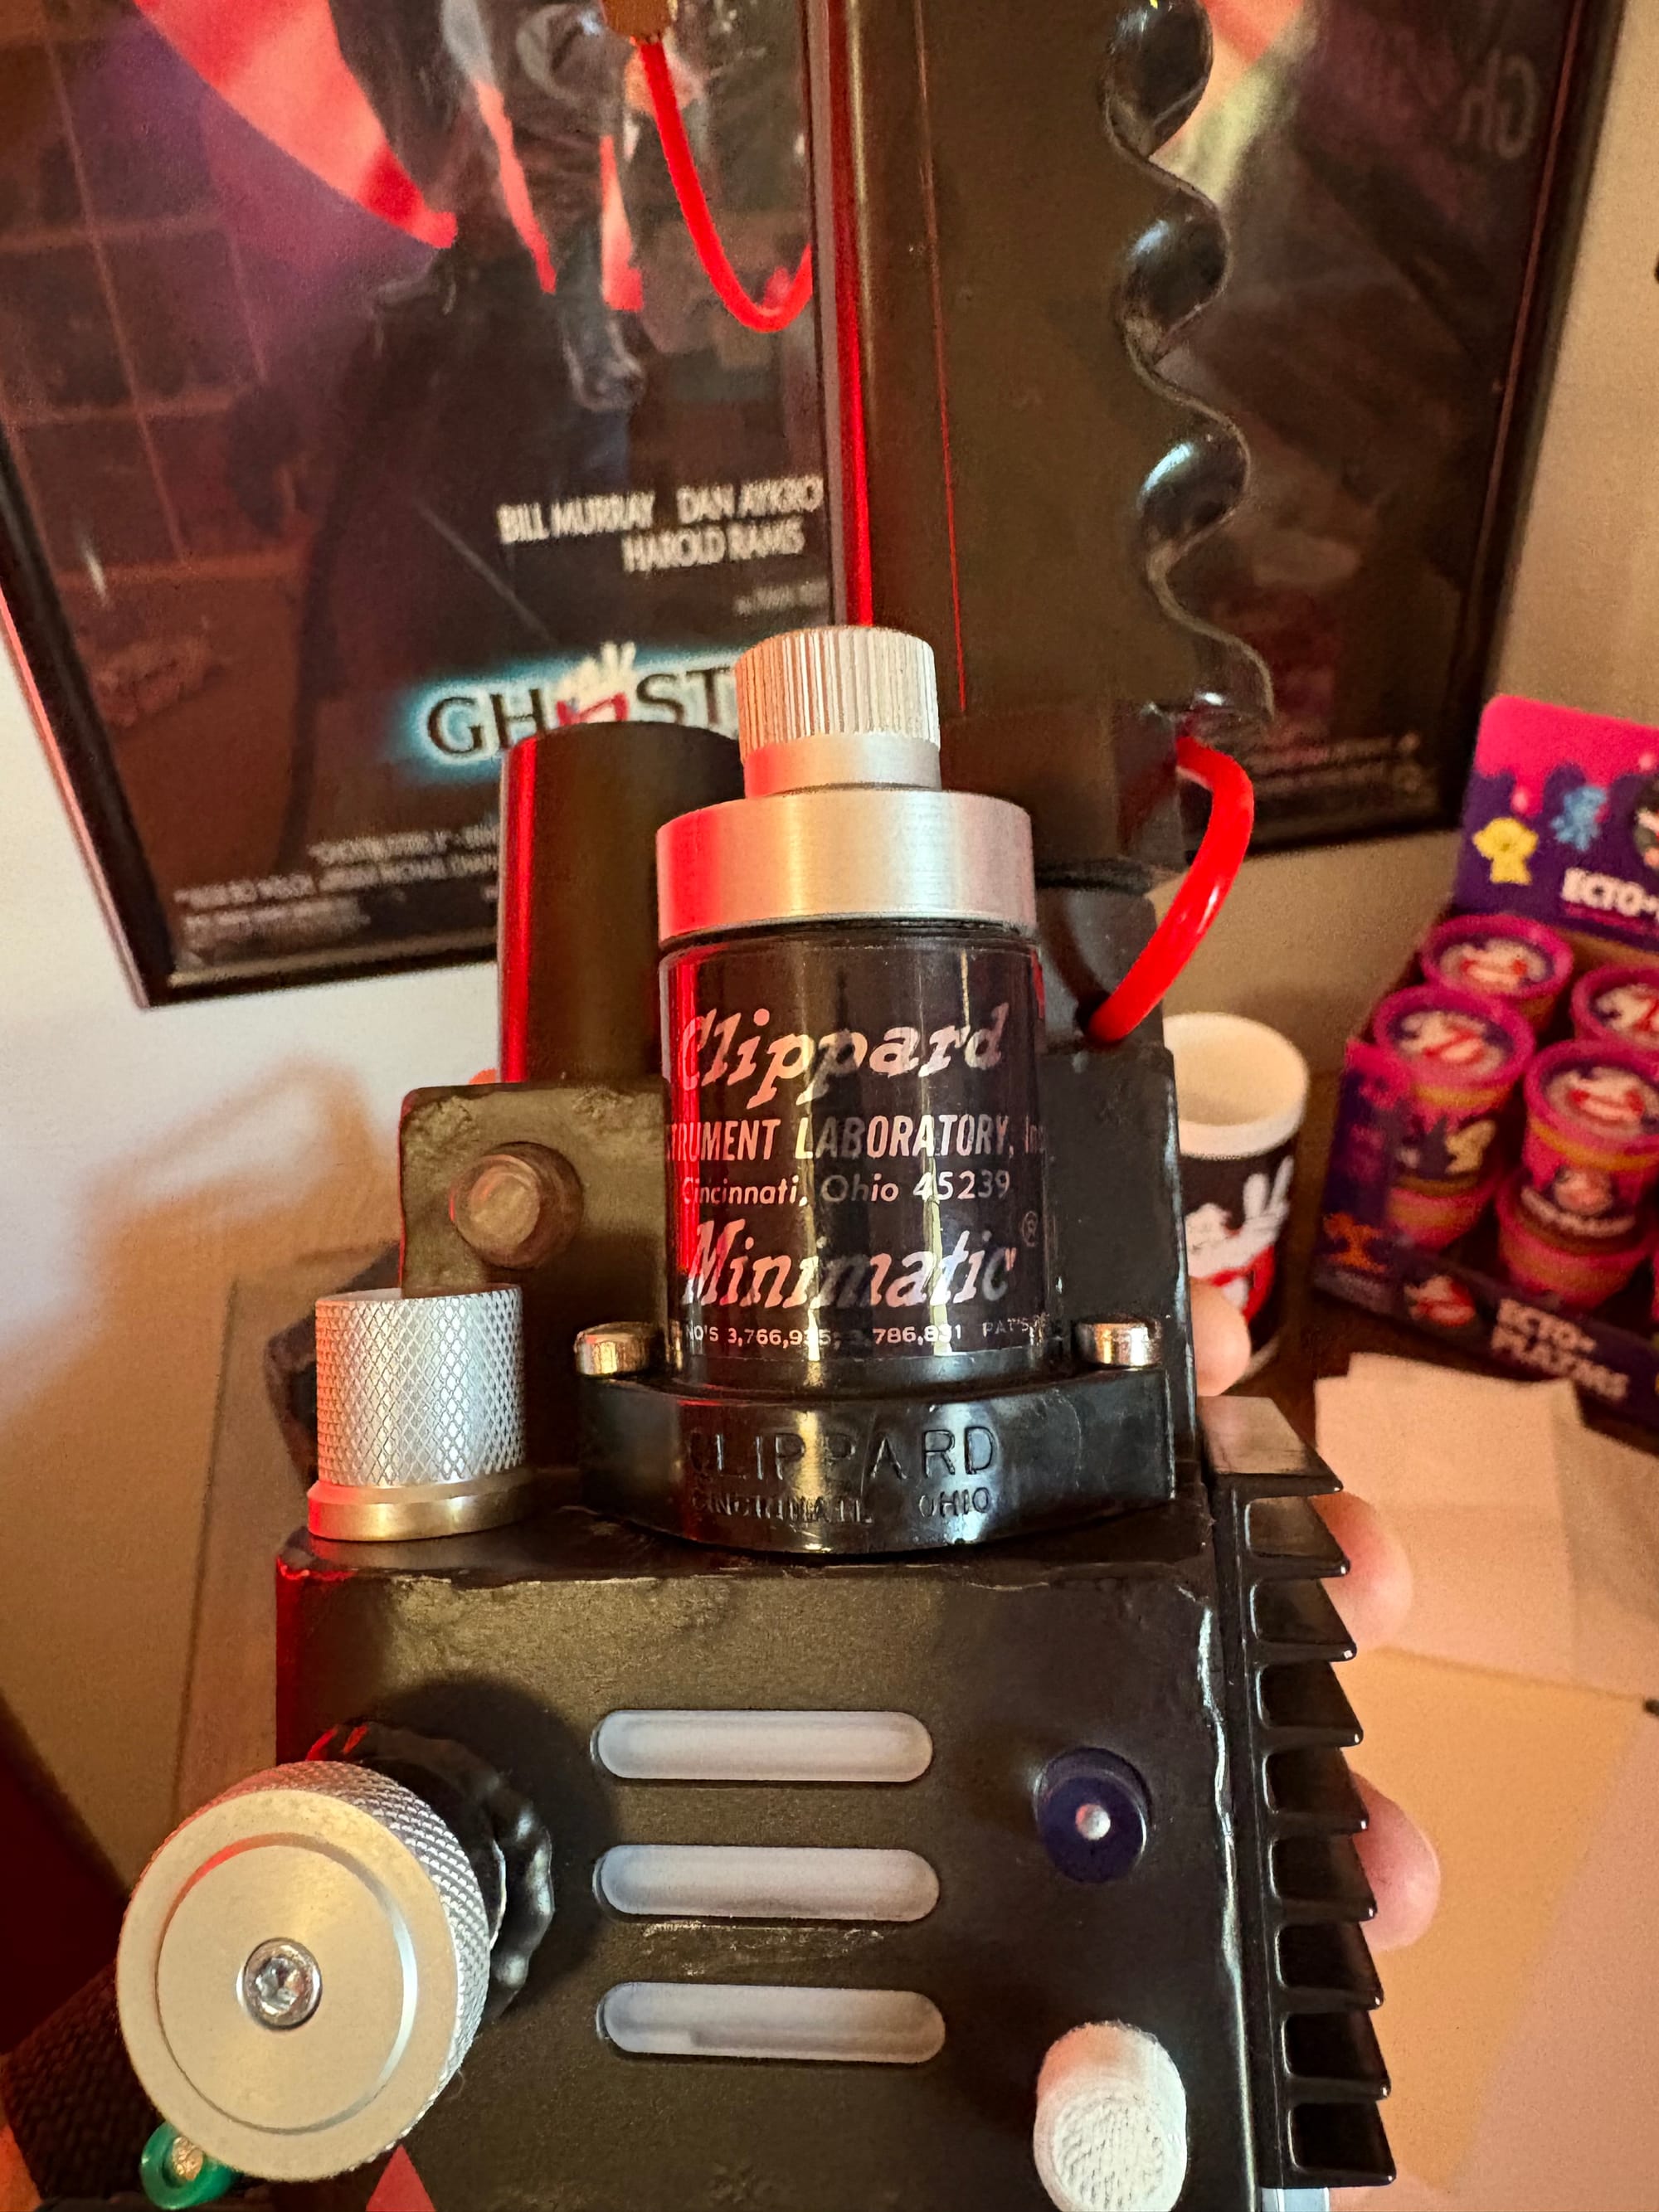
The popped hole with the attached nut and the 501 attached.
This time I used a real Clippard, not the accurate 701 but a very close 501, and most people won't know the difference. Also, it's from the right era, when most 701s people use are modern versions, so I think it is cool in that way. But it isn't flush on the bottom, so you need to drill a hole in the body to give this extra protrusion a place to go. Truthfully, I screwed this up, and the hole is a mess. The first time I drilled, the bit slipped just enough that the Clippard didn't line up with the screw holes. Then, the second time, since it was so close to the first hole, it just tore that body up. It's okay; the Clippard covers it, and you can easily fill, sand, and paint it later. It's also okay because this looks and feels so much better. The difference between the included fake Clippard, an accurate resin replacement, and especially a real version is so massive. If you've been hesitant to replace this, do it.
The Wrap Up
That is pretty much it for this round. I did a few other small things, like adding some silver paint to the thrower knobs or black paint to a few spots to dull the shine or make a screw head more accurate (or hidden). This isn't 100% finished (will it ever be?), but I am done with it for now. In the future, I'll probably look into a more accurate motherboard, hiding some seams, cleaning up the rush job on the thrower, using a few more accurate screws, and refining the work overall. I would love to change out the static lights for real ones in the thrower. I may even go as far as changing out some electronics or painting and weathering. That is the fun (and the problem) with things like this, and it seems especially true with Ghostbusters props: you can get pretty far with some quick work, but there is always more to do and a deeper dive into accuracy if you want.
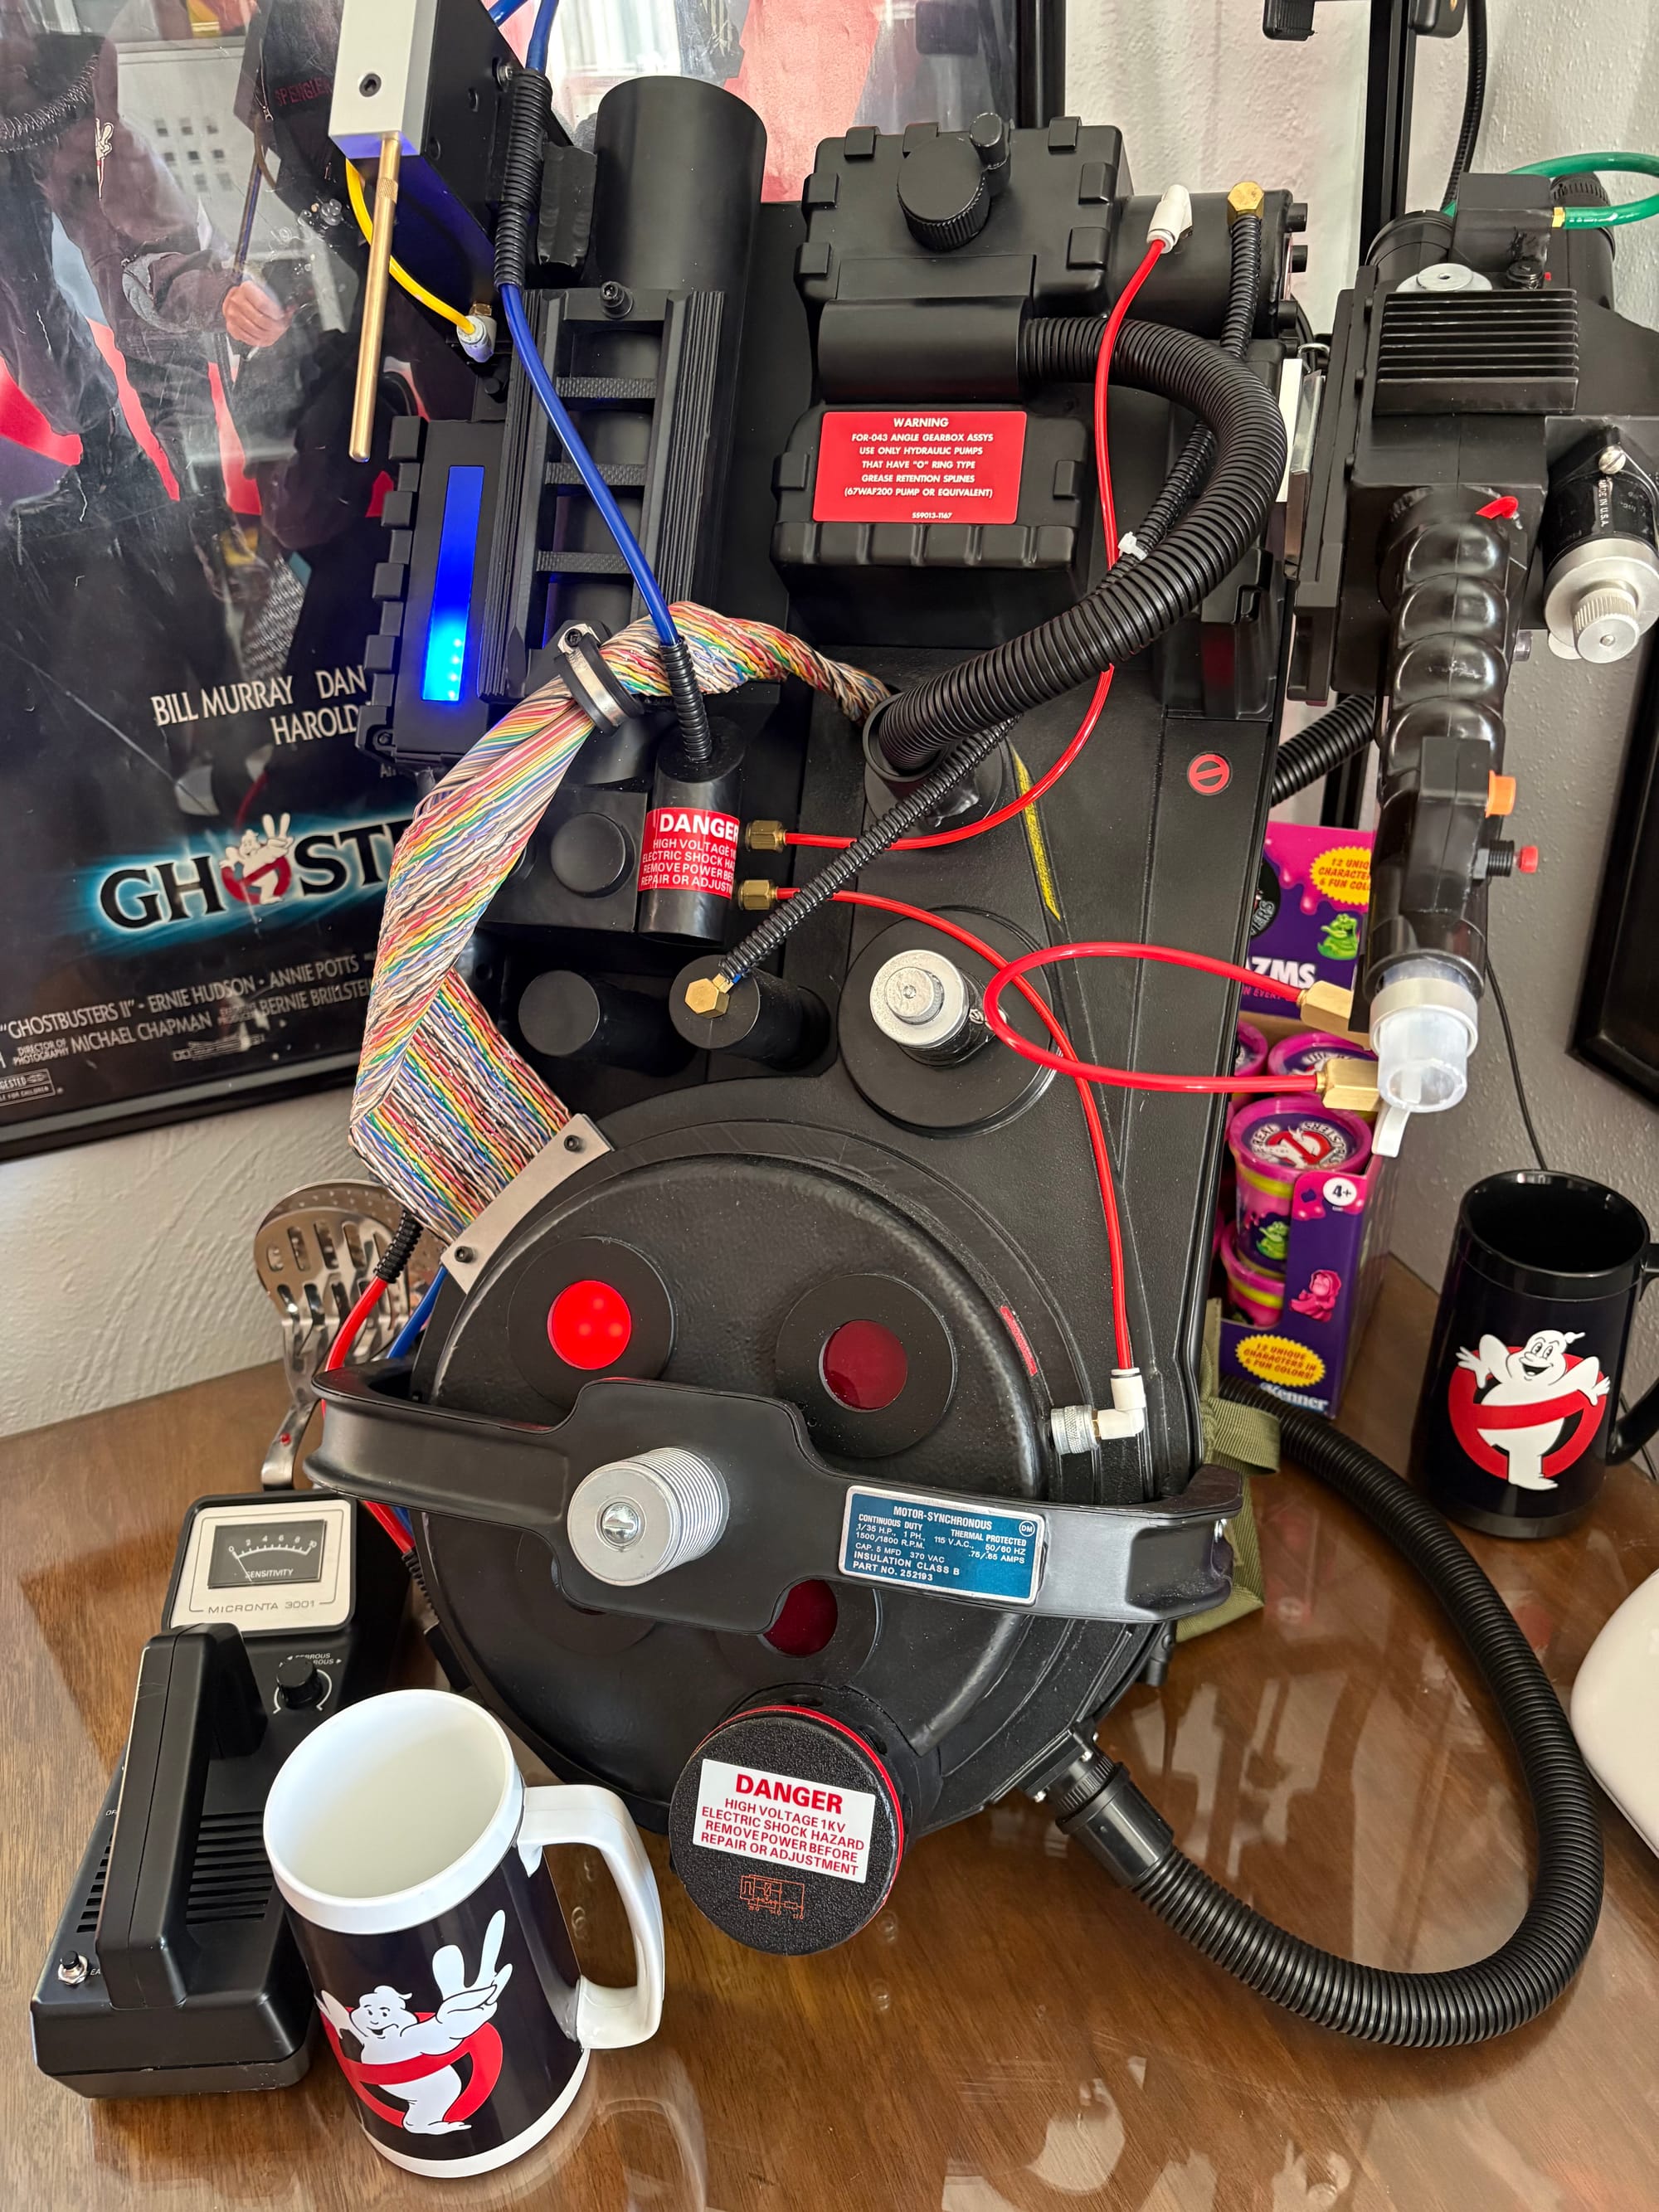
I don't know when I'll tackle anything else; I imagine it will be when I have some downtime during holidays or when there is a lull in real-life work. I also want to go back to my Haslab Afterlife pack! I never did anything with that because it felt daunting, but now it feels like a fun project just waiting to be done.
Thanks for reading! May your proton pack always be charged.
Comments ()